How the EZRGB Layout Designer Works for Homeowners
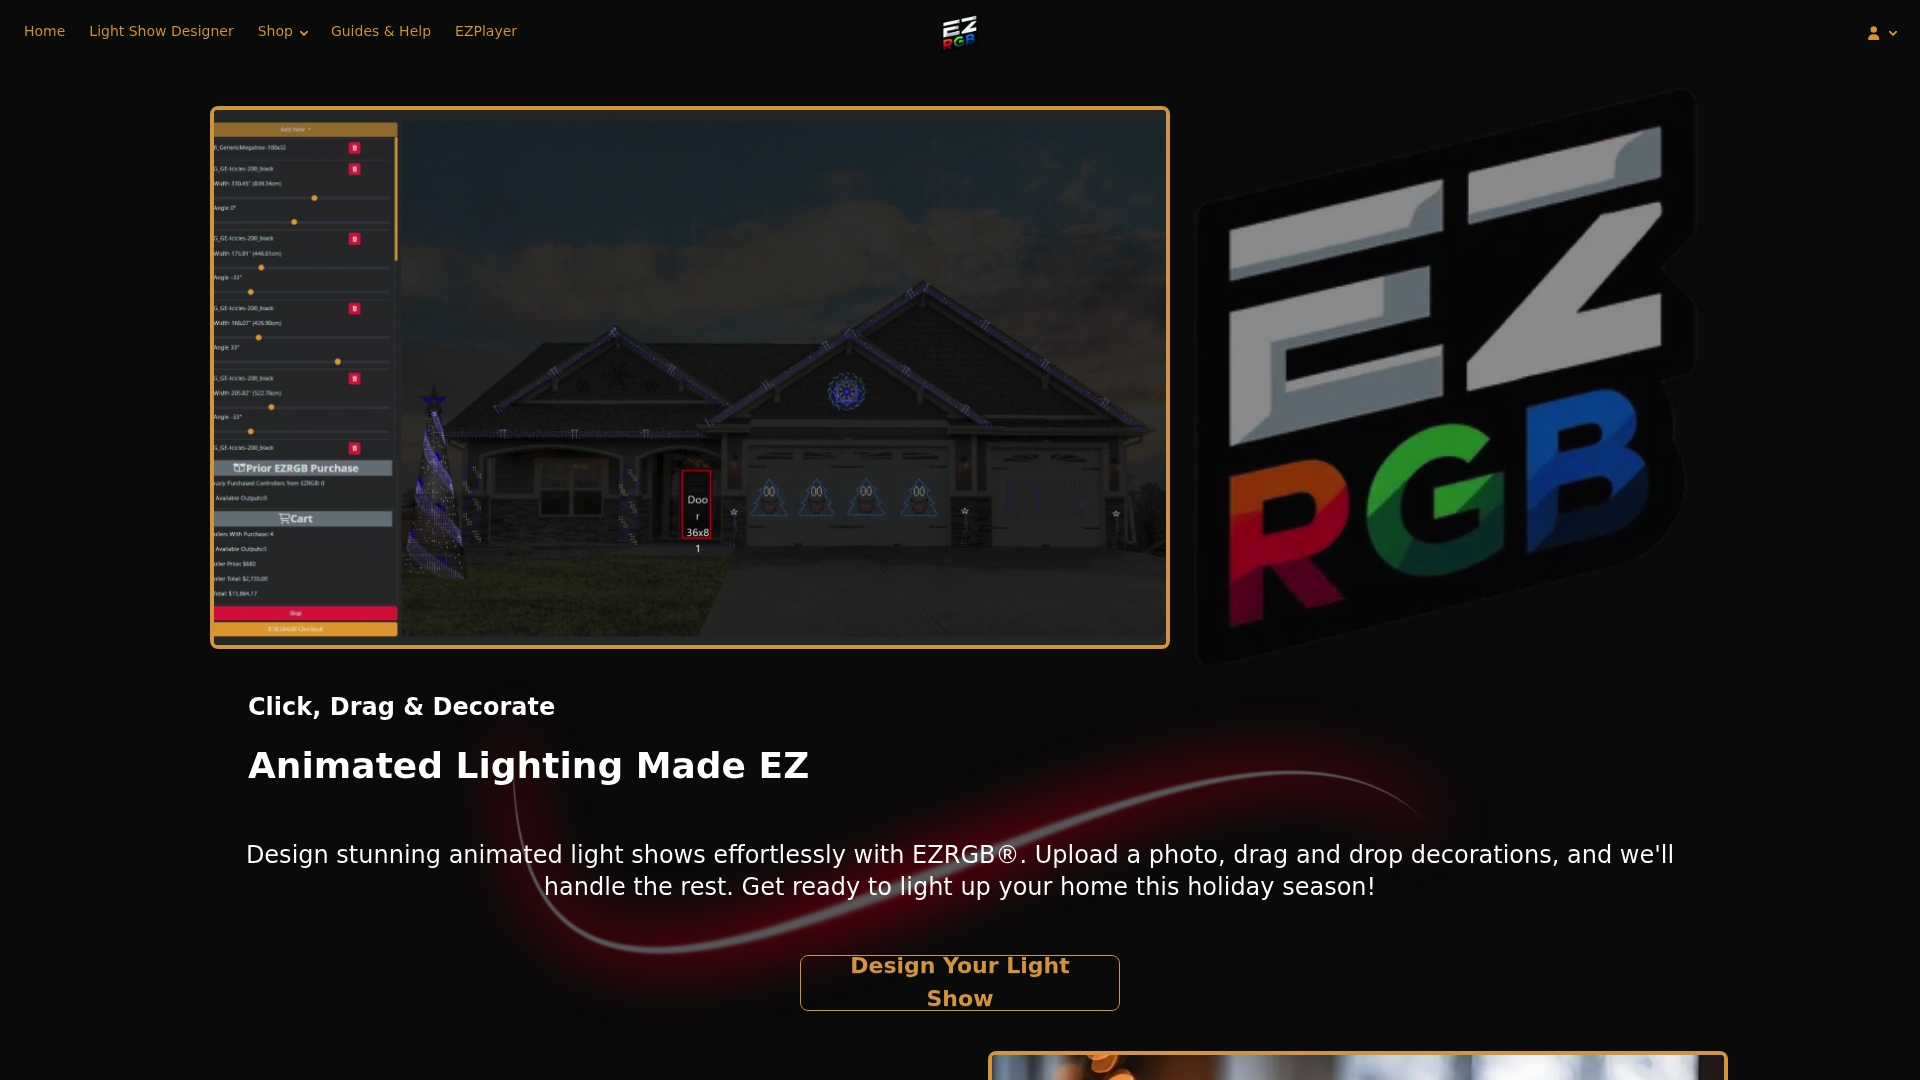
The EZRGB Layout Designer is a photo-based, drag-and-drop tool that turns a picture of your home into a fully scaled animated lighting layout — no spreadsheets, no coordinate mapping, no technical skills required. You upload a photo, place RGB props directly onto the image where you want them, and the system handles the rest. Once your layout is saved and you purchase a sequence or kit, EZSequence automatically maps your props and renders your animated show in the cloud to the sequences you purchase. Pre-wired, plug-and-play props, pixel extensions, and a controller ship to your door. Then EZPlayer connects your delivered hardware to your account so you can schedule, sync music, and update your show from the web.
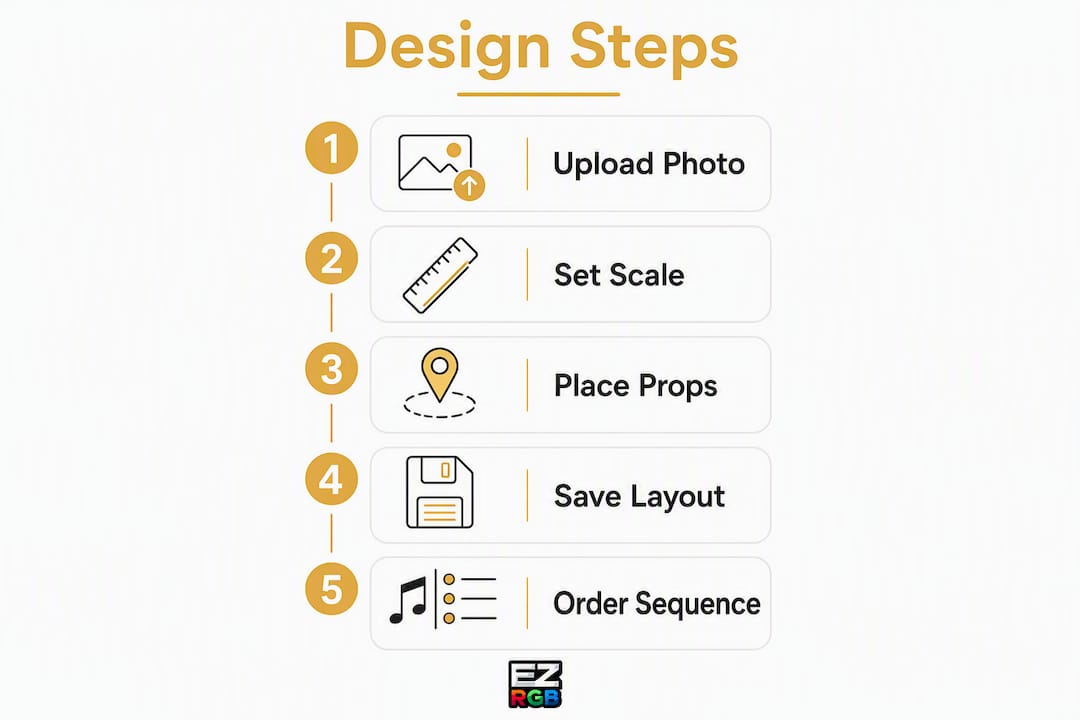
The fastest path from photo to running show:
-
Take a daytime, straight-on photo of your home’s full front exterior
-
Upload it to the EZRGB Layout Designer and scale it using a known measurement
-
Drag props onto rooflines, windows, and walkways
-
Purchase your sequences or kit to trigger cloud rendering via EZSequence
-
Receive pre-wired props, pixel extensions, and controllers at your door
-
Open EZPlayer, add your sequence to a playlist, schedule your show, and press play
Table of Contents
How to take and prepare the photo your layout needs
The photo you upload is the foundation of your entire design. A poor photo means props land in the wrong place, scaling is off, and your finished show won’t match your house. Getting this step right takes about ten minutes and saves hours of frustration later.
The ideal photo is taken during daylight, from ground level, straight-on to the front of your home. You want the full roofline visible from edge to edge, plus any yard features you plan to decorate. Avoid wide-angle or fisheye shots — they bow the roofline and make accurate prop placement nearly impossible. EZRGB’s placement best practices recommend keeping the camera at roughly the same height as your front door and stepping back far enough that the entire facade fits in the frame without cropping.
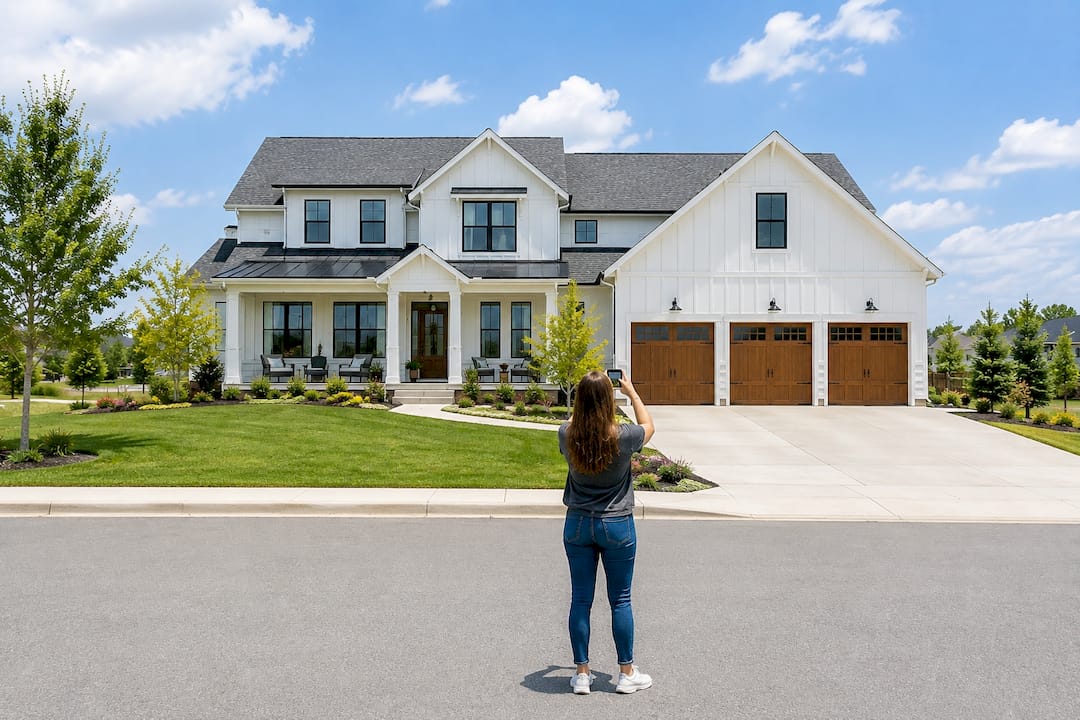
Pro Tip: Before you shoot, measure your front door width and height. You’ll enter one of these numbers into the designer to set the scale. A standard exterior door is a perfect reference because almost every home has one and it’s easy to spot in the photo.
Photo checklist
| Do | Don’t |
|---|---|
| Shoot during daylight, overcast preferred | Shoot at dusk or night |
| Frame the full roofline edge to edge | Crop the roofline or gutters |
| Stand level with the front door | Shoot from a steep upward angle |
| Use landscape, hold your phone horizontal | Use a wide-angle or fisheye lens |
| Note one reference measurement before shooting, front door is perfect | Skip the measurement step or guess |
Once your photo is ready, you’ll enter your reference dimension inside the designer to lock the scale. The designer uses that number to size every prop you place, so a 12-foot roofline prop actually spans 12 feet on your house.
How does the EZRGB Layout Designer work, step by step?
The Layout Designer’s drag-and-drop workflow is built so that placing props feels as natural as arranging furniture in a floor plan app. Here is the full sequence from a blank account to a saved, purchase-ready layout.
Note: The designer only works on desktop, mobile will not work.
-
Create your EZRGB account at ezrgb.com and log in.
-
Click on Light Show Designer at the top of the page.
-
Upload your photo. The designer displays it as your canvas. Use the alignment handles to straighten and crop if needed. Click apply crop then verify your photo.
-
Enter your reference measurement. Drag to box over the object your measured. Let’s use the door as an example. Place the box over the door, then click and drag the corners until the box matches the size of the door. Once it’s lined up, enter the door’s actual real-world dimensions. Click Start Designing once done. The designer now recalculates prop sizes automatically to fit your scale.
-
Pick a prop from the library. Click Add Product in the top left corner and select a prop. The prop library includes roofline pixel C9 strings, window frames, arches, trees, and specialty items such as deer, signing elves, and much more. All EZRGB’s prop are a pre-built with pixels installed.
-
Drag the prop onto the image. Drop it where you want it on your house. Use the rotate and flip controls to match your design. If using the C9s just click the beginning, different changes of angle, and the end.
-
Use the previewer. Before you buy anything, the built-in preview shows you a rough animation of how your props will move and light up. Zoom and pan to check every corner.
-
Your layout saves automatically. Your layout is stored in your account so you can return and edit it anytime, per EZRGB’s guides and help documentation.
-
Buy your light show! The price you see updating live is the cost of your show. Click Add to Cart to add your plug-and-play show to the cart. Next click Proceed to Checkout and follow the steps at checkout to purchase your dream light show.
Before you purchase, confirm these settings:
-
Scale is set and props look proportional to your house
-
Preview the design
The designer works entirely in your browser. No software download is required for the design phase.
Note: If you made a mistake measuring or would like to change your home photo. Go to My Account then click on Light Show Designer then Reset Designer Setup*,* to reset your photo or measurements.
What EZSequence does after you buy
Once you complete a sequence purchase, EZSequence takes over — and this is where the real magic happens. You don’t map channels by hand or render files on your own computer. The cloud does it.
EZSequence uses cloud-based render jobs to read your saved layout, match each prop to its channel in the purchased sequence, and produce a playable file tailored to your specific house. The backend coordinates rendering queues, file storage, and fulfillment triggers so that your sequence arrives pre-mapped to your layout rather than as a generic file you’d have to configure yourself.
| Step | Who handles it |
|---|---|
| Reading your saved layout and prop assignments | EZSequence (automated) |
| Matching props to sequence channels | EZSequence (automated) |
| Rendering the animation timing and effects | Cloud render job (automated) |
| Storing the completed sequence file | Cloud storage (automated) |
| Triggering kit fulfillment and shipping | Automated fulfillment workflow |
| Choosing which songs to schedule | You, via EZPlayer |
| Adjusting playback timing or playlists | You, via EZPlayer |
The practical result: when your props arrive, your sequence is already built for your house. You’re not starting from a blank timeline in a sequencing app — you’re plugging in and pressing play.
What you can still control:
-
Which purchased songs appear in your playlist
-
The order and timing of scenes within EZPlayer
-
When your show runs each night via the Scheduler
-
Adding new sequences or effects in future seasons
How EZPlayer plays back and keeps your show current
EZPlayer is the bridge between your cloud account and the hardware sitting in your yard. It receives your rendered sequence files, manages your playlist, and lets you control the show from the web without touching the controller.
EZPlayer supports scheduling, playlists, and remote sequence updates so your show can run on a set schedule every night without you manually starting it. When EZRGB releases an updated sequence or you purchase a new song, EZPlayer pulls the update over the air — no USB drives, no re-flashing the controller.
Steps to push your design to playback:
-
Download or assign your rendered sequence from your EZRGB account
-
Connect EZPlayer to your controller via Ethernet
-
Run a test playback to confirm all props respond correctly
-
Open the Scheduler inside EZPlayer and set your nightly start and stop times
-
Sync your purchased songs so they appear in your playlist
-
Save the schedule — EZPlayer runs it automatically from that point forward
For managing light scenes and playlists in EZPlayer, the guides page walks you through grouping songs into scenes and setting priority order when multiple sequences overlap. EZPlayer works with the controller that ships in your EZRGB kit, so device compatibility is built in from the start.
What ships in an EZRGB kit and what plug-and-play means
“Plug-and-play” is not marketing shorthand here. EZRGB kits ship with pre-wired props and assembled controllers so that the most time-consuming part of a DIY pixel light setup — soldering connectors, configuring controllers, loading firmware — is already done before the box arrives at your door.
Typical kit contents:
-
Pre-wired RGB pixel props matched to your layout
-
Show controller(s)
-
Pixel extension cords with weatherproof connectors
-
Digital instruction sheet in my account on the webiste.
| Item | Buyer note |
|---|---|
| RGB pixel props | Individually addressable; full color spectrum |
| Show controller | Connects to EZPlayer and get programmed by the player |
| Connectors and cabling | Weatherproof connectors; no soldering required |
| Connection Instruction | Under My Account on website |
| Mounting hardware | not included |
Each prop in the box corresponds to your layout design. The props must be connected to the correct outputs marked on the controller pigtails. When you connect the controller to the EZPlayer software, the system will update the controller and your show plays correctly from the first test run. The EZRGB storefront lists individual props and full kits, so you can start with a roofline package and add yard props in a later seasons.
Common beginner mistakes and how to fix them
Most first-season problems trace back to one of five mistakes. Catching them early keeps your setup on track.
- Incorrect photo scaling — If you skip the reference measurement step, props will be sized wrong and your sequence won’t match your house. Fix: re-enter the reference dimension in the designer and re-save before purchasing.
Safety reminder: Always use outdoor-rated extension cords and weatherproof connector covers for any props mounted outside. Keep power supplies off the ground and away from standing water. Use a stable ladder with a spotter when mounting roofline props, and never work on the roof in wet or icy conditions.
For deeper troubleshooting, the EZRGB guides and help hub covers controller connectivity, sequence sync errors, and EZPlayer offline states with step-by-step fixes. The holiday lighting mistakes guide is a good first stop when something isn’t animating as expected.
How to change themes seasonally and expand your display
Your EZRGB layout doesn’t expire after Christmas. The same prop positions and channel assignments work for any holiday — you swap the sequence, not the hardware.
-
Swap sequences for new holidays. Load a Halloween, Valentine’s Day, or Fourth of July sequence into EZPlayer and your existing props play the new show. No rewiring, no redesign.
-
Add props to an existing layout. Open your saved layout in the designer, drag in the new prop, and the system saves. EZSequence re-renders the updated layout.
-
Expand to new controller zones. When your design grows beyond a single controller’s capacity, EZRGB figures it out for you while designing. If you have open ports the next time you design the system remembers and uses those ports first before adding another controller.
-
Integrate with xLights. For homeowners who want to build custom effects or use additional playback tools, EZRGB sequences integrate with xLights so you can import your layout into xLights for advanced editing while still using EZRGB’s prop library and fulfillment. Most beginners won’t need this in year one, but it’s a useful path if you want to create original effects beyond the pre-built library.
Planning tip for future expansion: The system makes this easy by keeping track out your layout, network, and sequences. This is why having an all in one system is the best choice for your animated light show journey.
What a real beginner setup looks like from start to finish
A typical first-season homeowner project follows a predictable arc. Here’s what the timeline looks like in practice.
| Phase | Typical duration |
|---|---|
| Photo and measurements | A short session |
| Layout design in the designer | A few hours |
| Order processing and shipping | Varies by location and season |
| Physical installation | A few hours for a standard show |
| EZPlayer setup and test run | Under an hour |
| Memories made for your viewer | Lasting a lifetime |
A common before/after: a homeowner with a standard two-car garage and a 40-foot roofline uploads a photo on Saturday morning, places roofline pixel strings and two window props, and saves the layout by noon. They purchase the sequence that afternoon. In time, the kit arrives. Installation takes a Sunday afternoon. That evening, EZPlayer runs the first scheduled show.
What makes the difference is the photo-based design step. When you can see your actual house behind the props as you place them, you catch alignment problems before they become installation problems. A prop that looks wrong in the preview is easy to move; a prop that’s already clipped to your roofline is not.
For design inspiration and exterior layout ideas, the festive home exterior lighting guide shows how different prop combinations look on various home styles.
Key Takeaways
The EZRGB Layout Designer turns a home photo into a purchase-ready animated lighting layout in a single session, with EZSequence and EZPlayer handling everything from cloud rendering to nightly scheduling.
| Point | Details |
|---|---|
| Photo quality determines accuracy | A straight-on daytime photo with one reference measurement sets correct prop scale throughout the design. |
| Drag-and-drop replaces manual mapping | Props placed on the photo are automatically mapped to sequence channels by EZSequence after purchase. |
| Kits ship pre-wired | Controllers and props arrive ready to connect; no soldering or firmware loading required. |
| EZPlayer manages scheduling and updates | Use EZPlayer to set nightly show times, sync purchased songs, and receive sequence updates over the air. |
| EZRGB grows with your display | Reuse your layout for new holidays, add props season by season, and integrate with xLights when you’re ready to expand. |
Why photo-based design is the right starting point for beginners
The conventional advice for setting up a pixel light show used to be: learn a sequencing app, map your channels in a spreadsheet, and test each prop one at a time. That process works, but it assumes you already know what a universe is, how DMX addressing works, and how to read a wiring diagram. Most homeowners don’t, and they shouldn’t have to.
A photo-based designer changes the starting point entirely. Instead of asking you to think in channels and coordinates, it asks you to look at a picture of your house and point to where you want lights. That’s a task anyone can do in minutes. The channel mapping, rendering, and fulfillment happen behind the scenes, managed by EZSequence’s cloud workflows. EZPlayer then keeps the show running on schedule without you touching the controller again.
The trio of Layout Designer, EZSequence, and EZPlayer functions as a managed workflow rather than a collection of separate tools. You design once, buy once, and the system handles the technical translation between your creative intent and the hardware on your roof. That’s not a small convenience — it’s the difference between a project that gets finished and one that stalls at the “figure out the software” stage.
Your first EZRGB kit: what to order and what to expect
The Roofline Special is the most practical starting point for a first-season homeowner. It covers the most visible part of any holiday display, ships with everything needed for a standard roofline run, and maps directly to the roofline prop category in the Layout Designer.
At checkout, purchasing a sequence triggers EZSequence to begin cloud rendering against your saved layout. Fulfillment prepares your pre-wired props and preprogrammed controller in parallel. When the box arrives, check that every prop connector is seated, confirm the controller powers on, and open EZPlayer to assign your sequence. Your show should be running within an hour of unboxing.
For a broader look at starter kits and individual props, the EZRGB storefront lists current inventory with prop specs and compatible sequence options. If you want step-by-step guidance before you order, the guides and help page walks you through the full process from photo to first playback.
Helpful resources for your next steps
The pages below are the most useful places to go after reading this guide:
-
How EZRGB Makes Designing Your Light Show Easy — practical walkthrough of the Layout Designer with prop placement examples for rooflines and windows.
-
How to Use EZRGB Light Show Designer: 2026 Guide — step-by-step instructions covering the designer UI, EZPlayer setup, and scheduling.
-
Holiday Lighting Placement Best Practices — photo framing tips, measurement anchors, and prop placement guidance.
-
Roofline Special product page — specs and ordering details for the recommended first-season roofline kit.
-
Guides and Help hub — central support page for troubleshooting, saved layout management, and account help.
-
Holiday Lighting Mistakes EZRGB Helps You Prevent — common first-season errors and how to avoid or fix them.
-
How to Do Light Scenes or Playlists in EZPlayer — detailed guide for building playlists and setting scene priority in EZPlayer.
FAQ
What is the EZRGB Layout Designer?
The EZRGB Layout Designer is a browser-based, drag-and-drop tool that lets you upload a photo of your home and place animated RGB props directly onto the image to create a scaled lighting layout — no technical skills or software download required.
Do I need to know anything about DMX or channel mapping?
No. The Layout Designer handles channel assignment through a guided prop settings panel, and EZSequence maps your channels automatically after you purchase a sequence. You confirm prop placement and channel numbers in the designer; the cloud does the mapping.
How long does it take to design a layout and get the show running?
Most beginners complete their layout design in one to three hours. Physical installation of a standard roofline typically takes two to four hours, and EZPlayer setup runs about half an hour to an hour. The full first-weekend project fits comfortably across two days.
Can I use my EZRGB layout for holidays other than Christmas?
Yes. Your saved layout and prop positions stay in your account year-round. Load a new sequence for Halloween, Valentine’s Day, or any other holiday in EZPlayer and your existing props play the updated show without any rewiring.
Does EZRGB work with xLights?
EZRGB supports xLights integration for homeowners who want to create custom effects or use additional playback tools beyond EZPlayer. Most beginners won’t need it in the first season, but the option is available as your display grows.