How Outdoor LED Grids Function: A Homeowner’s Guide
An outdoor LED pixel grid is a collection of individually addressable RGB pixels arranged into props, strips, or roofline kits and driven by a networked show workflow. Understanding how outdoor LED grids function comes down to one signal path: your sequencing software creates a show file, a show player sends that data over your network using E1.31 or DDP, a pixel controller receives it and outputs a WS2811-style data stream, and each pixel lights up with the exact color the sequence assigned it. Every pixel in the chain reads its own color values and passes the rest downstream.
The five parts you need to understand before buying anything:
-
Pixels — individually addressable RGB nodes with a built-in microcontroller chip
-
Props — the physical mounting structure (roofline strips, coro shapes, megatrees)
-
Controllers — the hardware that converts network data into pixel protocol signals
-
Power supplies — low-voltage PSUs that feed current to pixel runs
-
Show player — the software or device that plays your show file and schedules playback
Table of Contents
-
What are the five core components every outdoor pixel grid needs?
-
How does pixel data actually travel from your sequencer to each light?
-
How do controllers and universes work together in your setup?
-
How do you size and distribute power for a reliable outdoor display?
-
What does the full software workflow look like from design to playback?
-
How do you size a grid and what comes in a plug-and-play kit?
-
How do you install and maintain your grid so it lasts season after season?
-
Why pixel mapping is what actually separates a good display from a great one
What are the five core components every outdoor pixel grid needs?
Pixels are individually controllable RGB nodes — bullet-style, strip, or panel — each containing a microcontroller chip that distinguishes them from traditional string lights. A standard incandescent or static LED string receives one signal: on or off. A pixel receives a unique color value every frame, which is what makes animation possible.
Props and mounting give pixels their shape. Roofline kits like the EZRGB Roofline Special mount pixel strips along your eaves. Coro props are corrugated plastic cutouts with pixels inserted at regular intervals. Megatrees use vertical pixel runs radiating from a center pole. Each prop type has a fixed pixel count and spacing that determines how detailed the animation looks from the street. For a broader look at plug-and-play holiday light options, EZRGB’s blog covers when pixel props outperform simpler string setups.
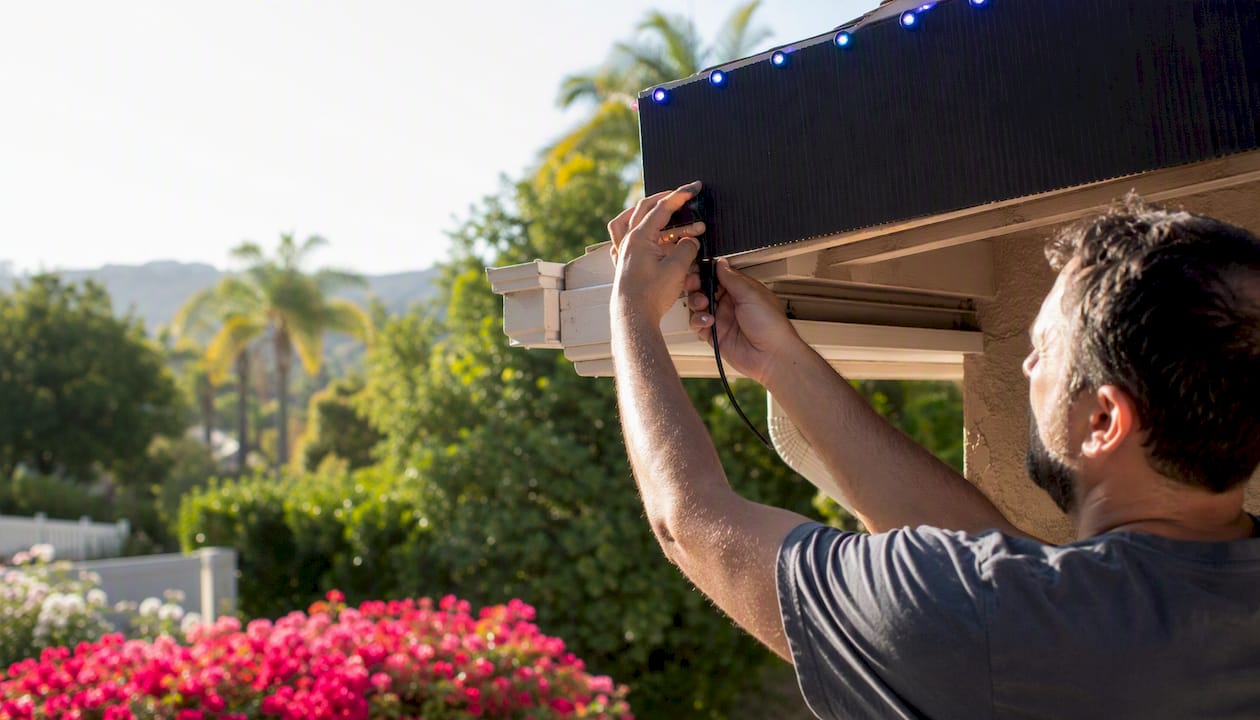
Controllers sit between your network and your pixels. They receive E1.31 or DDP data packets from your show player, decode the color values, and output a WS2811-style serial signal to each pixel output port.
Power supplies run at 5V or 12V depending on your pixel type. Sizing them correctly prevents color shifts and flickering on long runs.
Show players handle playback and scheduling. EZRGB’s EZPlayer supports .fseq/.mp3 playback, E1.31 and DDP controllers, playlist scheduling, and cloud-based show management — making it a practical choice for homeowners who want to schedule shows the easiest way.
Pro Tip: Color-changing animated pixels produce over 16 million color combinations per node. Even a modest 200-pixel roofline prop can display effects that no static string light can replicate.
How does pixel data actually travel from your sequencer to each light?
The data chain that powers animated outdoor LED lighting systems is a digital daisy chain. The practical path is: sequencing software → show file → show computer → E1.31 → controller → WS2811 pixels. Each pixel in a string has a microcontroller that reads the color data addressed to it and passes the remaining data to the next pixel downstream. One failed pixel can interrupt every pixel after it in that run.
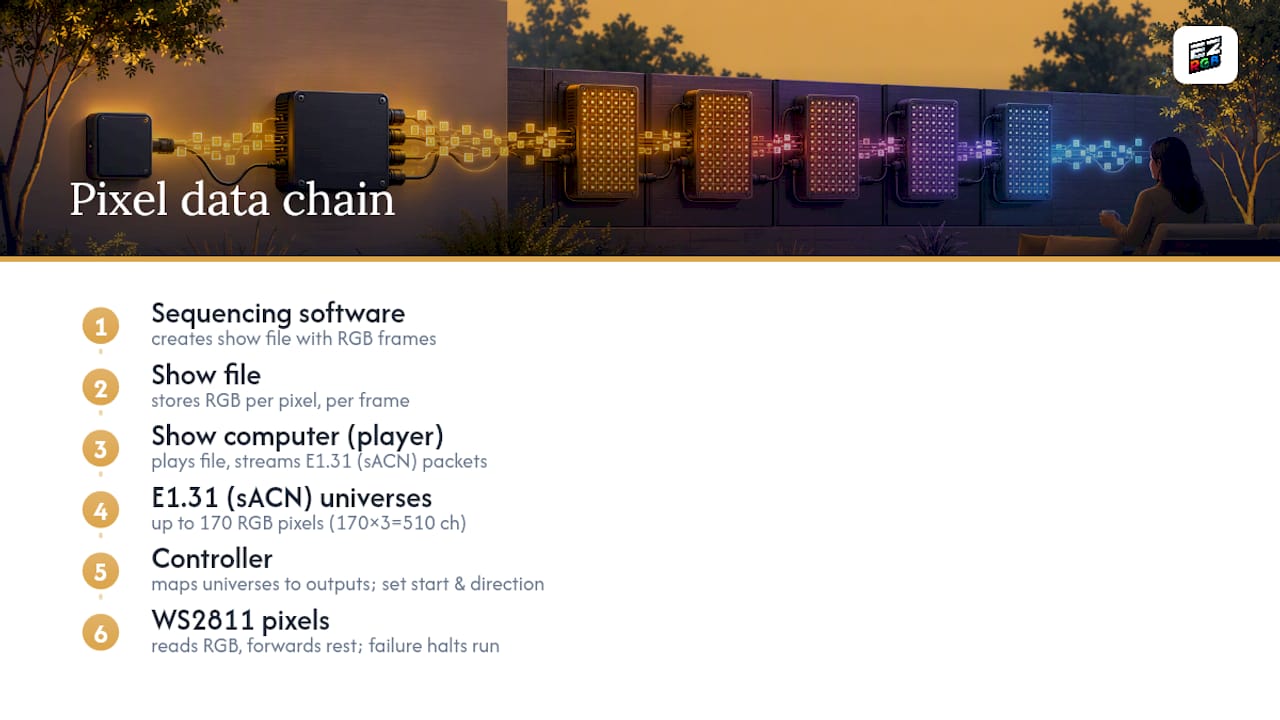
Your show file stores RGB values for every pixel at every frame. The show player streams those values as E1.31 (also called sACN) or DDP packets across your local network. E1.31 organizes pixel data into universes. Each universe carries data for up to 170 RGB pixels (170 × 3 channels = 510 channels, within the 512-channel DMX limit). A moderate-sized display needs multiple universes for pixel data.
Pixel ordering matters. If your controller outputs pixels starting from the left end of a roofline but your sequence maps them right-to-left, every effect will appear mirrored. Setting the correct start pixel and direction in your layout file fixes this before it becomes a wiring problem.
How do you map pixels so effects land in the right place?
Pixel mapping is the coordinate system that links each physical pixel to a numbered index in your sequencer. Without it, a “left-to-right sweep” effect has no way to know which direction is left. Layout tools that let you upload a photo and drag props onto it are the most practical way to build that map before you buy a single pixel.
The workflow in EZRGB’s layout designer follows these steps:
-
Photograph your home straight-on from the street.
-
Upload the photo into the EZRGB layout designer.
-
Drag props onto the photo and let EZRGB figure everything out.
-
Then buy a sequence and watch the magic happen. Every prop dancing to the music.
Pixel spacing and viewing distance determine how sharp your animations look from the curb. Tighter spacing costs more but produces finer detail at close range.
| Viewing Distance | Recommended Spacing | Typical Use Case |
|---|---|---|
| Under 50 ft | 1 inch | Front yard props, close-up displays |
| 50–100 ft | 2 inches | Standard roofline, driveway edge |
| Over 100 ft | 3 inches | Wide facades, large megatrees |
For a roofline mapping example: a 60-foot roofline at 2-inch spacing needs 360 pixels, which fits within three E1.31 universes. The layout designer assigns pixel 1 at the left corner and pixel 360 at the right, so every sweep effect plays correctly across the physical roofline. (Assignment depends on kit purchased and other props added. Please refer to your wiring info on your designer.
How do controllers and universes work together in your setup?
A pixel controller converts the E1.31 or DDP data your show player streams into the WS2811 serial signal your pixels understand. Topology — how you arrange controllers relative to your pixels and power — affects cable length, troubleshooting complexity, and cost.
Centralized topology uses one controller near your power source, with long pixel runs extending outward. Simpler to configure, but long runs increase voltage drop risk and require careful power injection planning.
Distributed topology places smaller controllers closer to each prop or zone, shortening pixel runs and reducing voltage drop. More controllers to configure, but faults are easier to isolate.
Universe math is straightforward. Divide your total pixel count by 170 to get the minimum number of universes. A 510-pixel display needs exactly 3 universes; a 511-pixel display needs 4. Assign each universe a unique starting address in your controller’s configuration panel, then match those assignments in your show player.
Pro Tip: Assign controller IP addresses in a consistent scheme (e.g., 192.168.1.101, .102, .103) and document them in a simple spreadsheet. When a controller goes offline mid-show, you will know exactly which zone to check.
E1.31/sACN is the most common protocol for homeowner setups. DDP works similarly yet more efficient and is supported by most controllers and players, including EZPlayer.
How do you size and distribute power for a reliable outdoor display?
Pixels typically run on 5V or 12V. Power distribution planning from large installs scales directly to homeowner displays and is often the difference between a show that runs all season and one that fails on the first cold night.
Size your PSU with these steps:
-
Count your total pixels per power supply zone.
-
Multiply pixel count by the per-pixel current draw (typically 60mA at full white for a 5V pixel).
-
Add 20% headroom to that total.
-
Choose a PSU rated at or above that amperage.
For example: 300 pixels × 0.06A = 18A. Add 20% headroom = 21.6A minimum. A 30A PSU gives you comfortable margin.
Voltage drop is the most common subtle failure in long pixel runs. When current travels more than 50–100 pixels from the injection point, the voltage at the far end drops enough to shift colors toward red or cause flickering. Inject power at both ends of long runs, or at midpoints on runs over 150 pixels.
Use weatherproof connectors rated for outdoor use (IP65 or higher) on all outdoor connections. Run your cabling through conduit where it crosses walkways or sits on the ground. Ground your power supplies to a common ground point to prevent ground loops that cause flickering.
What does the full software workflow look like from design to playback?
The workflow for animated outdoor LED lighting systems follows a clear path: design → sequence → show file → player → networked controller. Cloud tools compress the middle steps significantly for first-time installers.
-
Upload a photo of your home to the EZRGB layout designer.
-
Place props, set pixel counts and spacing, confirm start orientations.
-
Buy EZSequences to auto-generate a synchronized sequence for your layout.
-
Download and register your EZPlayer.
-
EZRGB sync layout and mapped sequence files into EZPlayer, set your schedule, and connect to your controller network.
Open-source show tools demonstrate timeline editors, live preview, and DDP/sACN output — features that show how much manual work cloud-based platforms replace. For homeowners who prefer local playback, Falcon Pi Player (FPP) on a Raspberry Pi is a widely used option that plays .fseq files and outputs E1.31 locally. EZPlayer adds cloud scheduling, remote updates, and direct sync with your purchased EZRGB sequences — no SSH sessions or manual file transfers required.
Pro Tip: EZPlayer lets you update your show schedule, swap songs, and sync new EZRGB sequences directly from the website. For homeowners who add props year over year, that cloud connection means you never rebuild your show from scratch.
For a deeper look at light show software options, EZRGB’s blog covers compatibility across major players and sequencers.
How do you size a grid and what comes in a plug-and-play kit?
Sizing is straightforward: measure your mounting area in inches, divide by your chosen spacing, and that is your pixel count. Add 10% for spares and transitions between props.
A complete plug-and-play kit typically includes:
-
Pre-mapped pixel props with pixel counts and orientations already configured
-
A controller (will be programmed by the cloud on first connection)
-
Weatherproof connectors and pixel extension cords
-
Access to EZSequence for auto-generation of sequences that match your display.
-
EZPlayer access for scheduling and cloud playback
Budget tiers for common homeowner setups:
-
Basic: One prop (wreath, window frame) plus EZPlayer — good for a first-season test.
-
Mid: Roofline kit plus one or two accent props, single controller, one PSU zone.
-
Pro: Multiple roofline sections, megatree, distributed controllers, full EZSequence library.
Before buying from anywhere, confirm: protocol compatibility (E1.31/sACN or DDP), included PSUs, and whether the kit includes EZSequence automation and EZPlayer support. The EZRGB design guide walks through the layout designer and EZSequence workflow in detail.
How do you install and maintain your grid so it lasts season after season?
Plan cable routes on paper before mounting anything. Test each section on the ground before it goes up.
Pro Tip: Run a full show test at night before your permanent mounting day. Color shifts and dead pixels are much easier to fix when the prop is still on your workbench.
Installation checklist:
-
Mount props and route cables along planned paths.
-
Connect power supplies and verify voltage at the far end of each run.
-
Connect controllers, assign IP addresses, and confirm E1.31 universe assignments.
-
Load your show file into EZPlayer and run a full playback test.
-
Seal all outdoor connectors with weatherproof covers or self-amalgamating tape.
Troubleshooting flow: Flickering → check power injection points and PSU load. Dead section → check data continuity at the last working pixel. No output → verify controller IP and universe assignments in EZPlayer. Wrong colors → confirm pixel ordering and start orientation in your layout file.
For end-of-season storage, label every cable with its prop name and controller port. Store pixels in a dry container. Check the EZRGB product care guide for specific maintenance steps. Keep a small bag of spare pixels — replacing one failed node takes two minutes when you have the part on hand.
Key Takeaways
Outdoor LED pixel grids function by sending sequenced color data from a show player over E1.31 to a controller, which outputs WS2811-style signals to individually addressable pixels arranged in mapped props.
| Point | Details |
|---|---|
| Pixel mapping is required | Every pixel needs a coordinate in your layout file so effects play in the correct physical location. |
| Universe math is simple | Divide total pixel count by 170 to calculate the minimum number of E1.31 universes needed. |
| Power injection prevents failure | Inject power every 150 pixels or at both ends of long runs to prevent voltage drop and color shifts. |
| Spacing sets viewing quality | Use 1-inch spacing under 40–50 ft, 2-inch for 50–100 ft, and 3-inch for distances over 75–100 ft. |
| EZRGB automates the hard steps | The EZRGB layout designer, EZSequence, and EZPlayer handle mapping, sequencing, and cloud scheduling in one workflow. |
Why pixel mapping is what actually separates a good display from a great one
Most homeowners assume that more pixels automatically means a better show. The pixel count matters less than most people think. A 200-pixel roofline with accurate mapping and a well-sequenced show file will outperform a 600-pixel display where the mapping is wrong and effects play in random positions. Pixel mapping is the choreography. It tells each light exactly where it lives in the visual field, which is what makes a ripple effect actually ripple across your roofline instead of flickering randomly.
Professional installers have known this for years. The “wow factor” in a high-end display comes from effects that respond to the physical shape of the house, not from raw brightness or pixel density. Automated mapping tools that let you place props on a photo of your home and generate a layout file are what bring that professional result within reach for a homeowner doing their first install. EZRGB built its platform around exactly that idea: upload your photo, place your props, and let EZSequence generate the sequence. The technical work that used to take hours of manual coordinate entry happens in the background.
What EZRGB gives you that a parts list alone cannot
The hardest part of building an animated display is not buying pixels. It is getting the mapping, sequencing, and scheduling to work together without spending a weekend troubleshooting configuration files. Honestly it is learning everything. Computer, networking, programming, power management, and much more.
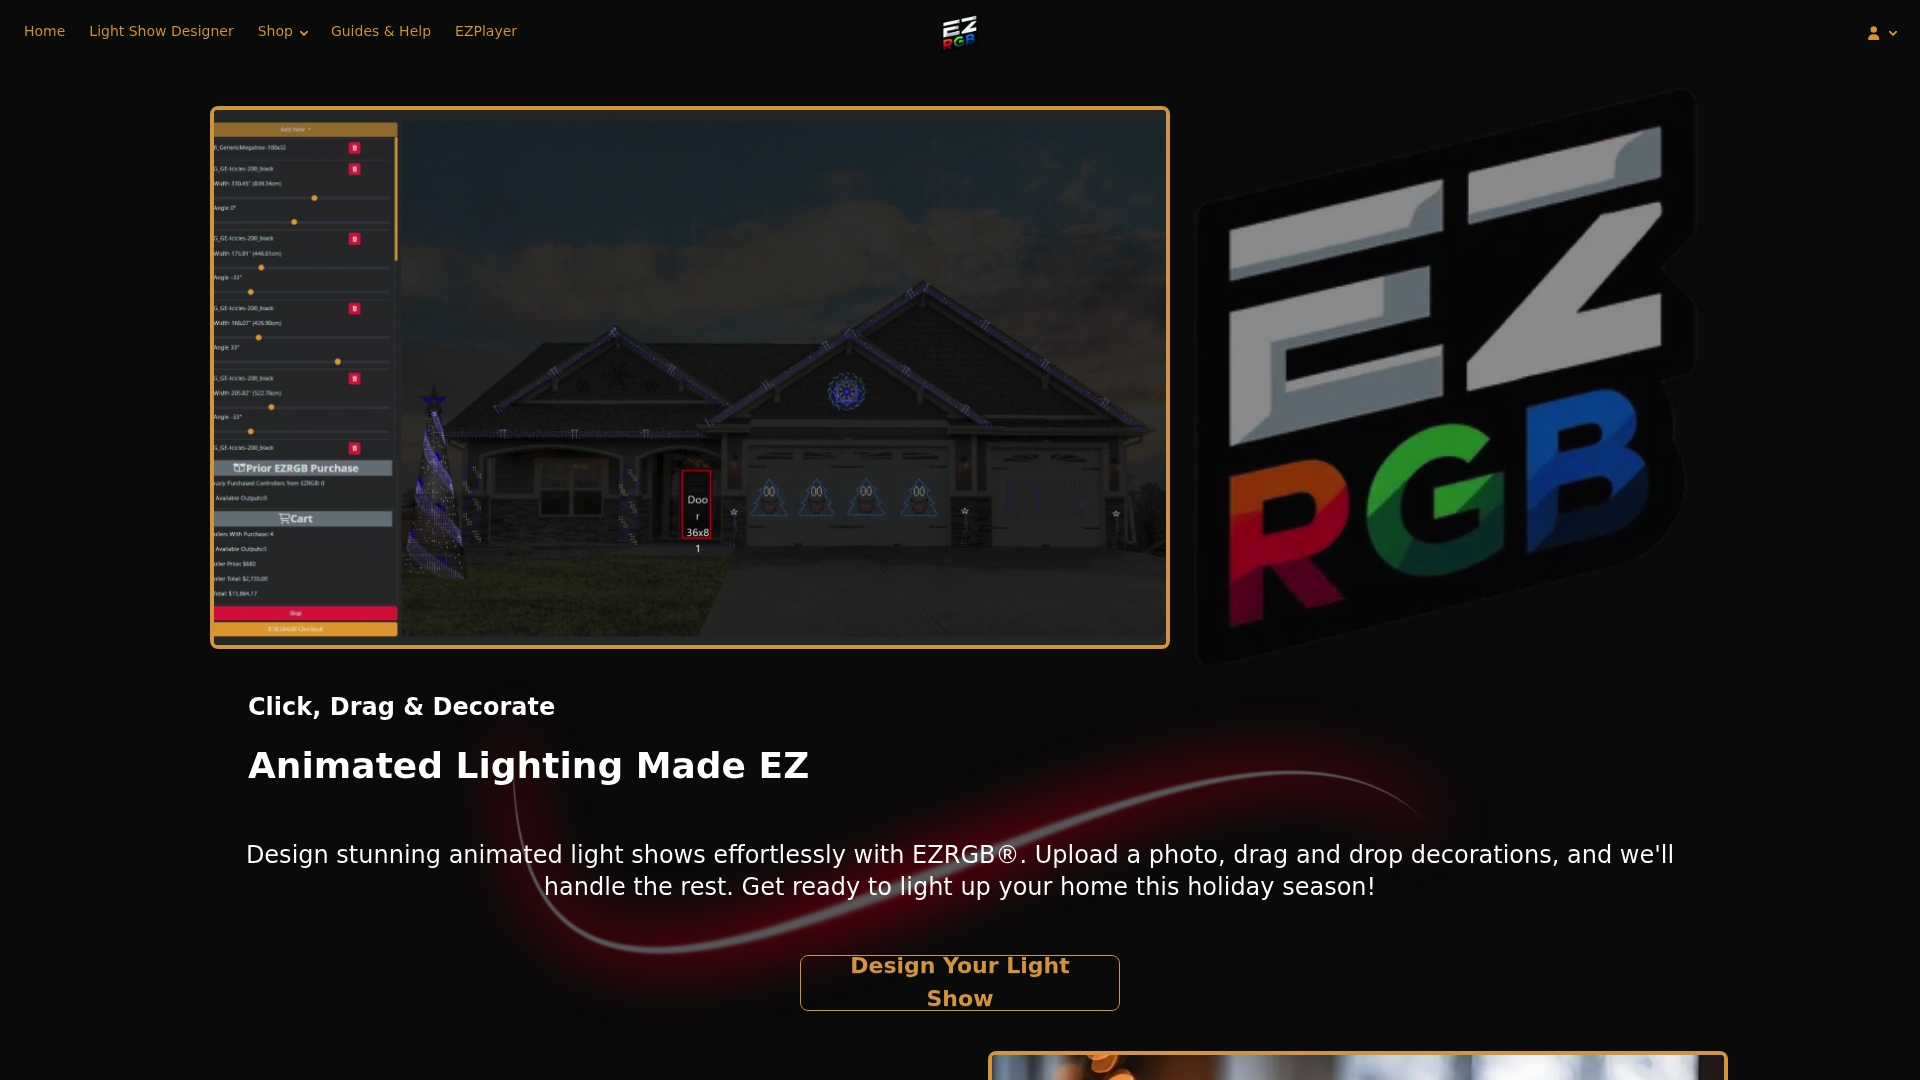
EZRGB kits arrive with props already mapped, controllers sync-configured, and purchased sequences ready to load. The Roofline Special is a practical starting point for most homeowners: a complete roofline pixel kit with included PSUs, pre-mapped layout files, and full EZSequence and EZPlayer compatibility. EZSequence auto-generates your sequence from your uploaded layout, and EZPlayer keeps your show connected to the cloud so you can update your schedule, sync new songs, and make changes from the website without touching your controller. The Christmas Light Show Kit 1 packages everything a first-season installer needs into one order.
Visit ezrgb.com to browse kits, or head to the guides and help section to walk through the layout designer and EZSequence workflow before you buy.
Useful sources
-
TechSpot — Ever Wondered How Those Computer-Controlled Christmas Light Displays Work?
-
Learn Christmas Lighting — Where Do I Start With a Christmas Light Show?
-
Ironwood Glitter — How we power and control massive holiday light displays
FAQ
How do outdoor LED pixel grids differ from regular string lights?
Pixel grids use individually addressable RGB nodes, each with a built-in microcontroller chip, so every pixel can display a unique color per frame. Standard string lights receive one signal for the entire strand.
How many pixels fit in one E1.31 universe?
One E1.31 universe carries 512 DMX channels, which accommodates up to 170 RGB pixels (3 channels each). A moderate-sized display needs multiple universes.
What is EZSequence and what does it do?
EZSequence is EZRGB’s automated sequencing tool that reads your uploaded layout file and generates a synchronized light show sequence for your specific prop arrangement, eliminating manual timeline editing and mapping.
Do I need a Raspberry Pi to run a pixel light show?
Yes or a computer. EZPlayer handles show playback and scheduling with cloud connectivity, so you can manage your show from the EZRGB website.
What causes flickering in a pixel display?
Flickering most often results from insufficient power at the pixel run. Check your PSU load, verify power injection points along long runs, and confirm that voltage at the far end of each run stays within spec.