
Your First Animated Christmas Light Display Made Easy

You can mount a small animated roofline and one focal prop in a single weekend. That’s the whole plan for year one, and it’s enough to stop traffic on your street.
Planning your first Christmas light display without feeling overwhelmed comes down to one decision: start with animated pixel lighting instead of static LED strings. Pixels give you motion, color changes, and music sync with fewer actual lights than a traditional static display needs to create the same visual impact. The EZRGB platform handles the hardest part, generating sequences automatically from a photo of your home so you never have to hand-program a single light.
Quick-start checklist for this weekend:
-
Buy first: An EZRGB Starter Kit that includes pixel strings, a controller, and prop extensions
-
Safety before power: Plug everything into a GFCI-protected outdoor outlet and test the full run before mounting
-
Skip sequencing year one: Purchase a pre-made EZSequence auto-generate to produce a show in minutes
Pro Tip: EZRGB’s EZSequence auto-generates a complete light show sequence from your uploaded or designed layout. Buying or generating one sequence for your first season saves 40–80 hours of manual programming in xLights and gets your display running the same weekend you install it.
Animated pixels look more impressive with fewer lights than static strings because motion and color shifts draw the eye continuously. A 40-foot roofline with several hundred addressable pixels running a synchronized sequence will outperform a much longer static white LED rope to a neighbor watching from the street. That’s the core reason this guide focuses on animated lighting from the start, with xLights as the free DIY sequencing option and EZRGB’s layout designer plus EZSequence as the low-effort path for first-timers.
Key Takeaways
Starting small with animated pixel lighting and a pre-generated EZSequence is the most reliable path to a finished, impressive first-year display without the stress of hand-sequencing or over-buying.
Table of Contents
-
How do you assess your home and set realistic first-year goals?
-
What scale and theme should you pick for your first display?
-
How do you turn photos and measurements into a shopping list?
-
How do you install safely and avoid common electrical mistakes?
-
How do you keep the project manageable and grow it over the years?
-
What does animating lights actually involve, and how hard is it?
-
EZRGB puts your first animated display within reach this season
How do you assess your home and set realistic first-year goals?
Start outside, not online. Walk to the street in front of your house and take one photos: one in daylight. This photo should reveal your actual sightlines, the viewing distance a neighbor experiences, and which architectural features read clearly from 50–80 feet away.
From those photos, capture one measurement before you design anything:
- The front door: measure the width and height
Set one tiny goal for year one. The three most manageable options are: roofline only, roofline plus one window prop, roofline plus mega tree, or a small yard matrix. Pick one focal element and a simple outline. Trying to do the whole house in season one is the single most common reason first-timers quit mid-install.
Check your HOA covenants and local municipal code early. Some associations restrict brightness levels or require lights off by a specific hour. A quick call to your HOA office or a look at your city’s ordinance page takes 15 minutes and prevents a headache in December. For placement and sightline guidance specific to exterior lighting, EZRGB’s placement guide covers common first-year mistakes worth reviewing before you sketch anything.
What does a realistic budget and timeline look like?
Budget ranges by tier
Small animated display (roofline + 1 prop):
-
Controller
-
Mounting clips and weatherproof connectors: a moderate cost option
-
EZSequence pre-made sequence: a moderately priced option
-
EZPlayer
-
Total: $600–$1,000
Medium display (roofline + 2 props + pathway):
-
Controller
-
Mounting clips and weatherproof connectors: a moderate cost option
-
EZSequence pre-made sequence: a moderately priced option
-
2 coro props
-
EZPlayer
-
Total: $900–$1,500
Ambitious first-season display (full roofline + 3–4 props + matrix):
-
Controller
-
Mounting clips and weatherproof connectors: a moderate cost option
-
EZSequence pre-made sequence: a moderately priced option
-
4 coro props
-
matrix or mega tree
-
EZPlayer
-
Total: $1,500–$6,000
Gear reuses year to year, so your second-season cost drops sharply. Many decorators treat year one as Stage 1 and budget for props and sequences in year two rather than trying to complete the full vision in a single season.
Two-weekend install timeline
Weekday prep (before Weekend 1):
-
Photograph your home from the street (day and dusk)
-
Measure door
-
Design your kit
Weekend 1 — Layout and buying:
-
Finalize your EZRGB layout design using the uploaded house photo
-
Confirm design
-
Purchase your kit
Weekend 2 — Install and test:
-
Mount roofline clips and run pixel strings
-
Connect controller according to online wiring diagram.
-
Download EZPlayer program your controllers and run a full test show
Which lights and tech give you the best animated result?
The honest answer: addressable pixel lights outperform static LED strings for animated displays at every level of scale. ENERGY STAR recommends LEDs over incandescent lights for holiday displays because they use significantly less electricity and last longer. Pixels take that efficiency further by pulsing and changing color rather than staying on continuously.
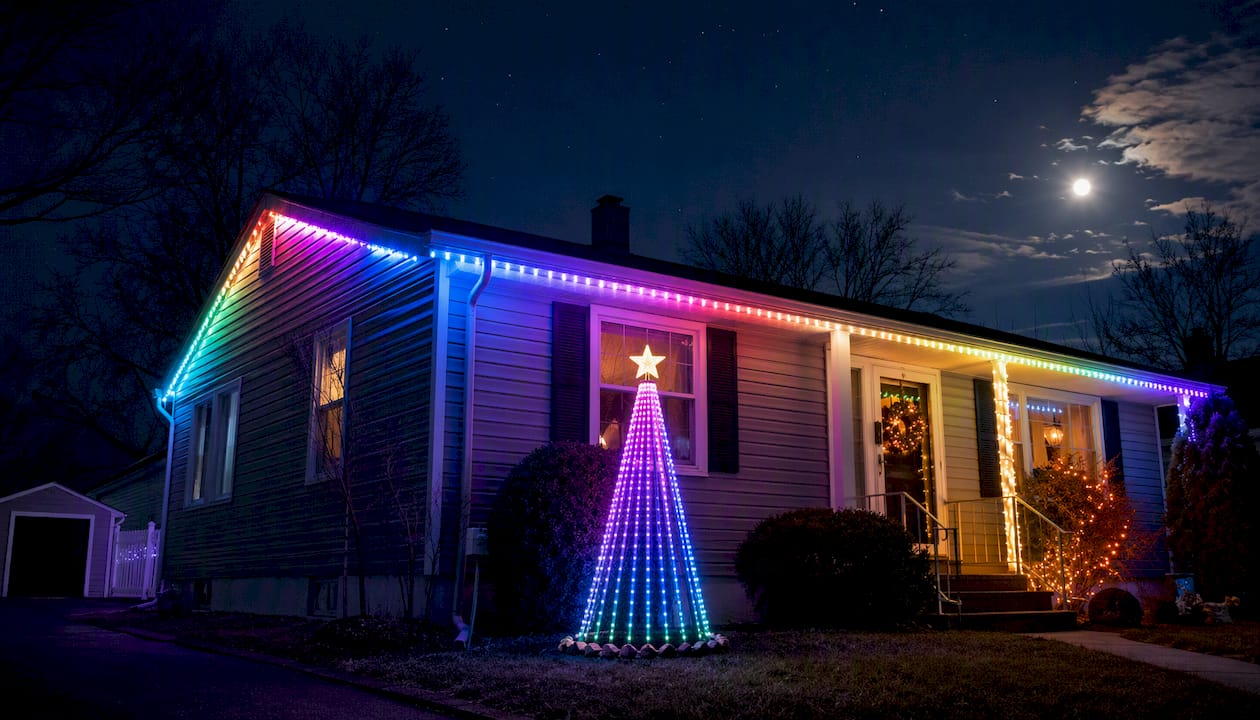
LED strings vs. addressable pixels
| Feature | LED string lights | Addressable pixel lights |
|---|---|---|
| Cost | Lower upfront | Higher upfront, season give more value |
| Setup time | 30–60 minutes | 2–4 hours first season |
| Visual impact | Static only | Full animation, millions of colors |
| Expandability | Limited | Add props and runs each year |
| Music sync | Not possible | Yes, via controller + sequence |
Animating lights with sequencing can reduce energy use compared with always-on static displays because pixels are off or dimmed for portions of each song. A 3-minute animated sequence cycles lights through patterns rather than burning every pixel at full brightness for 6 hours straight.
Essential equipment for a basic animated setup
-
EZRGB 12v pixel strings allows for longer runs
-
A controller with spare ports — The designer figures out your controllers and when you come back the following year it uses the open ports first before buying another controller.
-
EZPlayer for cloud-based scheduling and sequence updates
-
Outdoor-rated extension cords and waterproof connectors
A reliable synchronized display requires appropriate controllers, power supplies, and show-player equipment to handle real-time control. Skimping on the controller or power supply is the most common cause of flickering, dropped channels, and mid-season failures.
Sequencing options: xLights is the free, industry-standard tool for hands-on sequence design. It gives you full control but requires a learning investment. EZRGB’s EZSequence auto-generates a sequence from your uploaded layout, which is the faster path for a first-year display. For a deeper look at beginner-friendly animated lighting options, EZRGB’s guide compares these paths side by side.
Energy note: ENERGY STAR guidance confirms that LED-based holiday lighting uses significantly less power than incandescent alternatives. Animated pixel displays that pulse and sequence rather than burn static at full brightness extend that efficiency advantage further.
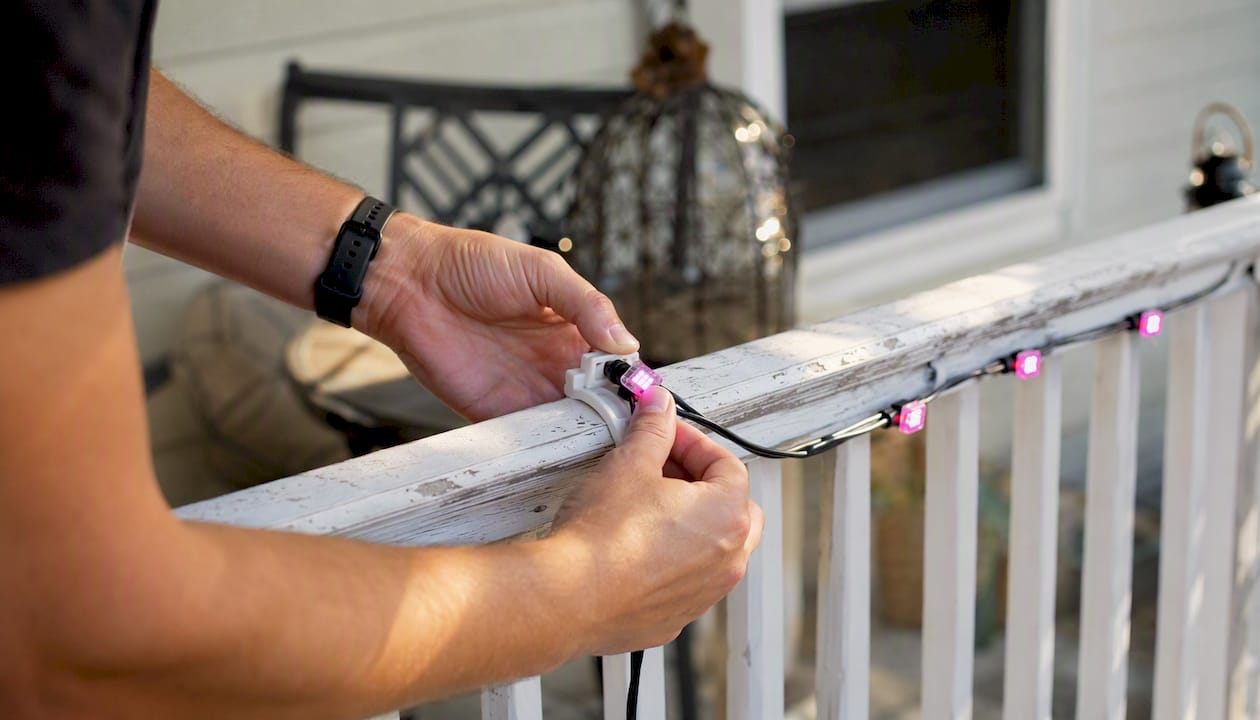
Weatherproofing your equipment
Controllers and power supplies must live in weatherproof enclosures rated for outdoor use. A plastic project box with a gasketed lid, mounted under an eave or inside a covered porch, protects your electronics from rain, snow, and temperature swings. Seal cable entry points with silicone or weatherproof grommets.
Seasonal maintenance
When a pixel fails mid-season, the fix is usually one of three things: a dead pixel node (swap it out), a loose connector (reseat and waterproof), or a voltage drop issue (add a power injection point mid-run). Keep a small bag of spare pixel nodes and connectors in your garage so a 10-minute fix doesn’t become a weekend project. For animated display setup guidance that covers controller and power troubleshooting, EZRGB’s setup guide is a practical next read.
How do you keep the project manageable and grow it over the years?
The decorators who enjoy this hobby long-term share one habit: they treat each season as one chapter, not the whole book.
Year-by-year expansion roadmap
Year 1: Roofline outline + one focal prop. Learn your controller, run your first EZSequence, and get comfortable with EZPlayer scheduling. The goal is one clean, reliable show.
Year 2: Add two props and consider a small yard matrix. Reuse your existing controller if you bought with spare ports. Add one or two new sequences to your EZPlayer playlist.
Year 3: Expand to full-house outlines, add more sequences, and consider a second controller if your prop count warrants it. By this point, your hardware investment from year one is fully amortized.
Storage and labeling
Store pixel strings loosely coiled in clear plastic bins, never tightly wound. Label each bin with the run name, pixel count, and connector type. Keep a printed or digital copy of your layout map with each bin. A tested “go-live” checklist — power on, EZPlayer loads, first song plays — takes 20 minutes to create and saves an hour of troubleshooting every November.
Pro Tip: Buy your controller with at least 4 spare ports beyond your year-one plan. Adding a prop in year two costs $50–$150 in hardware. Replacing a maxed-out controller to accommodate it costs $150–$300 and requires remapping your entire layout.
What does animating lights actually involve, and how hard is it?
Animated lighting works like this: your pixel strings connect to a controller, the Player reads a sequence file (.fseq format), and a controller sends the right color command to every pixel at the right millisecond. The sequence is the choreography; the player is the stage manager.
Time vs. cost trade-offs for sequencing
| Approach | Time investment | Cost | Skill required |
|---|---|---|---|
| Hand-sequence in xLights | 40–80 hours per song | Free | High |
| Buy a pre-made sequence | 60–90 min to import | $40–$1000 per song | Moderate |
| EZRGB sequences | Under 5 minutes | $20-$60 per song | None |
Pre-made sequences and automated sequence generation are the single biggest time-savers for first-time decorators who want animation without a steep learning curve. A 90-second song can take 40–80 hours to hand-sequence in xLights depending on complexity. Buying or auto-generating that same sequence takes under an five minutes, including testing.
Practical shortcuts for beginners
-
Use EZRGB’s EZSequence auto-generate for your first season. It reads your uploaded layout and produces a complete player file without any manual mapping.
-
Use EZPlayer for scheduling. You set the show start and end times, select your songs, and EZPlayer handles playback from the cloud. Changes to your playlist or sequence updates sync automatically.
-
Use an FM transmitter for music playback if you want neighbors to tune in from their cars. It requires no additional wiring and works with EZPlayer’s audio output.
For a deeper explanation of what a holiday light show sequence is and how .fseq files work inside EZPlayer, EZRGB’s sequencing guide covers the mechanics without assuming prior knowledge.
How does EZRGB make starting an animated display easier?
EZRGB is built specifically for homeowners who want a professional animated display without becoming hobbyist engineers. The workflow has four steps, and none of them require prior experience with lighting software.
Step 1 — Design weekend: Upload a photo of your home to the EZRGB layout designer. Drag and drop pixel props onto your roofline, windows, and yard. The designer shows you exactly what your display will look like before you order anything.
Step 2 — Order your kit: The Christmas Light Show Kit 1 is the standard year-one purchase. It includes pre-configured pixel strings, a ready-to-use controller, power supply, and all mounting hardware. The Front Yard Essentials Kit 2 is the mid-tier option if your layout includes two or more yard props alongside the roofline.
Step 3 — Install and map weekend: Mount your pixel strings using the included clips, connect the controller and power supply, and run a quick test. Because EZRGB ships pre-programmed controllers matched to your layout, there’s no manual channel mapping.
Step 4 — Run with EZPlayer: EZPlayer connects to the cloud, loads your purchased or sequences, and lets you schedule shows by time of day. When you buy a new EZSequence or update a prop, EZPlayer syncs the change automatically. You can adjust your playlist, add songs, or change show timing from the EZPlayer interface without touching your controller.
EZRGB’s help guides and support resources cover every step of this workflow with step-by-step tutorials. For a full walkthrough of how EZRGB simplifies the animated display process, the brand’s own guide is the most direct reference for new users.
What first-timers should actually expect from year one
Most decorators who build displays they’re proud of didn’t finish the whole vision in year one. They started with a roofline and one prop, ran a handful of songs, and spent December watching neighbors slow down to look. That’s a successful first season.
Year one is about learning your hardware, getting comfortable with EZPlayer scheduling, and discovering which parts of your layout you want to expand. The hardware you buy this season lasts several years. The sequences you purchase or generate can be reused, tweaked, or replaced without touching the physical install. A modest first-year display built on a solid controller with spare ports costs you almost nothing to expand in year two.
The biggest emotional payoff isn’t the complexity of the show. It’s the reliability of it. A clean, synchronized 4-song playlist that runs on schedule every night from Thanksgiving to New Year’s Day delivers more neighborhood joy than an ambitious half-finished display that glitches every third night. Pre-sequenced EZSequence files and EZPlayer’s automated scheduling make that reliability achievable in year one, without the learning curve that stops most first-timers before they finish.
EZRGB puts your first animated display within reach this season
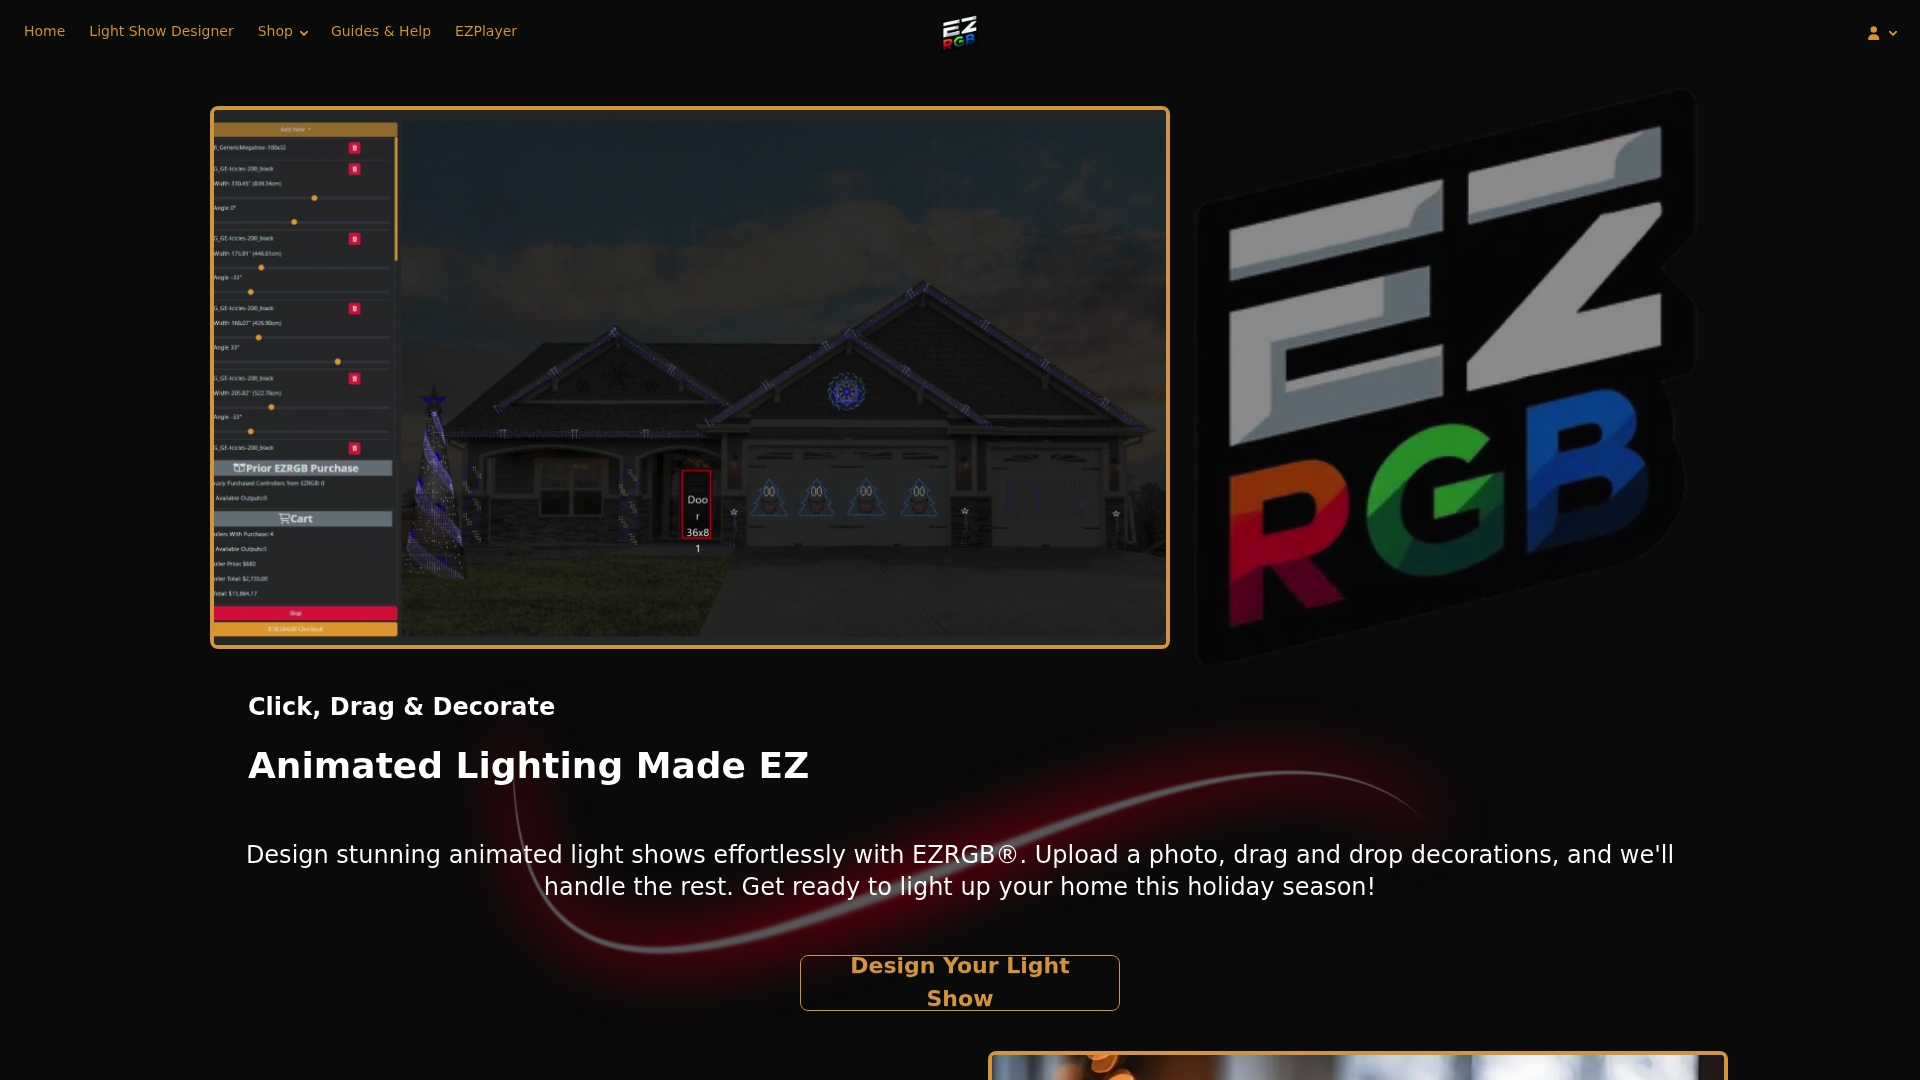
EZRGB gives first-time decorators a complete animated display path without the DIY engineering. Upload a photo of your home, place your props in the drag-and-drop layout designer, and let EZSequence auto-generate a synchronized show for your exact layout. Your kit ships pre-programmed, your controller arrives ready to connect, and EZPlayer keeps your show updated from the cloud all season long.
The Christmas Light Show Kit 1 is the right starting point for a roofline plus one prop. If your front yard calls for more focal pieces, the Front Yard Essentials Kit 2 covers a medium-tier year-one build. Both kits include everything you need to go from unboxing to a running animated show in a single weekend. Visit Ezrgb to upload your home photo, design your layout, and place your order before the season starts.
Sources
-
Should I sequence my Christmas lights to music? — Learn Christmas Lighting
-
Building A Christmas Lights Display – Christmas Props Australia
-
Pixel Christmas Lights: A Beginner’s Buyer’s Guide - Your Pixel Store
FAQ
How do I decorate for Christmas without getting overwhelmed?
Pick one focal element — a roofline outline or a single yard prop — and finish that before adding anything else. Using a pre-configured kit like the EZRGB Starter Kit with an auto-generated EZSequence removes the two biggest friction points: figuring out what to buy and how to program it.
What makes animated Christmas lights worth the extra setup?
Animated pixel displays create motion and color changes that draw the eye far more effectively than static strings, often with fewer total lights. Sequencing pixels to music also tends to reduce energy use compared with always-on static displays because pixels cycle through patterns rather than burning at full brightness continuously.
How early should I start planning my first light display?
Order your kit and finalize your layout by late October. That gives you two full weekends in November for installation and testing before the holiday season starts, with time to troubleshoot any issues before your first show night.
Why do Christmas lights feel so satisfying to put up?
Psychologists note that holiday decorating activates positive associations with memory, community, and anticipation. A synchronized animated display amplifies that effect for neighbors, turning a personal tradition into a shared neighborhood experience.
Can I use xLights with an EZRGB kit?
Yes. EZRGB’s system supports integration with xLights, the industry-standard free sequencing tool. You can import xLights sequences into EZPlayer, or use EZRGB’s EZSequence auto-generate for your first season and move to xLights for custom sequences in year two.