Animated Holiday Display Setup at Home: 2026 Guide
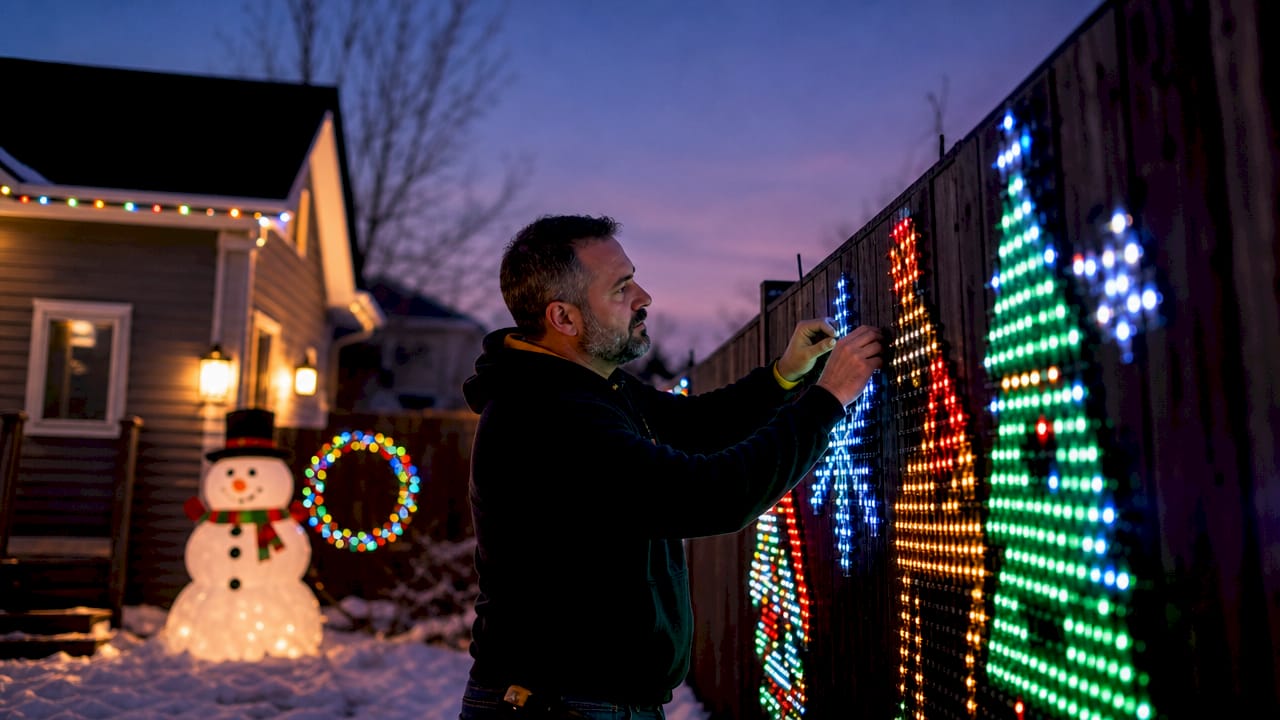
An animated holiday display setup at home is defined as a synchronized system of pixel lights, controllers, props, and sequencing software working together to produce a choreographed light show. The best displays combine RGB pixel technology with music synchronization to create effects that static string lights simply cannot match. This guide covers every layer of the process, from choosing your first controller to troubleshooting voltage drop, so you can build a display that actually works on the first night you flip the switch.
What does an animated holiday display setup at home require?
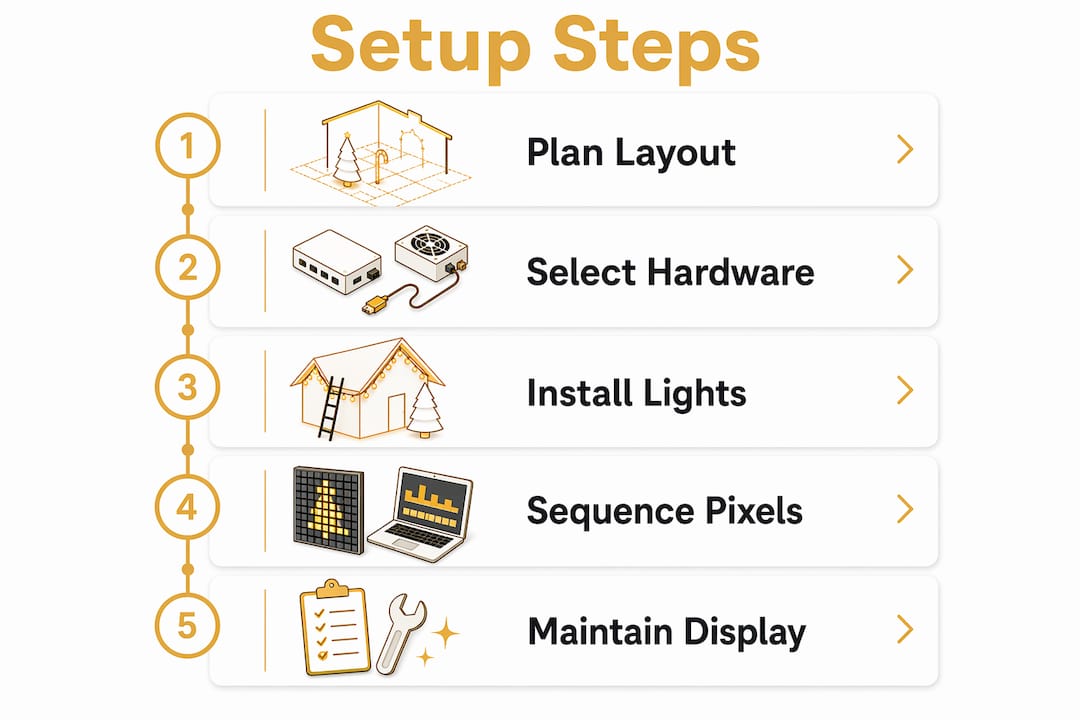
A complete animated holiday light show has five core components: a pixel controller, RGB pixel lights, physical props, a show player, and an audio output device. A standard beginner setup includes one central controller, around 2,500 individual RGB pixel lights, simple props like window outlines or arches, a dedicated show player such as a Raspberry Pi running Falcon Player, and an FM transmitter so neighbors can tune in from their cars. That combination gives you a fully functional show without overbuilding on your first season.
The industry term for this type of display is a “pixel light show,” though homeowners commonly call it an animated Christmas light display or a holiday light show. Both phrases describe the same thing: individually addressable LEDs that a controller can command one pixel at a time. That individual control is what separates pixel lights from traditional string lights and makes fluid animations possible.
![]()
Pixel mapping is the technique that choreographs what each pixel does and when. Good pixel mapping creates fluid, intentional effects. Poor mapping produces chaotic, flickering results that frustrate viewers and the homeowner alike.
What hardware do you need to get started?
Hardware selection is the most consequential decision you make before buying a single bulb. Get this right and everything else becomes manageable. Get it wrong and you spend december troubleshooting instead of entertaining.
Controllers and channel counts
Industry guidance recommends 32 light channels for homes under 2,500 square feet and up to 64 channels for larger homes. More channels give you finer control over different zones of your display. The Baldrick 8 Port Controller from Ezrgb is built specifically for homeowners who want reliable channel management without a steep learning curve.
Pixel light voltage: 12V vs. 5V
Voltage choice affects every other hardware decision. Switching to 12V LED systems reduces voltage drop, allows longer cable runs, and preserves color accuracy across the full length of your display. A 5V system loses brightness and color fidelity the farther you get from the power supply. For most home setups, 12V is the correct choice. Ezrgb’s C9 RGB pixel lights run on 12V and are designed for outdoor residential use.
Core components at a glance
| Component | Role |
|---|---|
| Pixel controller | Sends timing and color data to each LED |
| RGB pixel lights | Execute the color and animation commands |
| Show player | Runs your sequence files automatically |
| Props and mounting hardware | Give your display physical structure and shape |
| FM transmitter | Broadcasts your audio track to nearby listeners |
Pro Tip: Plan your power injection points before you buy cable. Long pixel runs without mid-run power injection cause the far end of your display to appear dim or color-shifted, even with a 12V system.
How do you plan and design your display layout?
Planning before physical installation saves hours of rework. The most common beginner mistake is mounting lights first and mapping pixels second. That sequence almost always produces reversed or misaligned animations that require you to pull everything down and start over.
Sequencing software such as xLights lets you build a virtual model of your home and assign pixel numbers to every prop before you touch a single staple gun. Organizing props correctly in sequencing software before installation avoids a technical maze and makes controller setup far smoother. Think of it as drawing the blueprint before pouring the foundation.
Pixel numbering is a detail that trips up nearly every first-time builder. Pixel number one must sit closest to the controller in each prop. If you install a prop with pixel one at the far end, every animation on that prop runs in reverse. Verify your numbering in software before you climb the ladder.
Common planning mistakes to avoid:
-
Skipping the virtual layout step and going straight to physical installation
-
Assigning all props to a single controller output, which limits animation flexibility
-
Forgetting to account for cable routing distance when calculating power needs
-
Using inconsistent pixel numbering across props from different manufacturers
AI-assisted choreography tools can cut sequence creation from many hours of manual keyframing down to minutes. That time savings matters most when you are managing a display with dozens of props and hundreds of effects. Ezrgb’s light show designer takes this further by letting you upload a photo of your home, drag and drop decorations, and sync them to music without writing a single line of code.
Pro Tip: Label every prop and its corresponding controller port with a physical tag during installation. When you troubleshoot a flickering arch at 9 PM in december, you will not want to trace cables in the dark.
How do you install and synchronize your holiday lights?
Installation follows a fixed sequence. Skipping steps or reordering them creates problems that are hard to diagnose later. Work through each stage in order.
-
Mount your props and route your cables. Attach all physical props to your home before connecting any electronics. Route pixel cables along eaves, gutters, or conduit to protect them from weather and foot traffic.
-
Connect pixel strings to controller outputs. Match each string’s data input to the correct controller port. Double-check that pixel number one on each string connects to the port end, not the far end.
-
Power on and test each output individually. Use your controller’s test mode to confirm every pixel lights up before loading a sequence. This isolates hardware faults from software issues.
-
Load your sequence file onto the show player. Transfer your
.fseqfile to the Raspberry Pi or dedicated show player. Confirm the file plays back correctly in a test run before scheduling it for public display. -
Synchronize audio. Connect your FM transmitter and verify the broadcast frequency is clear in your area. Run a full sequence playback with audio to confirm timing alignment between lights and music.
-
Schedule your show. Use the Scheduler function in your show player software to set start and stop times. Automated scheduling means your display runs consistently without manual intervention each night.
Pro Tip: Insert a null pixel at the start of any fixture with a long data cable run. Null pixels boost the data signal and prevent the reliability issues that appear as random flickering or dropped frames in long runs.
How do you maintain and troubleshoot your display?
A reliable display requires active power management, not just a one-time setup. Setting software current limits based on your power supply specifications prevents overloading and reduces the risk of blown fuses or dangerous voltage sags. Most controllers let you cap the maximum current draw per output. Use that feature.
Common problems and their fixes:
-
Dim or color-shifted pixels at the end of a run: Add a power injection point at the midpoint of the string. This is almost always a voltage drop issue, not a defective pixel.
-
Reversed animations on a prop: Check pixel numbering. Pixel one is likely at the wrong end of the prop.
-
Random flickering or dropped frames: Insert a null pixel at the start of the affected fixture to boost the data signal.
-
Show player not triggering at the scheduled time: Verify the system clock on your Raspberry Pi is synced. A drifted clock causes scheduling failures.
Outdoor electrical setups carry real safety risks. Use only weatherproof connectors and enclosures rated for outdoor use. Never leave extension cords lying in standing water. Inspect all connections at the start of each season before powering on.
For seasonal preparation, update your controller firmware and sequencing software before october. Manufacturers release fixes for known bugs between seasons. Running outdated firmware is the easiest problem to prevent and one of the most common causes of unexplained failures. Ezrgb’s product care and repair resources walk you through seasonal maintenance checks specific to pixel hardware.
What I have learned from building animated holiday displays
The single biggest lesson I took from my first few seasons is that planning time pays back triple during installation. Homeowners who spend an extra weekend in the virtual layout stage almost never have to remount props or rewire controller outputs. The ones who skip it almost always do.
The second lesson is about scale. Start smaller than you think you need to. A well-executed display with 2,500 pixels and clean pixel mapping looks dramatically better than a chaotic display with 10,000 pixels and no coherent choreography. Viewers respond to fluid, intentional effects. They do not count pixels.
I have also seen homeowners underestimate how much the audio component changes the experience. A synchronized FM broadcast turns a light show into an event. Neighbors park in front of your house. Kids ask their parents to drive by again. That reaction does not happen with lights alone.
My honest advice: commit to the planning phase, choose 12V hardware from the start, and add complexity one season at a time. Your second-year display will be dramatically better than your first, and your third will be better still. The learning curve is real, but it is not steep if you build on a solid foundation.
— Rob
Ezrgb makes your first animated light show achievable
Building a pixel light show from scratch takes time, but you do not have to figure out every piece alone. Ezrgb is built specifically for homeowners who want impressive results without spending weeks on technical setup.
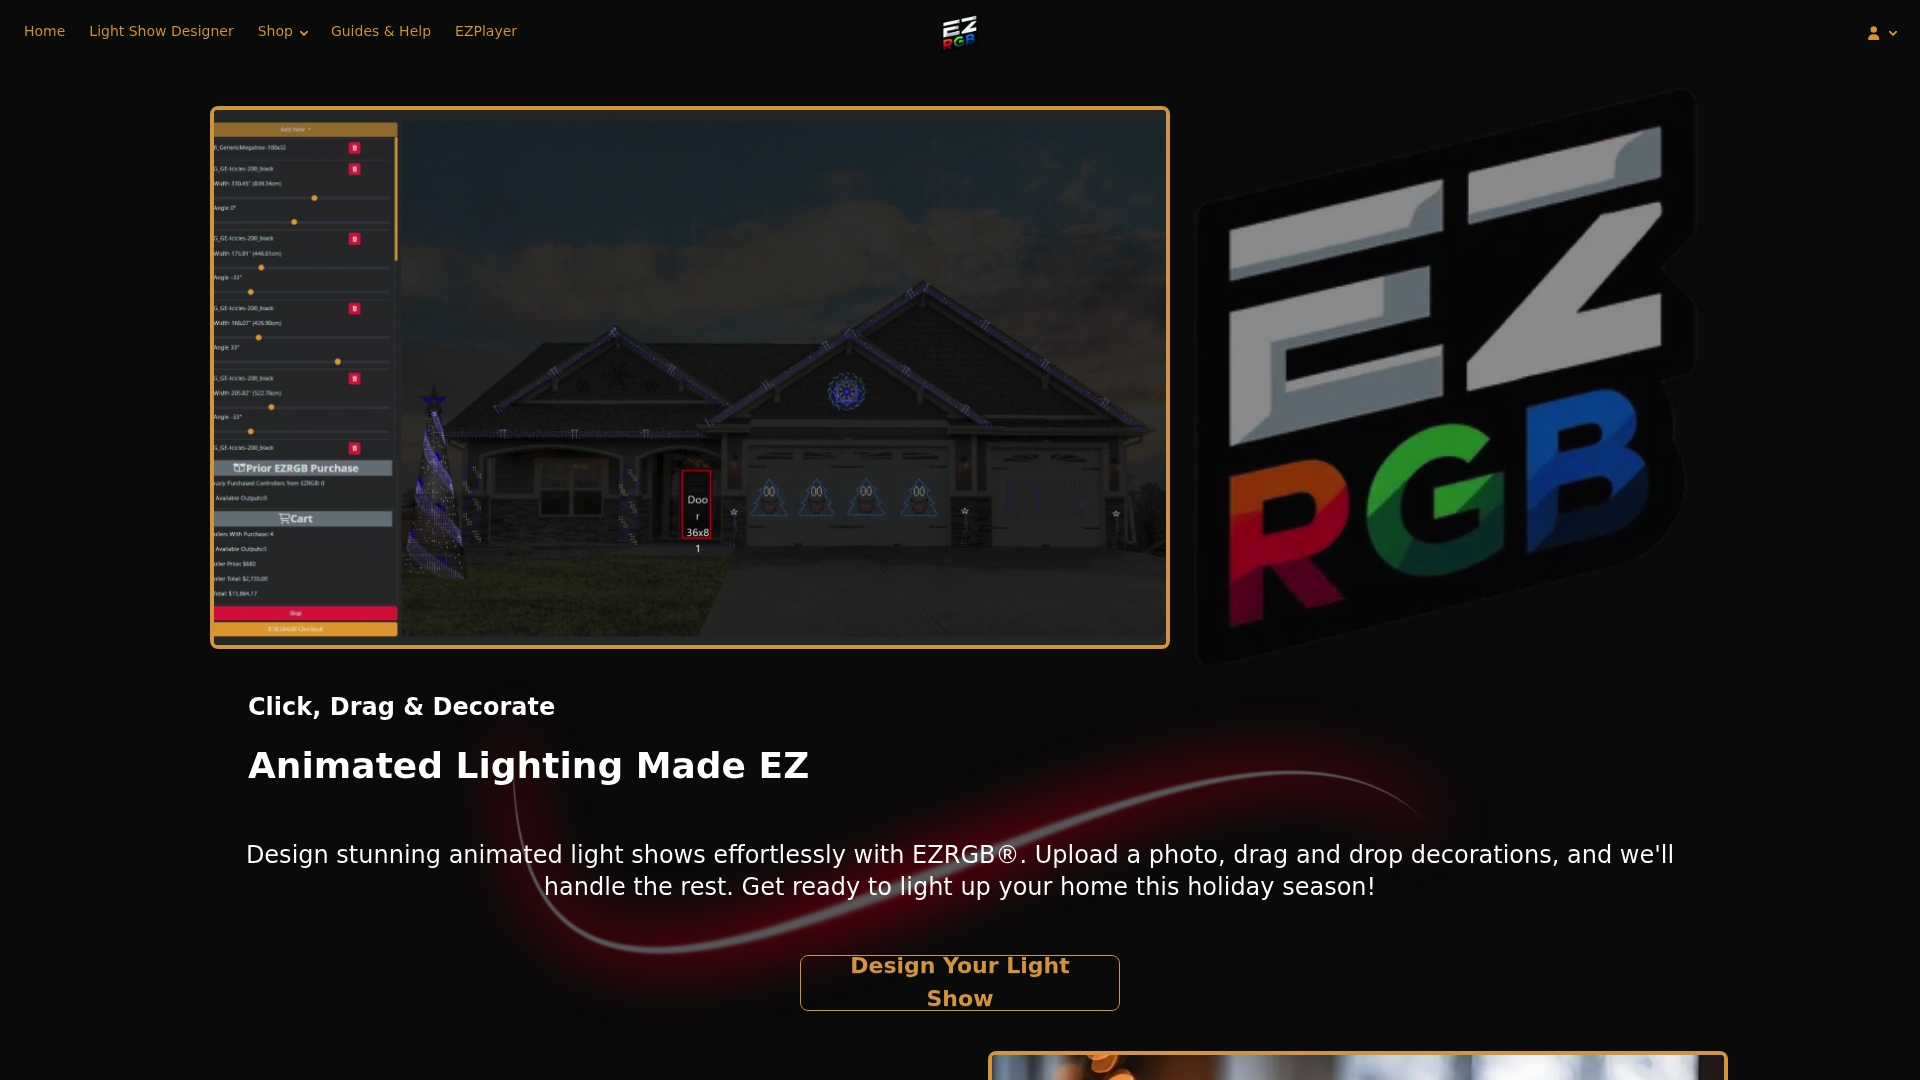
The Ezrgb light show designer lets you upload a photo of your home, drag and drop pixel props, and sync everything to your chosen music track. No coding, no manual pixel mapping, no guesswork on channel counts. Ezrgb ships plug-and-play kits with preinstalled pixel props so your hardware arrives ready to connect. Browse the full range of holiday light show kits and find the setup that fits your home and your budget.
Key takeaways
A successful animated holiday display setup at home requires the right hardware, careful pixel mapping, and methodical installation in that exact order.
| Point | Details |
|---|---|
| Start with the right components | A beginner setup needs one controller, around 2,500 pixels, simple props, a show player, and an FM transmitter. |
| Choose 12V over 5V | Twelve-volt systems reduce voltage drop and maintain color accuracy across long pixel runs. |
| Map before you mount | Build your virtual layout in sequencing software and verify pixel numbering before physical installation. |
| Use software current limits | Set maximum current draw per controller output to prevent blown fuses and voltage sags. |
| Scale gradually | A clean, well-mapped small display outperforms a large, poorly choreographed one every time. |
FAQ
What is an animated holiday display?
An animated holiday display is a synchronized system of individually addressable RGB pixel lights controlled by a central controller and sequencing software to produce choreographed lighting effects, often set to music.
How many pixels do I need for a beginner setup?
A standard beginner configuration uses around 2,500 RGB pixels. That quantity is enough to cover window outlines, rooflines, and simple props on a typical residential home.
Do I need coding skills to build a pixel light show?
No coding skills are required. Tools like the Ezrgb light show designer use a drag-and-drop interface, and sequencing software like xLights provides a visual layout editor that does not require programming knowledge.
What causes flickering or dim pixels in a display?
Flickering usually points to a data signal issue, which a null pixel at the start of the fixture can fix. Dim pixels at the end of a run indicate voltage drop, which mid-run power injection resolves.
How many controller channels does my home need?
Homes under 2,500 square feet typically need 32 channels. Larger homes benefit from up to 64 channels to give each display zone independent control.