
Homeowners: Upgrade to Animated Lights From Photo With EZRGB
Upgrading from traditional Christmas lights to an animated holiday display isn’t simply a matter of buying brighter or color-changing lights. An animated display uses individually controllable RGB pixels, a controller, sequences, and a show player that work together to create effects synchronized across your house and yard.
That may sound complicated at first, but beginners don’t have to build an entire system from individual components. A plug-and-play system can take much of the controller configuration, hardware selection, and wiring guesswork out of the process.
With EZRGB, for example, you can start by designing the display on a photo of your own house. Choose the props and lighting you want, see the system and pricing develop as you design, and start with a manageable display that can be expanded later.
Regardless of the system you choose, test your equipment before installing it. Connect your controller and a section of pixels on the ground, make sure everything responds correctly, and become familiar with how the system works. It’s much easier to solve a problem at ground level than after the lights are installed along the roof.
And, of course, treat outdoor electrical safety seriously. Use properly rated equipment, weather-resistant connections, GFCI-protected circuits where required, and follow the electrical requirements provided by the equipment manufacturer.
TL;DR:
Animated holiday displays typically use individually addressable RGB pixels rather than ordinary color-changing Christmas lights.
Pixels need a compatible controller to tell each light what color and brightness to display.
A sequence contains the instructions that create the movement and synchronization you see during a show.
A show player such as EZPlayer, FPP, or xSchedule plays the finished sequences according to your playlist and schedule.
Plan your display before purchasing equipment and test everything before installing it.
Systems such as EZRGB can simplify the process by helping beginners design the display and providing compatible hardware that is prepared to work together.
What Lighting Types Actually Support Animation?
Not every color-changing Christmas light is a pixel.
Many traditional RGB products can change colors or run a selection of built-in patterns, but the entire strand—or sections of the strand—may operate together. That’s very different from the lighting used in a fully sequenced holiday display.
What Is an RGB Pixel?
An addressable RGB pixel contains red, green, and blue LEDs along with electronics that allow a controller to communicate with the individual pixel.
Instead of telling an entire strand to “turn blue,” a pixel controller can send instructions to individual lights.
For example, a sequence could tell:
Pixel 1 to turn red.
Pixel 2 to turn green.
Pixel 3 to turn blue.
Pixel 4 to remain off.
A fraction of a second later, all four can receive completely different instructions.
Multiply that by hundreds or thousands of pixels and you can create chases, waves, spirals, wipes, twinkles, text, images, and effects that move across multiple parts of a house.
That’s the basic technology behind the animated Christmas displays you see synchronized to music.
What Should You Look for When Buying Pixels?
You may see terms such as WS2811 when shopping for holiday pixels. This identifies technology used by the pixels and is important because the pixels and controller need to be compatible.
However, beginners don’t necessarily need to become experts on pixel chipsets before building their first display.
There are several practical things that matter when choosing pixels:
-
Voltage: Pixels and their power source need to use the correct voltage. 5V and 12V pixels are both common in animated lighting.
-
Connector type: Connectors need to match the controller, extensions, and other equipment in your system.
-
Pixel spacing: The distance between pixels affects installation and determines how many pixels are needed for a particular prop.
-
Outdoor construction: Pixels, connectors, controllers, and other equipment used outdoors should be designed and installed for that environment.
-
Controller compatibility: Your controller needs to support the type of pixels you’re using.
This is one area where buying a complete system can make getting started easier. Rather than purchasing pixels, controllers, extensions, and connectors separately and hoping everything works together, an EZRGB system is designed around compatible components.
What Are the Core Components of an Animated Light System?
It helps to think about an animated holiday display as several pieces working together.
1. The Pixels
Pixels are the actual lights you see on the house and props. Each one can be individually controlled, allowing effects to move through a strand instead of the entire strand simply turning on and off.
2. The Controller
The controller is the connection between your show data and your pixels. It receives lighting information and sends the appropriate data to the pixels connected to its outputs.
A controller can operate multiple sections of a display, depending on its capabilities and how the system is designed.
3. Power and Connections
Pixels require power, and larger displays may require careful planning for power distribution.
The controller, power supplies, extensions, connectors, pixel count, and distance between components all need to be considered when designing a system.
Beginners don’t have to calculate all of this from scratch when using a properly designed plug-and-play system. With EZRGB, the hardware requirements are determined as part of building the display in the Designer, helping remove much of the guesswork involved in selecting compatible components.
4. The Sequence
The sequence is essentially the choreography for your lights.
It contains the instructions that determine what the pixels should do throughout a song: which props illuminate, what colors appear, where effects move, and how those effects correspond with the music.
This is different from the controller. The controller doesn’t decide what looks good during the song—it follows the lighting data it receives.
EZRGB’s EZSequence system can take a professionally programmed sequence and map it to your particular xLights layout. You can review the suggested mappings and make corrections in the Layout Editor before EZRGB renders the sequence for your display.
5. The Show Player
Finally, something needs to play the completed show.
Players such as EZPlayer, FPP, and xSchedule can play rendered sequences and their accompanying audio. The show player is also where playlists and schedules can be managed.
EZPlayer brings this part of the process into the EZRGB ecosystem, allowing your sequences and show management to work together without requiring you to manually handle every step.
Once you understand these pieces—pixels, controller, power, sequence, and player—an animated light display becomes much easier to understand. Each part has a specific job, and when they’re properly configured, they work together as one system.
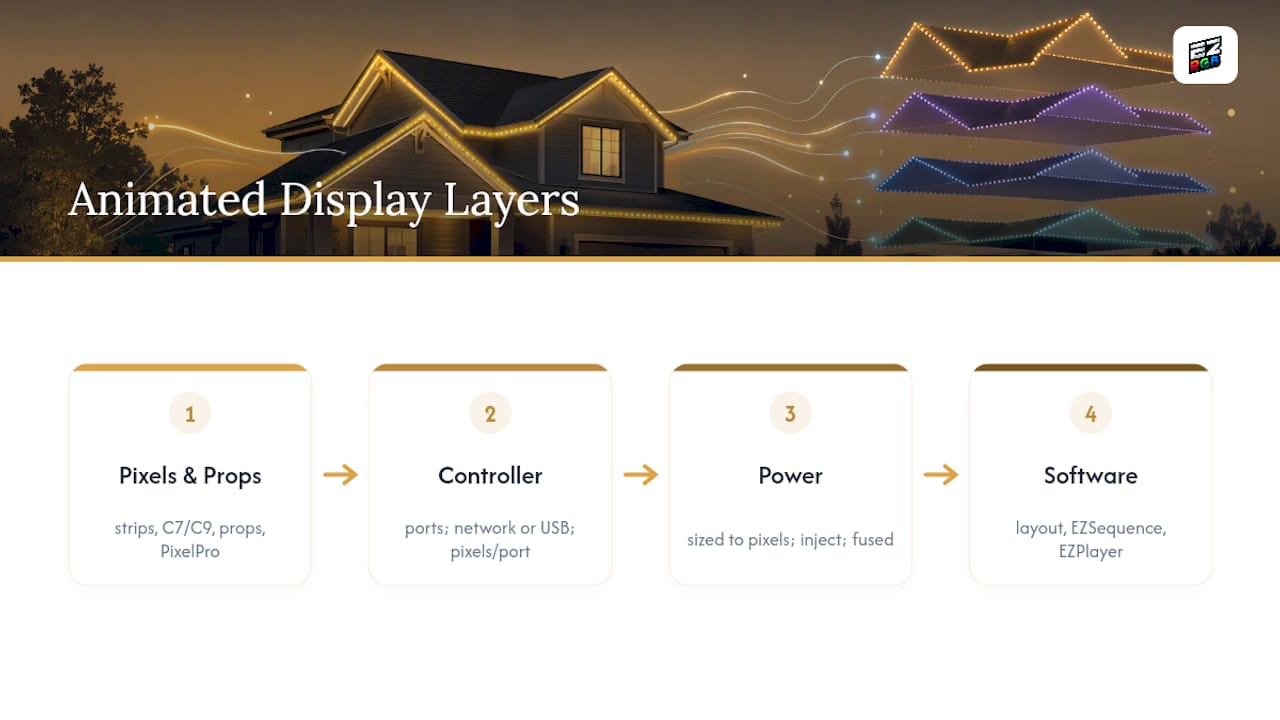
Pixels and Props
Addressable pixels come in many forms. Some are installed along rooflines and windows, while others are mounted into purpose-built props such as arches, snowflakes, singing characters, mini trees, and mega trees. Matrices arrange pixels into a grid that can display larger effects, patterns, text, and even simple images.
For a beginner, it’s important to understand that the prop and the pixels aren’t necessarily the same thing. A coro snowflake, for example, provides the physical shape while the pixels installed in it create the light and animation.
You can build these props yourself or purchase them with the pixels already installed. EZRGB takes the latter approach with its complete systems: the selected props arrive with their pixels installed and are designed to connect to the controller and extensions provided with the system.
Controllers
The controller takes the lighting data from your show and sends it to the pixels. Different controllers support different numbers of outputs, pixel counts, network protocols, and other features.
When comparing controllers, look beyond the number of ports. Consider how many pixels the controller can support, what type of pixels it works with, how it connects to your network, and whether it provides enough room for your display to grow.
The term plug-and-play can also mean different things depending on the manufacturer. A preconfigured controller can certainly make installation easier, but a complete plug-and-play system goes further.
With an EZRGB system, the controller, pixels, extensions, props, and configuration are designed to work together. The goal is to remove as much wiring, configuration, and component-matching guesswork as possible so a beginner can concentrate on installing and enjoying the display.
Power and Data
Power is an important part of any pixel display, but beginners don’t necessarily need to become electrical engineers to get started.
As a pixel run becomes longer or the distance between the controller and lights increases, both power and data need to be considered. Depending on the design, a system may use additional power distribution, shorter runs, data boosters, or other methods to maintain reliable operation.
This is another advantage of planning the complete system before purchasing individual components. When you’re assembling everything yourself, you’re responsible for calculating power requirements, choosing wire sizes, protecting circuits, determining appropriate distances, and making sure the components work together.
A properly designed plug-and-play system handles much of that planning before the equipment reaches your house.
Software
Software is what turns all of this hardware into an actual holiday light show.
With EZRGB, there are several tools that handle different parts of the process.
The EZRGB Designer helps you plan the physical display. Upload a photo of your house, scale it using a known measurement, and place compatible props and lighting directly onto the image. As the design develops, you can see what equipment is needed and what the system will cost.
EZSequence handles a different job. It doesn’t automatically create a new sequence from scratch. Instead, it takes a professionally programmed sequence and maps it to your particular xLights layout. EZRGB suggests where the sequence’s effects should go, and you can review and correct those suggestions with the Layout Editor before the sequence is rendered.
The finished sequence can then be played with EZPlayer, FPP, xSchedule, or another compatible player.
EZPlayer brings playback, playlists, scheduling, sequence management, and other show controls together in one place. For someone using the complete EZRGB ecosystem, this creates a path from designing the display to purchasing sequences and ultimately playing the finished show.
How Do You Upgrade to Animated Lights Step by Step?
You don’t have to convert your entire house to pixels in one weekend. For most beginners, starting with a manageable section of the display makes the process easier to understand and gives you room to expand later.
1. Plan the Display
Start with a clear photo of your house and decide which areas you want to animate.
A roofline, small mega tree, several arches, or a group of yard props can make an excellent first display. You can always add more in future seasons.
With the EZRGB Designer, you can do this planning virtually. Place props on your house photo and experiment with different layouts before purchasing and physically installing everything.
2. Test Before Installing
Whether you’ve built the system yourself or purchased a plug-and-play package, connect and test your equipment before permanent installation.
Make sure the controller powers up correctly, the pixels respond, the expected colors appear, and the props operate as intended.
This simple step can save considerable time later. Troubleshooting a connection while everything is sitting in front of you is much easier than troubleshooting the same connection after a prop is mounted on the roof.
3. Install the Display
Once you’ve confirmed that everything works, begin installing your props and lighting.
Use mounting methods appropriate for the surface and equipment, protect electrical connections from the weather, and follow the manufacturer’s installation requirements. Outdoor electrical equipment should be connected to properly protected circuits, and any electrical work beyond your experience should be handled by a qualified electrician.
Take your time with cable routing as well. A neat installation isn’t only about appearance—it can make troubleshooting and future expansion considerably easier.
4. Add Your Sequences
Once the physical display is installed, it’s time to give the lights something to do.
If you’re using EZSequence with an existing xLights layout, upload the required layout and network information to EZRGB. The system analyzes your display and suggests mappings between the professionally programmed sequence and your props.
Review those suggestions in the Layout Editor. If EZRGB has matched something differently than you want, you can correct the mapping before rendering.
EZRGB then renders the sequence for your particular display and provides the finished .fseq and matching audio needed by your show player.
5. Build and Schedule Your Show
Load your completed sequences into your preferred player and create a playlist.
With EZPlayer, your EZRGB sequences can be incorporated into your show without requiring you to manually manage every file. You can build playlists, schedule when the display runs, and monitor your show from the player.
Before opening night, watch the entire display from the same location your audience will use. Check that every prop is operating correctly, the audio and lighting remain synchronized, and the overall brightness is comfortable.
Beginner Tip: Test everything on the ground first. Ten minutes of testing before installation can save a trip back up the ladder later.
Why Do Animated Lights Fail, and How Do You Troubleshoot Them?
Even a well-designed animated display can occasionally have a problem. Fortunately, the way pixels operate can provide clues about where to start looking.
The Entire Prop Is Dark
Start with the basics. Check that the controller is operating, the output is configured correctly, the connection is secure, and the prop is receiving power and data.
Also check the direction of the pixel string. Addressable pixels have an input and an output, and data must enter from the correct end.
The Colors Are Wrong
If the sequence calls for red but the pixels display another color, the problem may simply be the configured color order.
Different pixels can use different RGB channel orders. This can usually be corrected in the controller configuration without physically changing the pixels.
Pixels Change Color or Behave Strangely Farther Down a Run
Unexpected colors, flickering, or unreliable operation farther along a run can indicate a power or data problem.
The solution depends on the system. It might involve power distribution, shortening a run, improving a connection, or using equipment designed to strengthen the data signal over longer distances.
Don’t immediately assume every long run requires power injection. Diagnose whether you’re dealing with a power problem, data problem, connection problem, or configuration problem first.
Everything After One Pixel Stops Working
Pixel data travels from one pixel to the next. Because of this, a failed pixel can sometimes prevent the pixels after it from receiving valid data.
If part of a prop works normally and everything after one particular point remains dark or behaves incorrectly, inspect the pixels and connections around that transition.
Troubleshoot One Section at a Time
The best troubleshooting method is usually the simplest: reduce the problem.
Instead of changing multiple controller settings and connections at once, test one controller output, one extension, or one prop at a time. Once that section works correctly, move to the next.
Animated holiday lighting becomes much less intimidating when you treat the display as a collection of smaller systems rather than one enormous system. And when you’re using a complete plug-and-play setup, many of the compatibility and configuration decisions have already been made before installation begins.
How Does EZRGB Simplify Layout and Design?
Matching your animation to the actual shape of your house is the single biggest factor in whether a display looks convincing or looks off. Academic research on synchronized lighting confirms this directly: displays read as more convincing when the virtual layout closely matches physical fixture placement, according to Drexel University’s research on synchronized lighting between real and virtual spaces. A sequence built for a generic rectangle roofline will visibly drift out of sync the moment it hits your actual gable ends and dormers.
EZRGB’s layout designer solves this by starting with your own house. You upload a photo, then place props directly on top of it, aligning them to your real roofline, windows, and trees rather than guessing at coordinates. That alignment step is what separates a display that looks intentional from one that looks like the animation is fighting the architecture.
A few design habits make a real difference once your layout is mapped:
-
Pick focal points before filling in everything else. One well-animated tree or one clean roofline chase reads better than five mediocre effects competing for attention.
-
Balance motion across the display. If every prop chases at the same speed, the eye can’t rest anywhere; stagger timing so some elements hold steady while others move.
-
Match color temperatures across zones. Warm white icicles next to cool white pixels look mismatched even when each section looks fine on its own.
-
Limit total on-time. Beyond the safety case for turning displays off overnight, shorter run windows also reduce wear on connectors and supplies.
Once the layout is mapped, EZSequence generates a sequence built to fit those exact boundaries rather than a generic template, and EZPlayer handles scheduling so the display turns on, runs its playlist, and shuts off without you touching a switch.
Pro Tip: Mark your layout boundaries the same way you’d label wiring, meaning where each fixture logically starts and ends. Reproducing those exact boundaries in the layout designer is what keeps a sequence from playing a section in the wrong direction once it’s mounted outside.
When Should You Call an Electrician Instead of DIYing It?
Staged upgrades make sense for almost every homeowner, not because full installs are impossible, but because power limits, roof access, and daylight hours all work against doing everything in one push. Adding one animated focal point this year and expanding next season spreads out both cost and risk.
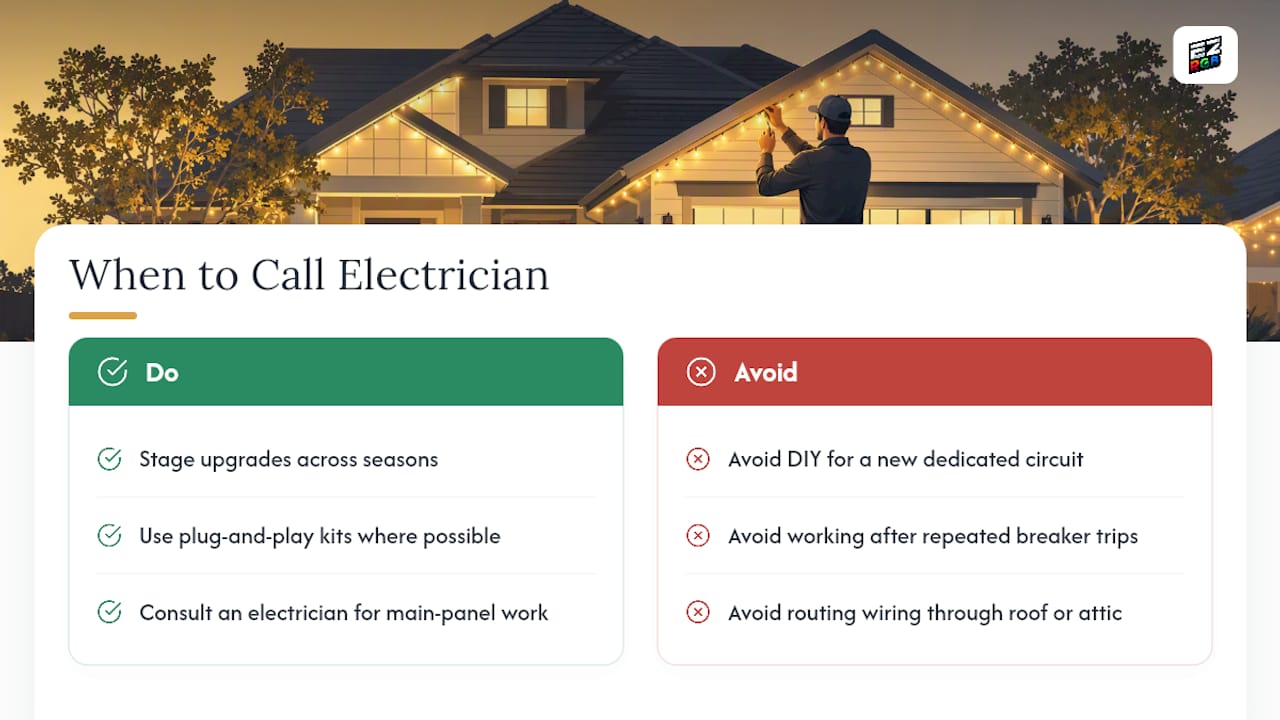
Some situations call for a licensed electrician rather than a weekend project. If your upgrade requires a new dedicated circuit, if a breaker trips repeatedly under normal load, or if you’re routing wiring through a roof penetration or attic space, that’s outside DIY territory regardless of experience level.
Plug-and-play kits lower the technical bar considerably, since pre-flashed controllers and pre-wired props remove most of the wiring guesswork that trips up first-timers. They don’t remove the need for sound electrical judgment on anything involving your home’s main panel.
— EZRGB Team
Start Your Animated Upgrade With EZRGB
You can use a photo-based layout designer to create a working, music-synced display without needing to learn wiring diagrams first. The plug-and-play kits arrive with preinstalled pixel props, a pre-configured controller, and the hardware needed to get one section running the same weekend it shows up.
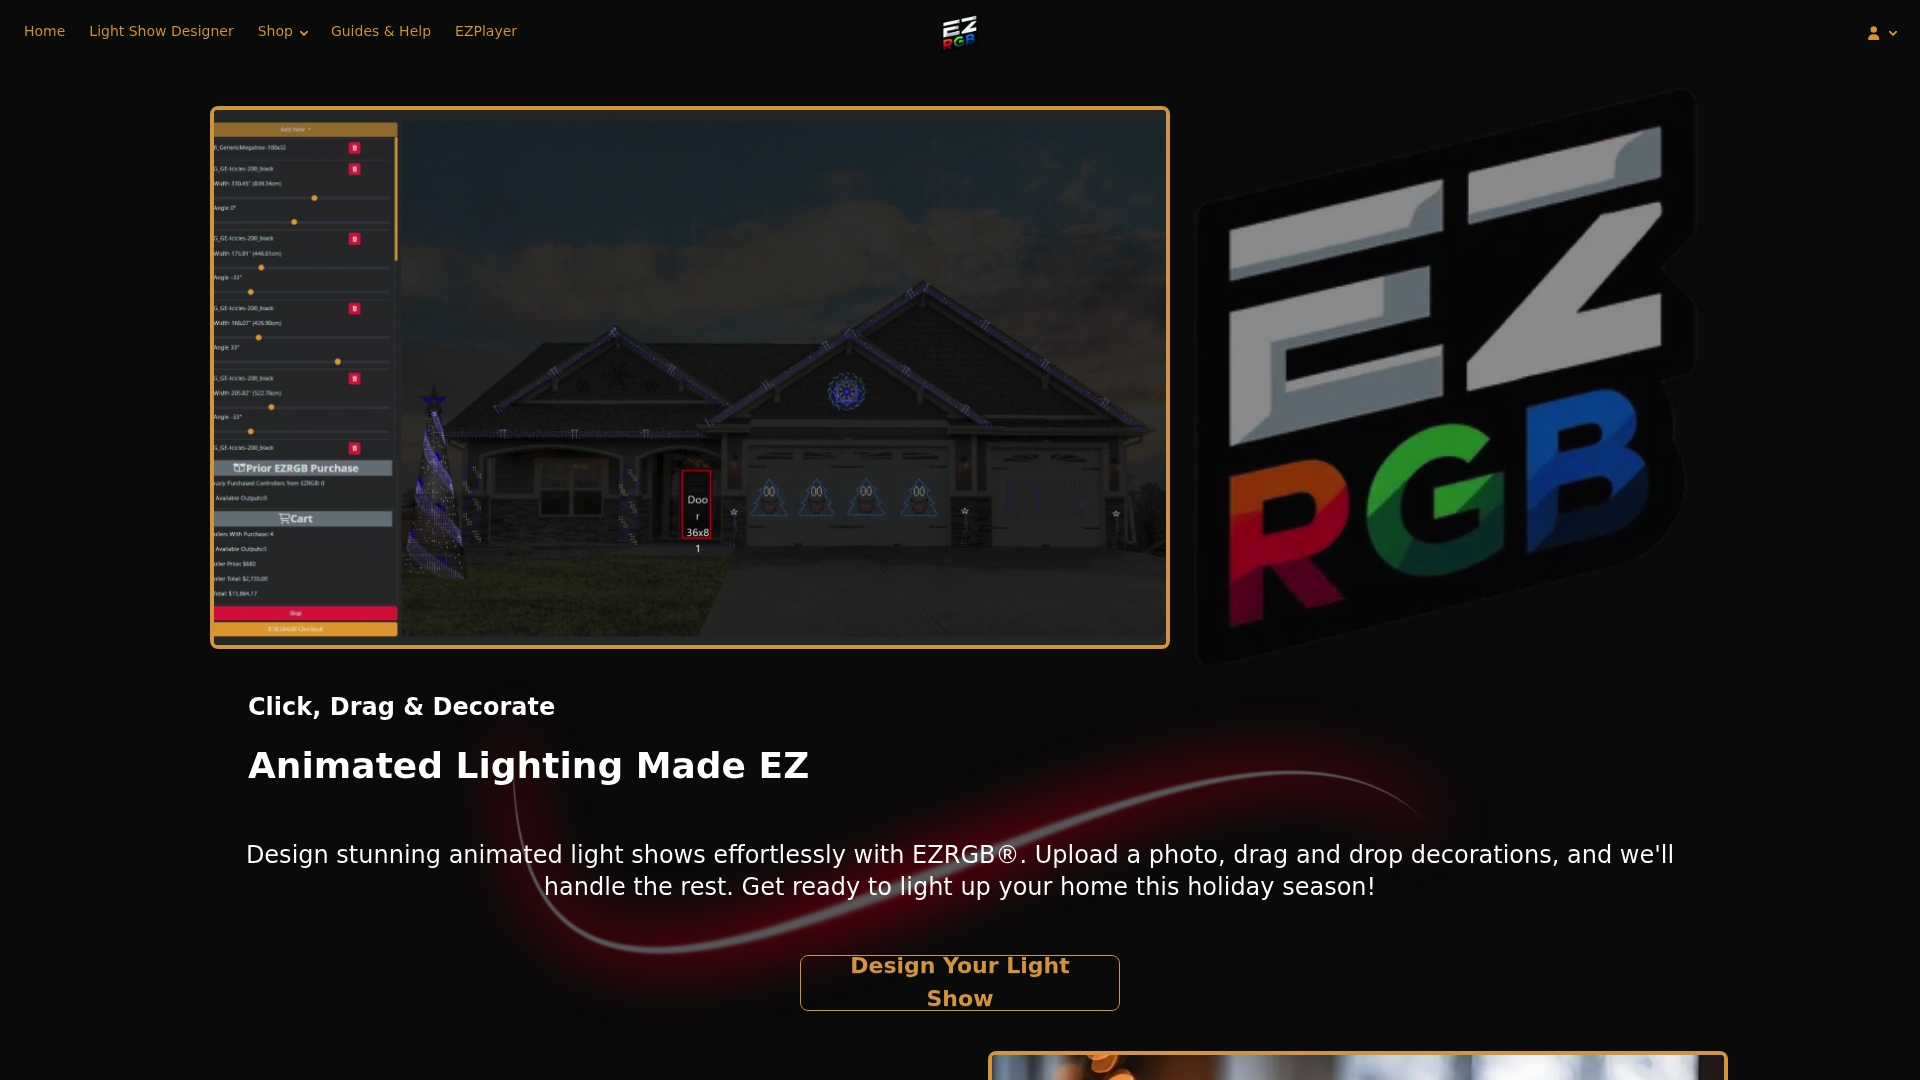
The workflow described throughout this guide (photograph, map, bench-test, expand) is built directly into the EZRGB platform. Upload your house photo into the layout designer, drop in props from the plug-and-play props catalog for individual focal points like a tree or wreath, and let EZSequence generate a sequence matched to your exact boundaries. From there, EZPlayer handles scheduling, so you can sync a purchased track from the RGB Sequences library, swap songs, or adjust show times without touching a single wire again. Browse the full catalog at EZRGB to see which kit fits your first focal area.
Sources
The safety and technical claims in this guide draw from a small set of authoritative sources worth bookmarking if you’re planning an install. The CPSC’s holiday decorating safety release covers GFCI use, cord inspection, and outdoor-rated equipment. The Department of Energy’s explainer on holiday lights breaks down LED energy savings and why power planning still matters. For the technical side of addressable pixels and buffer direction, WPILib’s addressable LED documentation is the clearest plain reference available.
-
Put safety at the top of your list when decorating this holiday season | CPSC
-
Synchronized lighting between real and virtual spaces — Drexel University
FAQ
How Do You Upgrade Your Lighting to Animated Displays?
Replace conventional strings with individually addressable pixels, add a compatible controller, and use sequencing software to design movement rather than static color. EZRGB’s layout designer, EZSequence, and EZPlayer cover this entire path from photo to scheduled playback.
Can I Turn Regular Lights Into Smart, Animated Lights?
Not directly. Standard RGB strings change color as one unit and lack the addressable chips needed for per-pixel movement, so you’ll need to add true pixel hardware like WS2811 strings rather than reprogram what you already own.
What Is the Best Type of Lighting for Animation?
Individually addressable pixel lighting, most commonly built on WS2811 chipsets, is the standard for real animation because each LED receives its own instruction from the controller. Conventional LED or incandescent strings can only shift color as a whole strand, not animate pixel by pixel.
How Do You Create a Lighting Animation Sequence?
Map your props to a layout that mirrors your house’s real dimensions, then generate a sequence built for those exact boundaries rather than a generic template. EZSequence automates this by producing a matched sequence directly from your EZRGB layout, which you then schedule and run through EZPlayer.
Are LED Animated Lights Safer Than Incandescent Strings?
LED strands use roughly 70% less energy than incandescent strands and run cooler, but that efficiency doesn’t replace proper wiring and circuit planning. Outdoor installs still need GFCI protection, outdoor-rated gear, and regular cord inspection regardless of which lighting type you choose.