
How Prop Placement Shapes Your Animated Light Display
Prop placement determines what viewers see first, how motion reads, and whether your animated lighting looks designed or accidental. The position of each piece controls focal point, perceived scale, depth, and motion readability — and those four factors decide whether a display stops traffic or blends into the neighborhood.
The core rules that change everything:
-
Anchor first. Choose your tallest, most prominent animated piece and place it before anything else.
-
Use three planes. Front plane at a moderate distance from the sidewalk, middle plane mid-lawn, and back plane near the house create depth.
-
Leave breathing room. Keep at least one figure-width of open lawn on both sides of animated pieces.
Pro Tip: Before you stake a single prop, stand at the curb and look at your yard. That sightline is your design canvas — place your anchor from there, not from your front door.
Key Takeaways
Prop placement controls focal point, depth, motion readability, and color hierarchy — and those four factors determine whether an animated display reads as designed or cluttered from the street.
| Point | Details |
|---|---|
| Anchor placement first | Place your tallest animated prop closest to the street before positioning anything else. |
| Three-plane depth | Distribute props across front (6–10 ft), middle, and back planes to create a readable scene. |
| Spacing around motion | Leave one figure-width of open space on both sides of animated pieces; never place two side by side. |
| Roofline rhythm | Use C9 bulbs at 12–15 inch spacing for rooflines viewed from the street. |
| EZRGB workflow | Use the layout designer to preview placement, EZSequence to generate timing, and EZPlayer to schedule and sync your show. |
Table of Contents
-
How to use EZRGB tools to test placement before you stake anything
-
Area-by-area placement rules for every part of your property
-
What the EZRGB Team has learned about placement and animated lighting
How Does Prop Placement Change What Viewers Actually See?
Where you place your props has a big impact on how an animated light show looks from the street. Good placement isn’t simply about filling empty areas of the yard. It’s about giving your sequence a collection of shapes and areas that can work together.
Think of your house and yard as one large canvas.
A mega tree might become the main focal point, while rooflines define the shape of the house. Arches, snowflakes, singing characters, and other yard props give effects additional places to travel. When these elements are positioned thoughtfully, a sequence can move naturally across the entire property.
Start With a Focal Point
Most displays benefit from having one area that naturally attracts attention. This could be a mega tree, a large matrix, singing characters, or even the house itself.
It doesn’t necessarily have to be the tallest prop or the prop closest to the street. What matters is that it makes sense visually with the rest of the display.
From there, use smaller elements to support that focal point rather than compete with it.
Think About How Effects Can Travel
One of the biggest differences between static Christmas lights and an animated pixel display is that effects don’t have to stay on one prop.
A sequence might sweep from the left side of the roofline across the house and finish on a mega tree. A color wave might move through several arches. A beat in the music might cause every prop in the display to flash at once.
Prop placement can make those movements feel natural.
For example, placing several arches evenly across the front yard creates a continuous area for effects to travel through. Scattering those same arches randomly around the property may make the same effect harder to follow.
Use Different Heights and Shapes
Not everything needs to be at the same height.
Combining rooflines, windows, yard props, trees, and other elements gives the sequence multiple levels to work with. Effects can move horizontally across the yard, vertically up a tree, or from the ground all the way to the roof.
This variety can make even a relatively small display feel much larger.
Keep Important Props Visible
Before permanently installing a prop, look at your display from where your audience will actually watch it.
Trees, bushes, parked vehicles, porch columns, fences, and even other props can block pixels from view. A prop that looks perfectly positioned while you’re standing beside it may be partially hidden when viewed from the street.
This is especially important for singing faces, matrices, and other props that display recognizable images or movements.
Don’t Feel Like You Have to Fill Every Space
Empty space isn’t necessarily a problem.
Packing too many props into one area can make individual effects harder to distinguish. Giving major elements some breathing room allows viewers to see what the sequence is doing.
A well-designed display with ten thoughtfully positioned props can often be more enjoyable to watch than a yard packed with props simply because there was room for them.
Simple Placement Rules for a Beginner Display
You don’t need professional design training to create a layout that works well. Start with a few practical guidelines:
-
Choose your main feature first. Decide whether the house, mega tree, matrix, or another large prop will be the visual centerpiece.
-
Create logical groups. Several arches, windows, snowflakes, or similar props positioned together give sequencing effects somewhere natural to travel.
-
Use multiple heights. Combine ground-level props with elements on the house to create more visual variety.
-
Keep sightlines clear. Check important props from the street before making their locations permanent.
-
Maintain reasonable spacing. Give recognizable props enough room that viewers can distinguish one from another.
-
Think left to right. Many sequence effects travel across groups of similar props, so their physical order should make sense when viewed from the audience’s perspective.
-
Design for your viewing location. A display primarily watched from cars across the street may need larger, easier-to-see elements than one viewed from a nearby sidewalk.
One of the easiest ways to check these decisions is to step back—or even take a photo from the normal viewing location—and look at the display as a whole rather than one prop at a time.
Why Placement Matters Even More in an Animated Display
In a traditional Christmas display, each decoration can work mostly on its own. Animated RGB lighting is different because multiple props can become part of the same effect.
The sequence may treat five arches as one group, use the entire roofline as another, or send an effect across multiple areas of the house.
That means the physical layout and the digital layout work together.
This is also why tools such as the EZRGB Designer can be helpful before purchasing and installing a display. You can place compatible props on a photo of your own house and get a better idea of how the overall layout will look before deciding where everything belongs.
Later, when you’re using EZSequence, your actual xLights layout helps determine how a professionally created sequence is mapped to your display. If the suggested mapping doesn’t make sense for the way your props are arranged, the EZRGB Layout Editor allows you to review and correct those mappings before the sequence is rendered.
EZSequence doesn’t decide where your physical props should go or automatically create the effects. Instead, it helps take an existing sequence and adapt it to the layout you’ve built.
That’s why it’s worth spending a little extra time on prop placement in the beginning. You’re not just decorating the yard—you’re creating the canvas that every sequence in your show will use.
How to use EZRGB tools to test placement before you stake anything
Trial-and-error in the yard costs time and leaves holes in the ground. The smarter approach: test sightlines and three-plane spacing in the EZRGB layout designer before you touch a stake.
-
Photograph your house from the curb at the distance most viewers will stand.
-
Upload the photo into the EZRGB layout designer at Ezrgb.
-
Place your anchor prop first in the designer, closest to the street.
-
Add props across the three planes — front, mid, back — using drag-and-drop.
-
Preview from curb distance in the app to check balance, spacing, and motion readability.
-
Purchase your show, we will start building and get you your dream show fast.
-
Buy Sequences and Schedule playback with EZPlayer, which handles cloud scheduling, song syncing, and sequence updates without starting over each year.
The EZRGB guides and help hub covers each step with product-specific documentation.
Area-by-area placement rules for every part of your property
Different zones have different viewing distances and different challenges. Here’s what works in each.
Roofline. Follow the architecture — don’t fight it. Use C9 spacing (12–15 inches) for rooflines viewed from the street. Keep color temperature consistent between roofline and yard props so the display reads as one scene. The Roofline Special kit is built around this spacing logic.
Trees and trunks. Wrap trunks uniformly for rhythm. Match wrap technique across similar trees — inconsistent wrapping reads as unfinished. Pick a wrap spacing that matches the tree’s scale; a large oak needs wider spacing than a young ornamental.
Windows and porches. Avoid blocking sightlines to your anchor. Place secondary motion props toward the midplane, not in front of windows that compete with yard props for attention.
Walkways and photo points. Plan a clear path so visitors can stop for photos without stepping into the viewing axis. A walk-through element works best at the midplane, not the front plane where it blocks the anchor.
Installation and visibility checks before show night
A well-placed display that falls over or goes dark on opening night loses everything. Run this checklist before your first show.
-
Mounting and stakes. Use ground stakes rated for your soil type. For hardscape, use weighted bases or wall brackets. Check all stakes after the first rain or wind event.
-
Wiring and power. Use outdoor-rated extension cords and map your controller runs during install. Label each run so troubleshooting takes minutes, not an hour.
-
Visibility check. Stand at curb distance and squint. Balance, harmony, and vertical rhythm create a stable, designed display — the squint test reveals whether left-right and top-bottom visual weight is even. If one side looks heavier, shift a midplane prop.
-
Safety. Secure spinning or moving parts so wind can’t send them into branches or fencing. Keep animated props clear of overhead obstructions.
Statistic to keep in mind: Professional installation crews measure and map spacing before a single clip goes up. Inconsistent spacing reads as clutter even with premium materials — the planning step is what separates a polished display from an expensive one.
Fast fixes for the most common placement mistakes
Most display problems come down to three issues: crowding, mismatched scale, and competing motion. Each has a straightforward fix.
| Problem | Fix |
|---|---|
| Crowded motion | Spread animated pieces across planes; no two adjacent |
| Top-heavy display | Add ground-level lighting or a low front-plane prop |
| Competing cycles | Separate fast-cycling props by at least two figure-widths |
| Scale mismatch | Move oversized props to the back plane; bring smaller ones forward |
Pro Tip: Run your display in white-only mode for one night. If the composition looks balanced and motion reads clearly, your placement is solid. If it looks cluttered or flat, adjust props before adding color sequences.
EZRGB makes placement planning faster and more accurate
Placement planning used to mean stakes, guesswork, and a yard full of holes. EZRGB compresses that process into minutes with the layout designer, EZSequence, and EZPlayer working together.
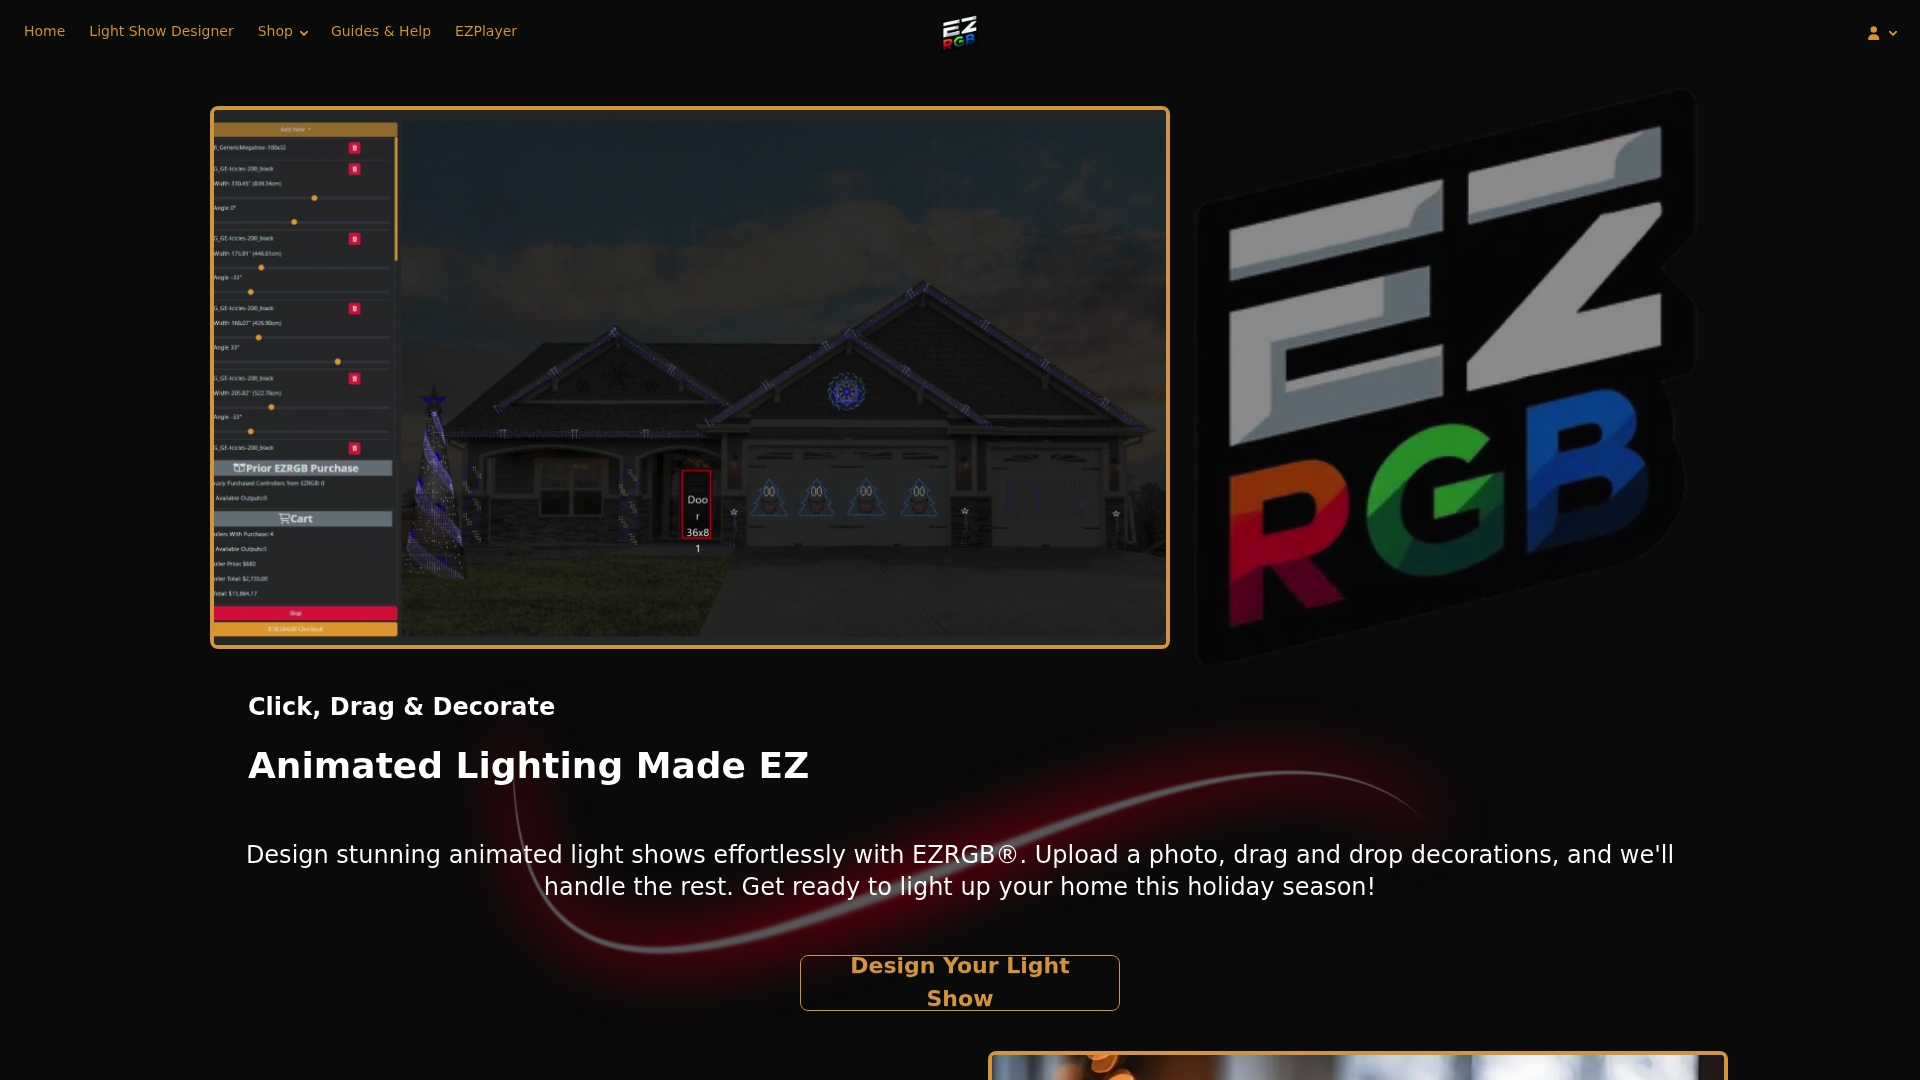
Upload a photo of your home, drag props into position across your three planes, and preview the result from curb distance before you buy a single piece. EZSequence auto-generates a timing sequence matched to your layout, so the choreography reflects your actual prop positions. EZPlayer then handles cloud scheduling, song syncing, and year-over-year updates — no rebuilding from scratch each season.
Kits like the Christmas Light Show Kit 1 and the Roofline Special give you plug-and-play starting points sized for real yards, with visual previews on each product page so you can match scale to your space before ordering. For roofline-specific builds, the Roofline Special is designed around the 6 inch C9 spacing standard.
Start with the EZRGB layout designer, place your anchor, build your planes, and export your sequence. Your display will be planned, previewed, and ready to install.
What the EZRGB Team has learned about placement and animated lighting
Animated lighting changes the rules of holiday decorating in ways that static displays don’t prepare you for. Motion needs space, contrast, and a clear viewing axis — and those requirements push you toward better composition decisions even when you don’t realize it. The homeowners who get the best results aren’t necessarily the ones with the most props. They’re the ones who placed an anchor first, left room around their animated pieces, and tested from the curb before finalizing anything.
The EZRGB layout designer exists because we saw how much time decorators spent repositioning props after installation. Previewing placement on a photo of your actual house, with your actual props, removes most of that iteration. User photos and demo previews consistently show the same pattern: displays planned in the designer look more balanced on install day than displays planned in the yard. That’s not a coincidence — it’s what happens when you can see the full scene before you commit to it.
Sources
-
5 Lighting Design Rules for Elegant Holiday Displays | Oro Valley - Margie Mae’s Holiday Decor
-
How To Plan A Commercial Christmas Display – The Christmas Light Emporium
FAQ
How does prop placement affect animated display impact?
Placement controls focal point, depth, and motion readability. An animated prop placed against a dark backdrop with open foreground space reads clearly at 40+ feet; the same prop placed in front of a lit window or next to another animated piece can disappear entirely.
What is the correct spacing for animated props?
Leave at least one figure-width of open lawn on both sides of each animated piece, and never place two animated props directly adjacent — their motion cycles won’t align, which reads as visual noise from the street.
How far apart should roofline lights be spaced?
C9 bulbs at 6 inch spacing is the standard for rooflines viewed from the street. This spacing holds the roofline’s shape at typical viewing distances and produces consistent visual rhythm.
Can the EZRGB layout designer help with prop placement?
Yes. Upload a photo of your home, drag props into position across your three planes, and preview the result before ordering or staking anything. EZSequence then auto-generates timing matched to your layout, and EZPlayer handles scheduling and playback.