Your kit includes all the decorations you’ve selected for your home, each prop includes a 25′ EZ extension cord for easy setup. The kit also features pre-programmed controllers tailored to your light show, complete with a detailed connection guide to ensure everything works seamlessly.
It includes your decoration with all pixel lights installed
Our system automatically saves your layout, allowing you to easily return and add more decorations whenever you’d like. It also integrates seamlessly with the controllers you’ve previously purchased from EZRGB. If there are available ports on your current setup, the system will prioritize using them first and will reprogram your existing controller to accommodate the new additions to your show.
Yes, the system is updated with new features and models every few days.
No worries, when we makes changes to the system it redoes yours automatically.
With our system, you won’t receive sequence files directly. Instead, you’ll get a .fseq show player file that’s ready to upload and enjoy! If you notice anything unusual, you can try using “hints” in the description field of xLights. There are more details in the boxes below about using hints. Only use hints if there’s an issue, as they help us improve by learning from errors. For further help, reach out to our support team at support@ezrgb.com
If your looking to add your own effects, turn off effects, or import into the layout with other files such as add-on trees, moving heads, etc.
First, in xLights go to “File” click “New Sequence“

Select “Musical Sequence“
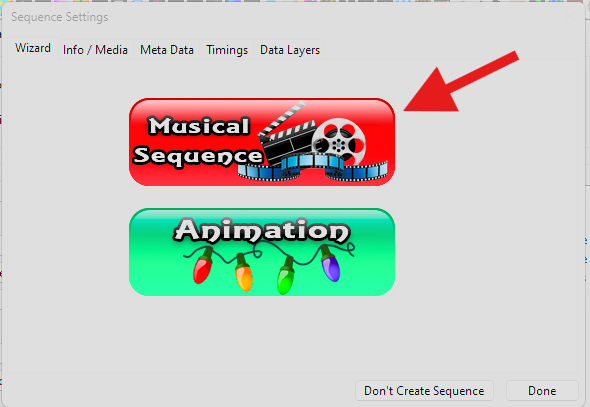
Select the Audio File

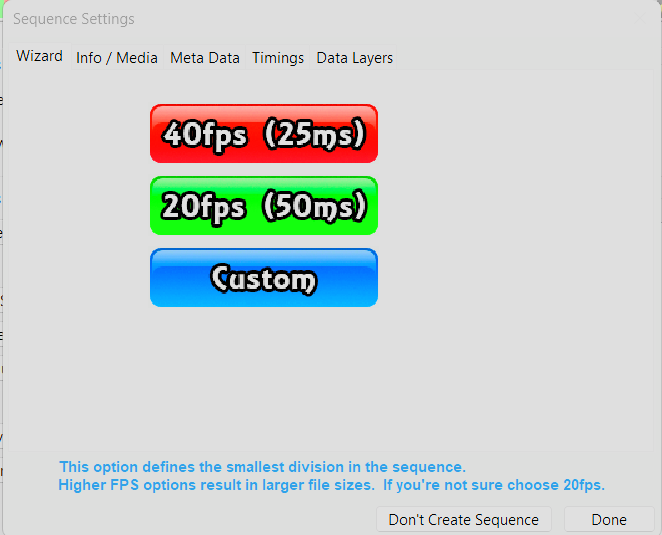
Select “Timing Choice”
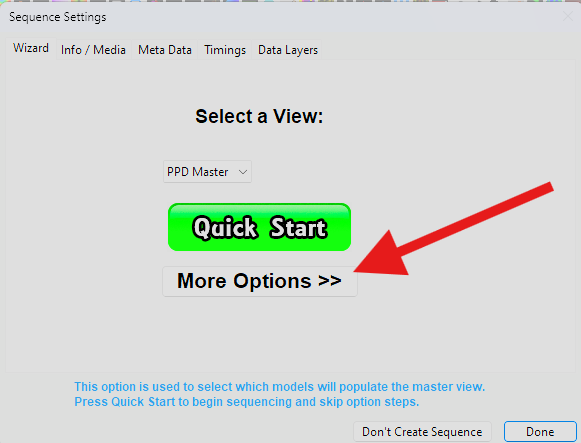
At Select a View, click “More Options“
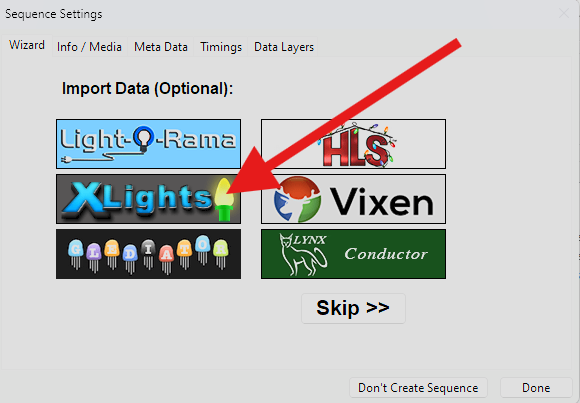
From Import Data choose “xLights“
Select the “Sequence”.fseq you downloaded from EZRGB

Click “Render”
Click “Save” Sequence

Now you won’t see the effects but you can add your own at this point or import a sequence in on top of this sequence.
Using Descriptions
All codes below are to be placed in the “Description” field of the xLights model. Having additional text in the description field, before, between, or after the codes, is fine. Codes can combined in many cases.
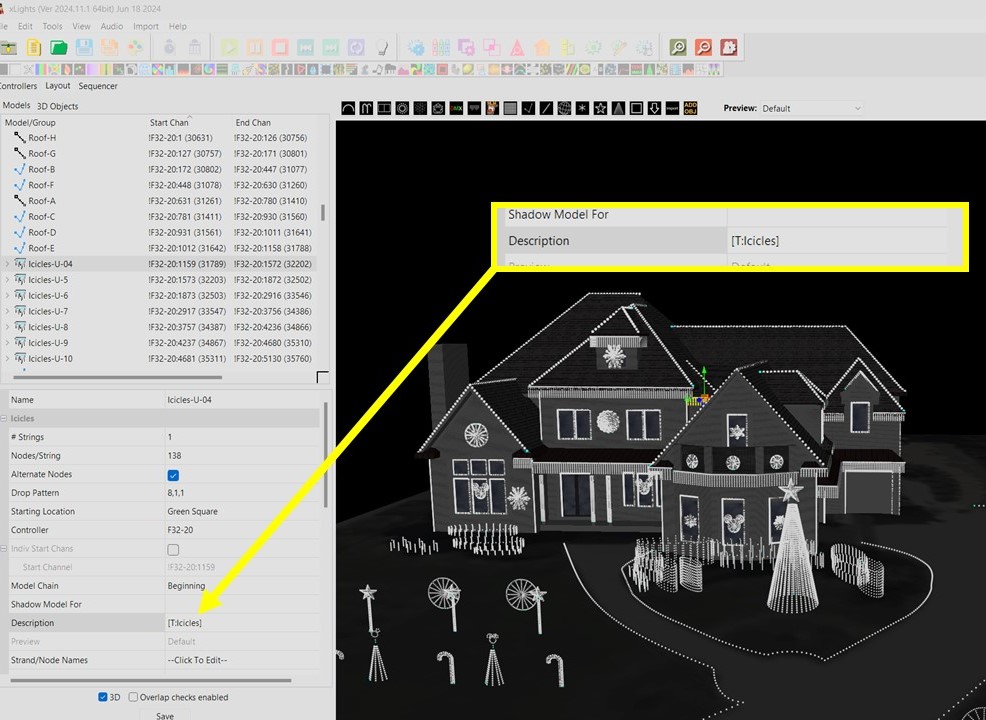
As the system grows smarter we hope to have it perfect as but sometimes the elves are sleeping. Follow the steps below and enter the given info in your “Description Field” in xLights.
Singing Face Roles
The system automatically assigns faces to singing roles in the sequence. This may not work out quite the way you want, if one of the faces deserves particular focus. This can be adjusted with the following tags:
[I:Primary] – Assign the lead singing role
[I:Secondary] – Assign the secondary singing role
[I:Backup] – Assign the backup singing role
[I:NoSing] – Do not use as a singing element
Overriding Stuff
Our elves do their best to get everything right, but sometimes they don’t. If the type of a model is not mapped correctly, here are some overrides “cheat codes” you can use to change the results, and help train the system for the future.
We want our system to be EZ, so we do not suggest using these codes unless you are having a problem. Use of codes is reviewed frequently to improve the system, and therefore the meaning and behavior of codes may change in the future.
[T:Arch] – Treat as an arch
[T:CandyCane] – Treat as a candy cane
[T:Cross] – Treat as a cross
[T:Cube] – Treat as a cube
[T:Flood] – Treat as flood lights. This is sometimes a good idea for light strings that serve better as floods, especially if there are not other floods in the layout.
[T:Icicles] – Treat as icicles
[T:Line] – Treat as a line
[T:Matrix] – Treat as a matrix. This also comes in variants for the matrix shape:
[T:Matrix_Horizontal] – A long, thin, horizontal matrix
[T:Matrix_Column] – A larger column matrix
[T:Matrix_Pole] – A smaller column matrix, such as a peace stake or pole
[T:Snowflake] – Treat as a snowflake
[T:Sphere] – Treat as a sphere
[T:Spinner] – Treat as a spinner
[T:Star] – Treat as a star
[T:TuneTo] – Treat as a “Tune To” sign. See additional instructions for the type of tune to sign.
[T:Tree] – Treat as a tree
[T:WindowFrame] – Treat as a window / door frame.
In the layout tab, get your display centered, and then right click to set the default viewpoint.
Enter “[T:WindowFrame]” in the description field of the prop that should be treated as a window.
Enter “[T:OnWhite]” in the description field of the prop that should be on white the entire time
Enter “[T:OnColor]” in the description field of the prop that should be on but complementing colors the entire time
Enter “[T:OnStatic]” in the description field of the prop that should be on with the user defined static from the model state.
Put “[I:Skip]” in the description field of the prop to be skipped.

 Companies such as Wally’s lights (https://wallyslights.com/collections/dmx-products) distribute a range of wands, bracelets, hats, and other wireless lighting products that can be synced to your light show. On the plus side, these are a fun giveaway for kids and give the audience something interesting, engaging, and, to some, mysterious, to play with. On the minus side, while some vendors (https://www.youtube.com/watch?v=ZlNSh7pii3U) provide sequenced effects for the wands, most do not.
EZSequence now provides support for these products.
Once you have your DMX RF wands or other similar lighting products working with xLights, simply add [T:DMX_Wands] to the description field of the model that controls the light color. If your wireless DMX controller also has a control signal (5-channel mode for the transmitter referenced above), place [T:DMX_WandsCtrl] in the model description field for the control channels.
Model Sizes
In some cases, the system may not detect the sizes of props such as trees or stars, which has a large impact in the role the props play in the sequence. For these cases, you can override the size:
[S:Mini] Set size to mini
[S:Mega] Set size to mega
[S:Default] Set size to default
Using “Tune To” Signs with EZRGB
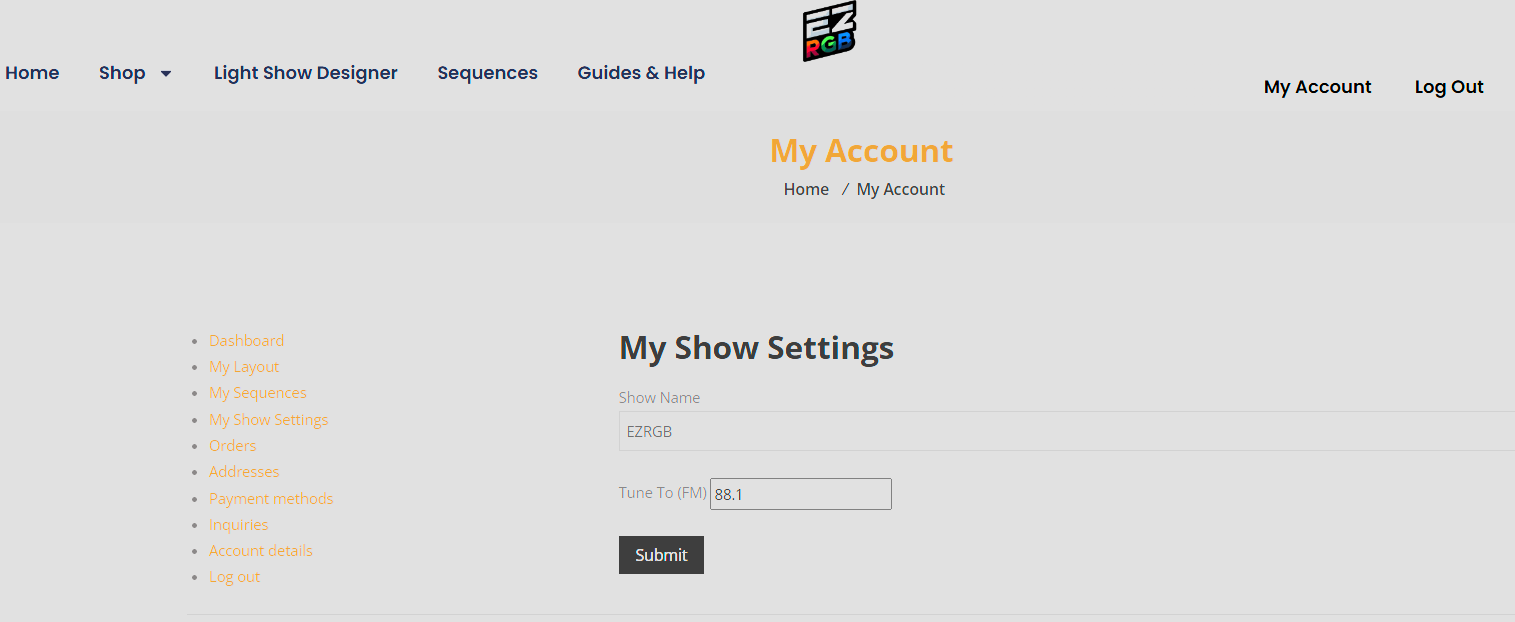
First Head over to the “My Account” then click on “My Show Settings” fill out the required fields and click submit.
Fixed “Tune To” Signs
“Tune To” signs that are fixed can only display one message. Most of these are custom made, with custom models, such as:

EZRGB may not recognize these as “Tune To” signs. They can be marked as “Tune To” signs by putting “[T:TuneTo]” in the xLights “Description” field for the model. Models marked this way will be lit up during the sequence, color-matched to the sequence.
ADVANCED: Adding More Color
If you want to use multiple colors on your fixed “Tune To” sign, you can do this with submodels. In addition to marking the sign with “[T:TuneTo]”, add submodels called “Color1”, “Color2”, “Color3”. These submodels will be assigned different colors from the sequence, as available.
Multi-Frequency “Tune To” Signs From The xLights Library
If you have purchased a “Tune To” sign from a coro vendor, it may be in the xLights library. Supported signs will adjust to your FM frequency. The following are supported in the library:
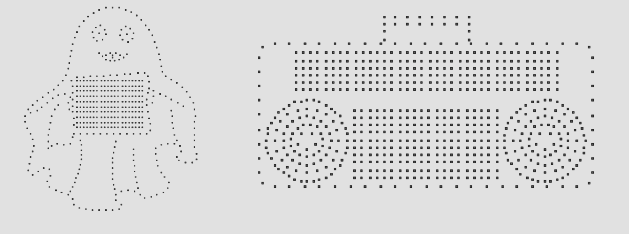
If your “Tune To” is not shown and is not rendering properly, the elves at EZRGB may notice and fix it for you. You can always reach out to support@ezrgb.com for help.
“Tune To” Matrix
This is still being implemented.
Non-EZRGB Options
If your “Tune To” sign is not in your layout (A/C, stand alone player, etc.) no need to do anything, of course.
If your “Tune To” sign is in your layout, and you do not want to use EZRGB to drive your “Tune To” sign, simply add “[I:Skip]” to the “Description” field in xLights. EZRGB will not put any effects on the model. You can then run a stand-alone player on the “Tune To” sign, or use an FPP or xSchedule background sequence.
It includes your decoration with all pixel lights installed
We are not your typical sequence store. Our patent pending system requires your files so, we can auto-map and render your show files.
The files can be found in your show directory folder. The easiest way to find it is to open xLights and see where you have been saving your show. The highlighted location below is where you will find the needed files.

xlights_rgbeffects.xml
xlights_networks.xml
This document will walk you step by step through the process of adding your downloaded FSEQ sequence files along with your music files to your xSchedule show player.
First, locate and retrieve your downloaded FSEQ file and the accompanying music file. Usually, they are located in your Downloads folder. Select both files and right-click and “copy” these files.
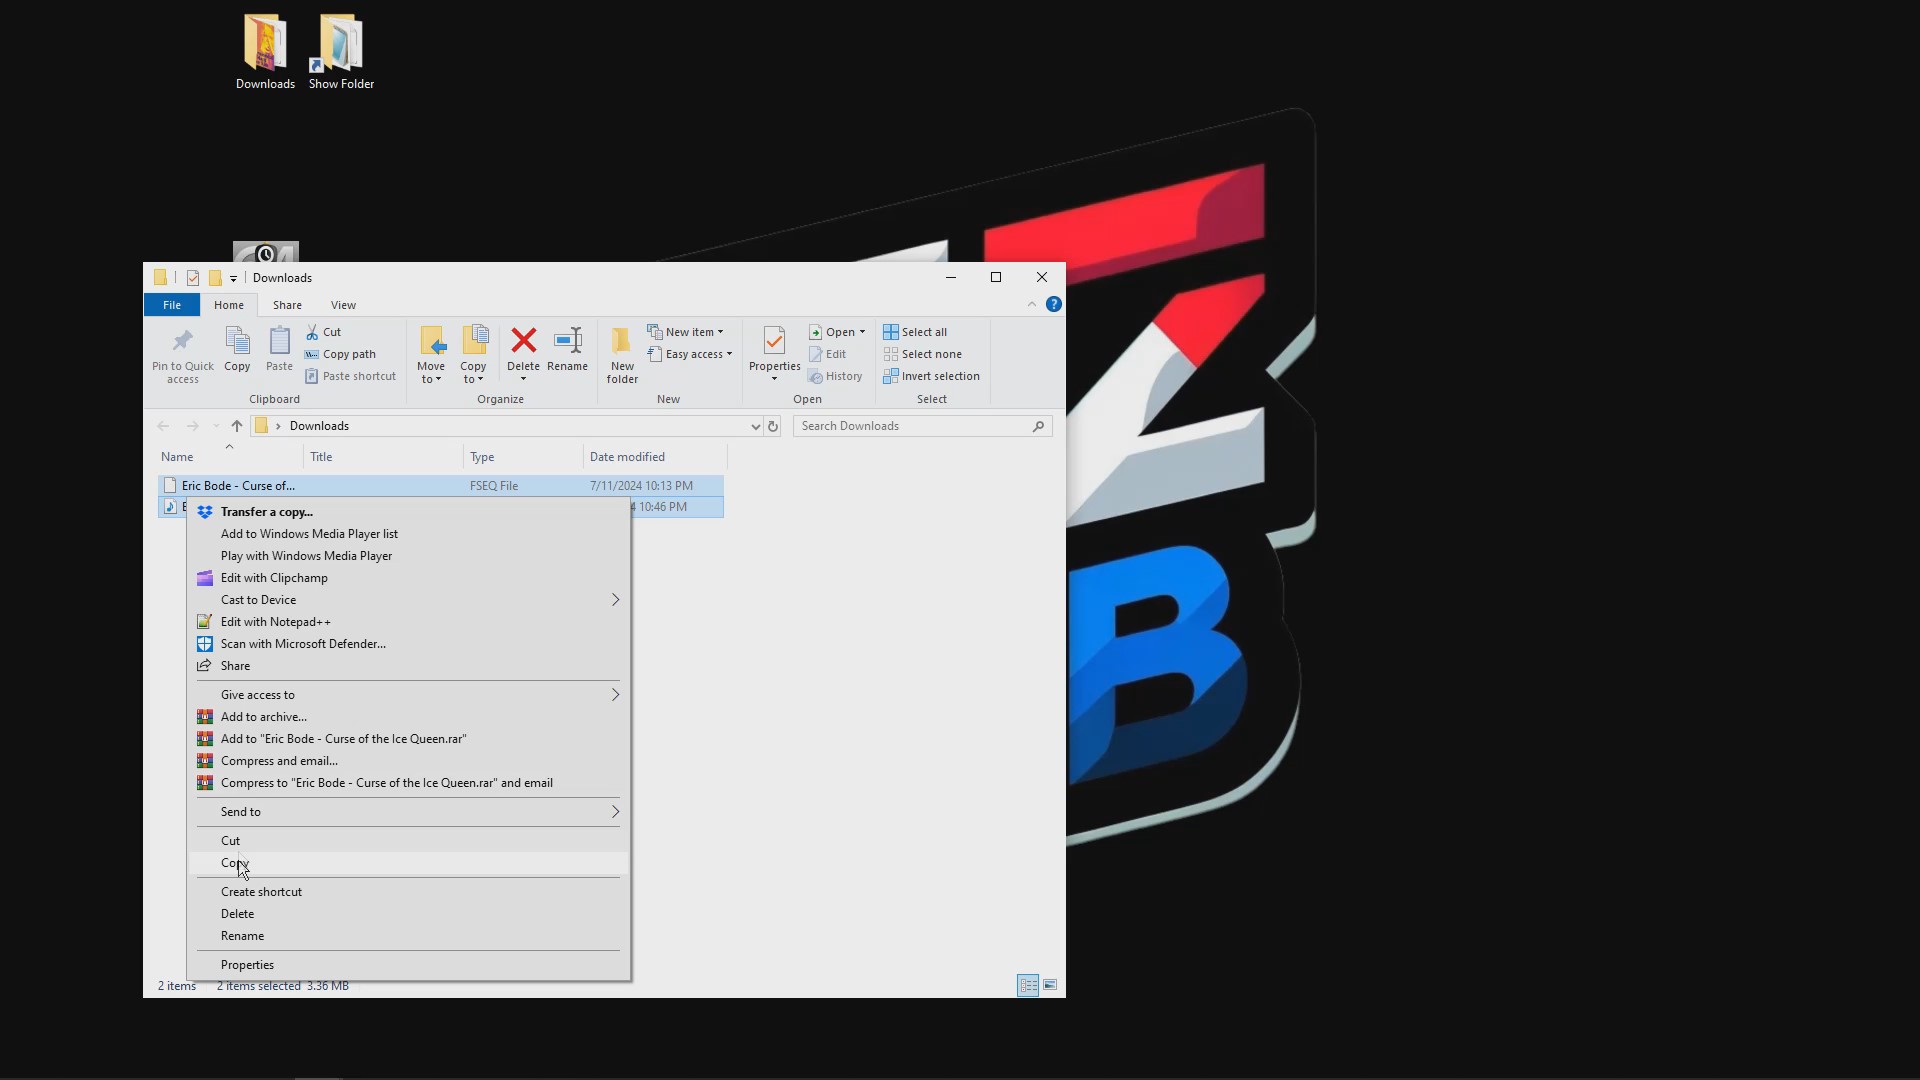
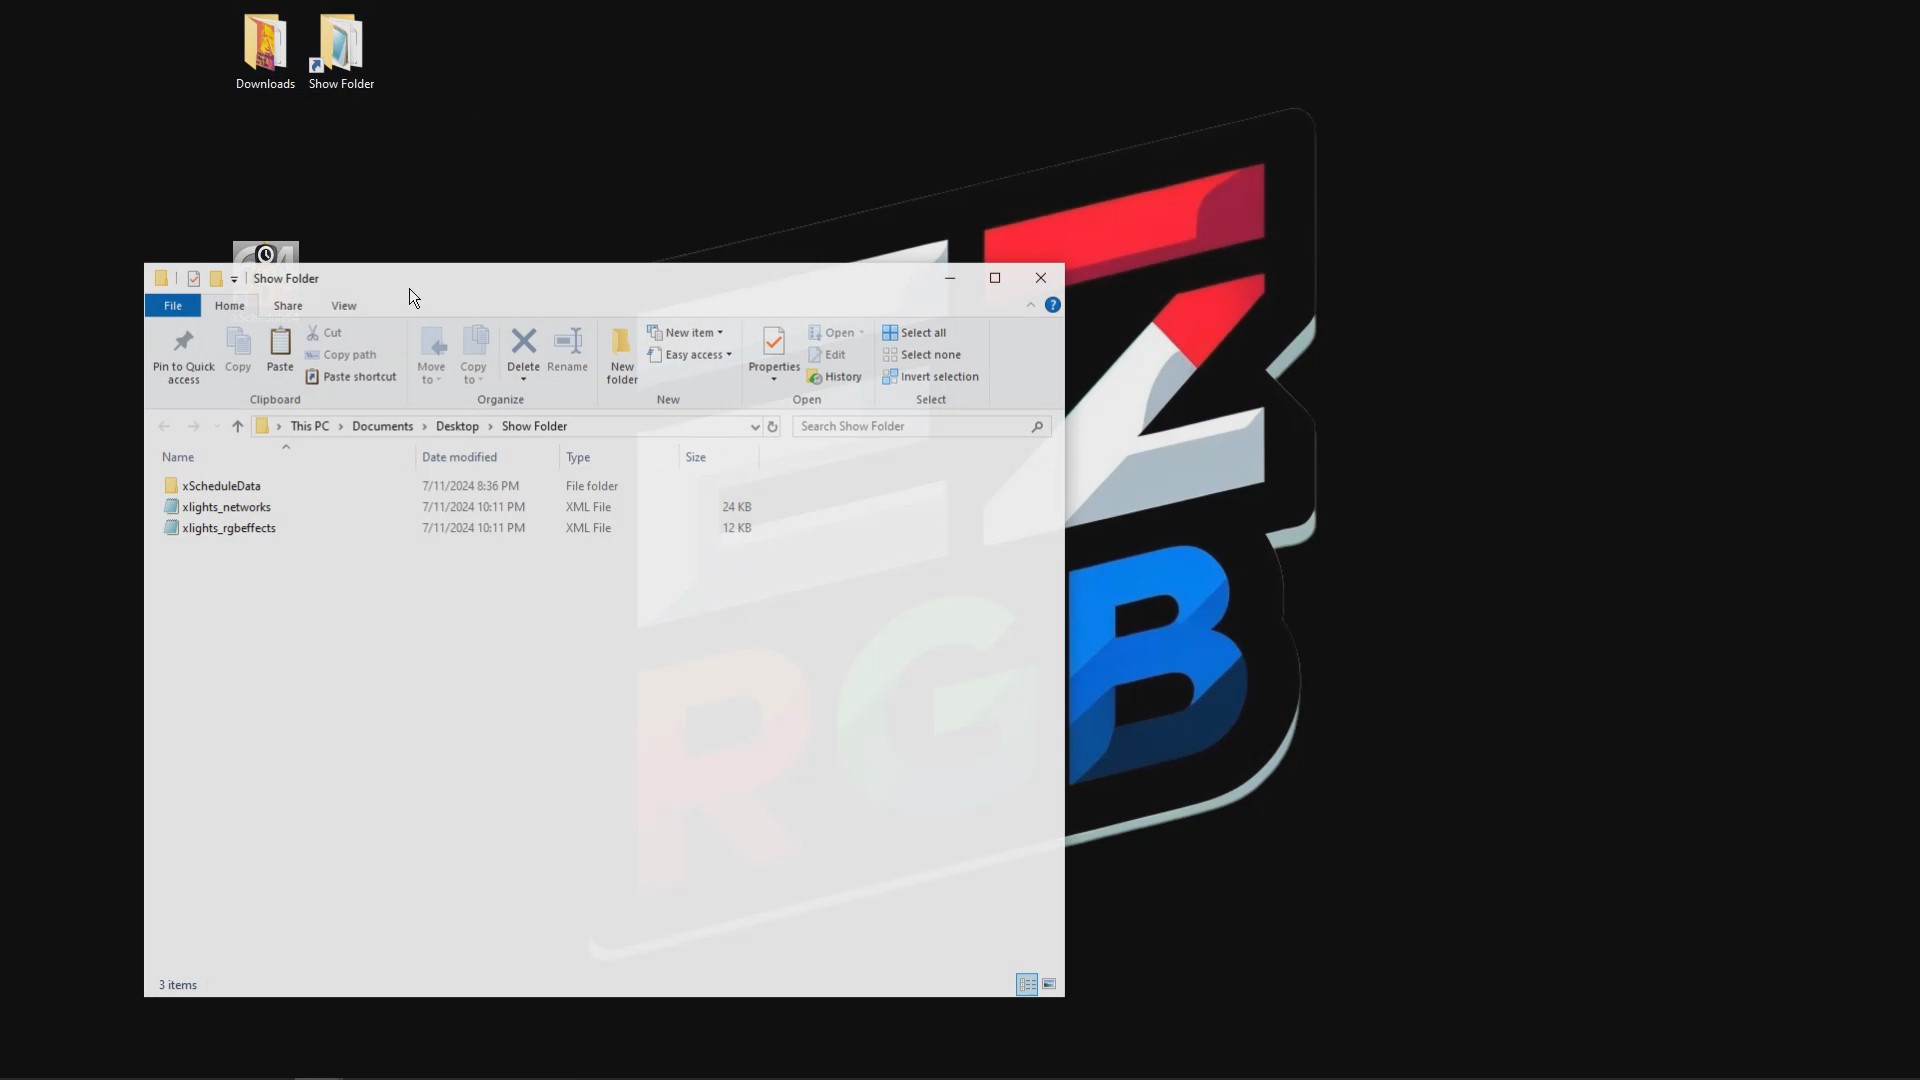
Next, open up your xLights show folder and place both of these files inside to get started.
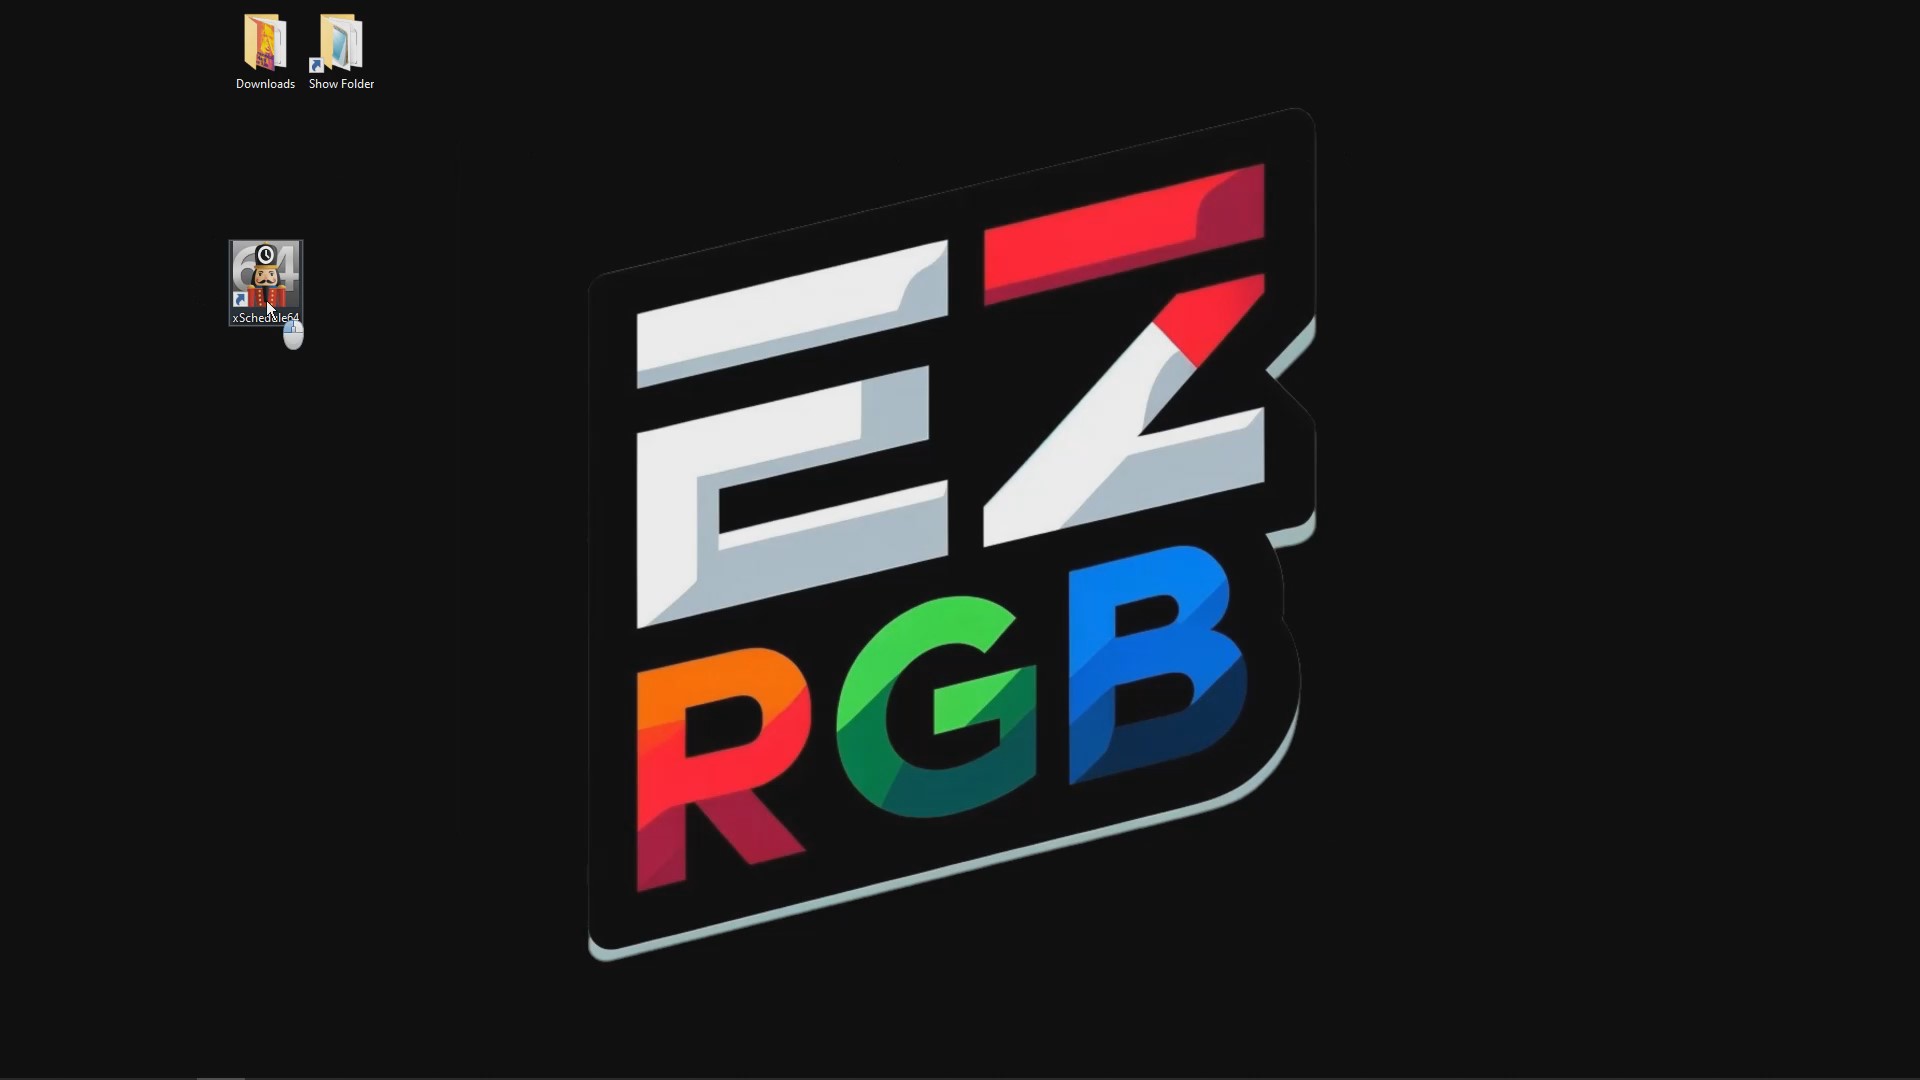
Next, open your xSchedule program.
Click the ADD button to create a new playlist.
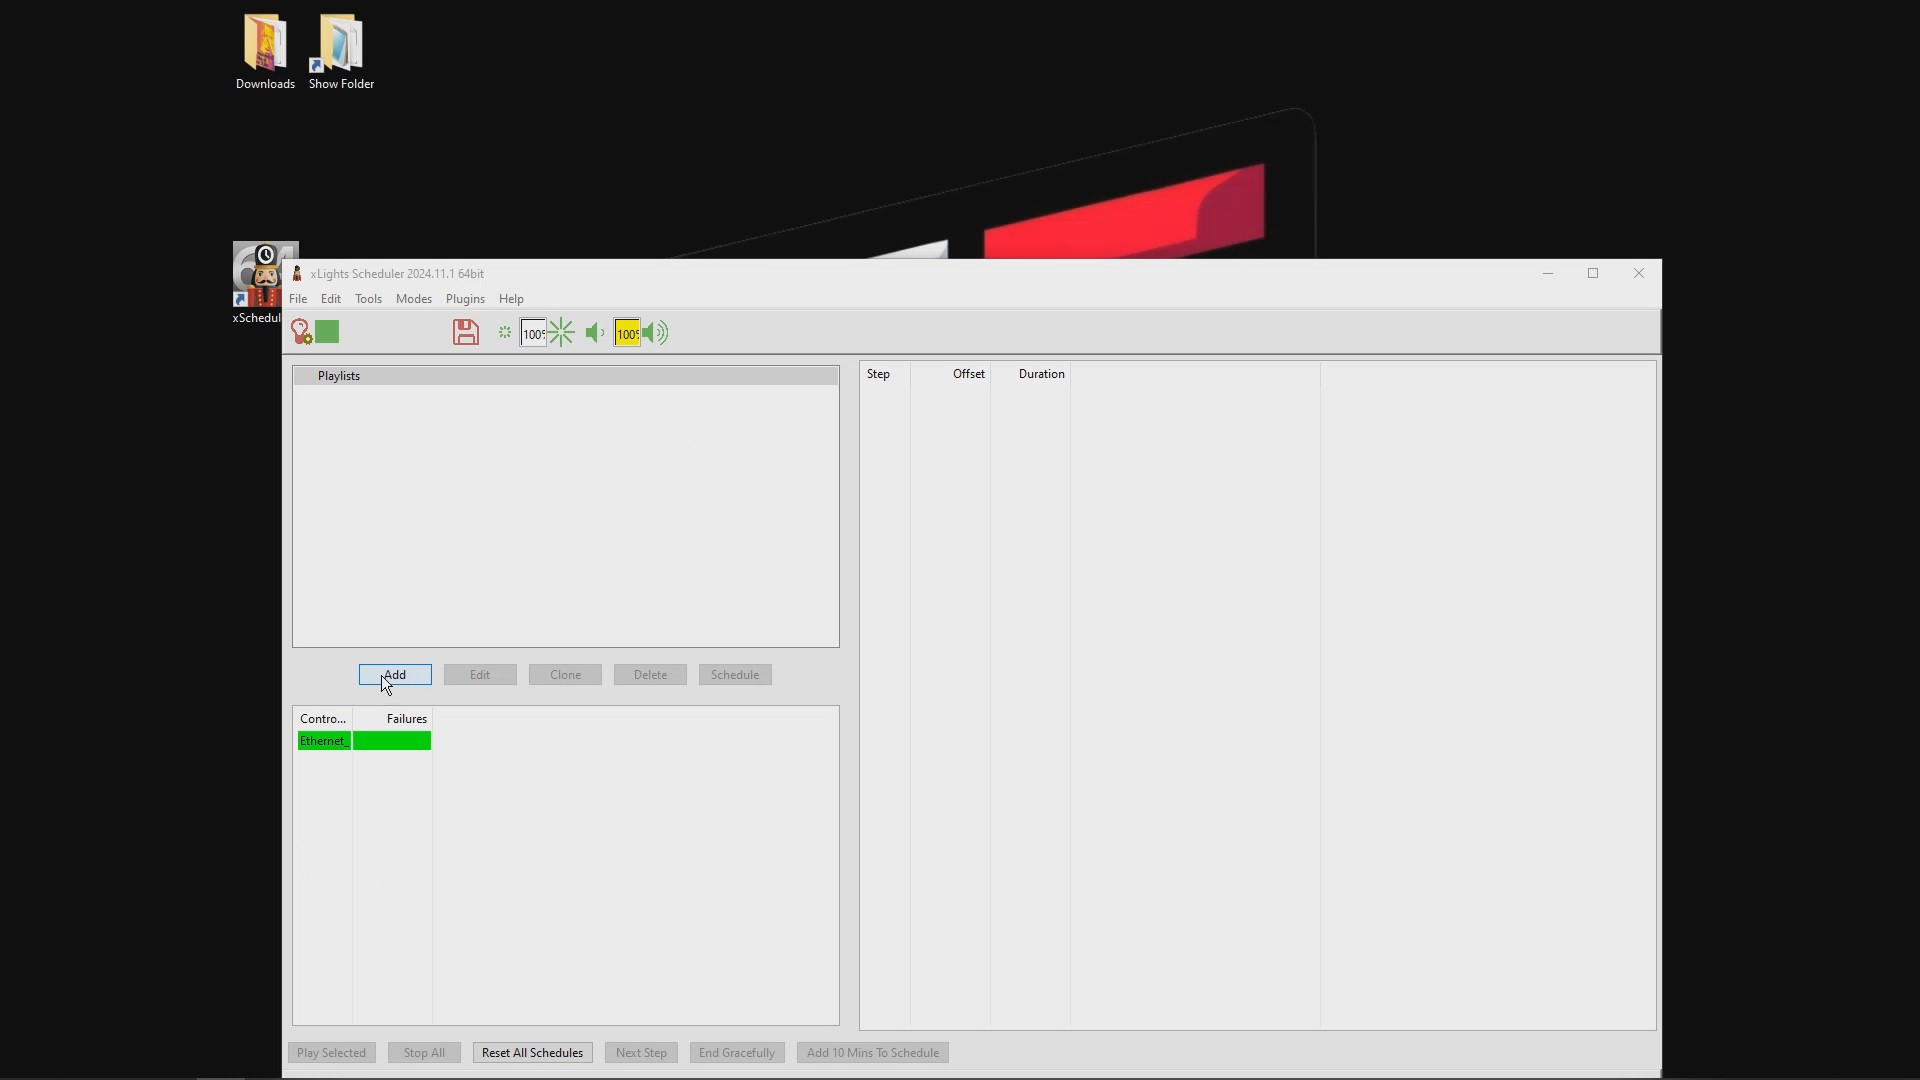
Give your playlist a name or title.
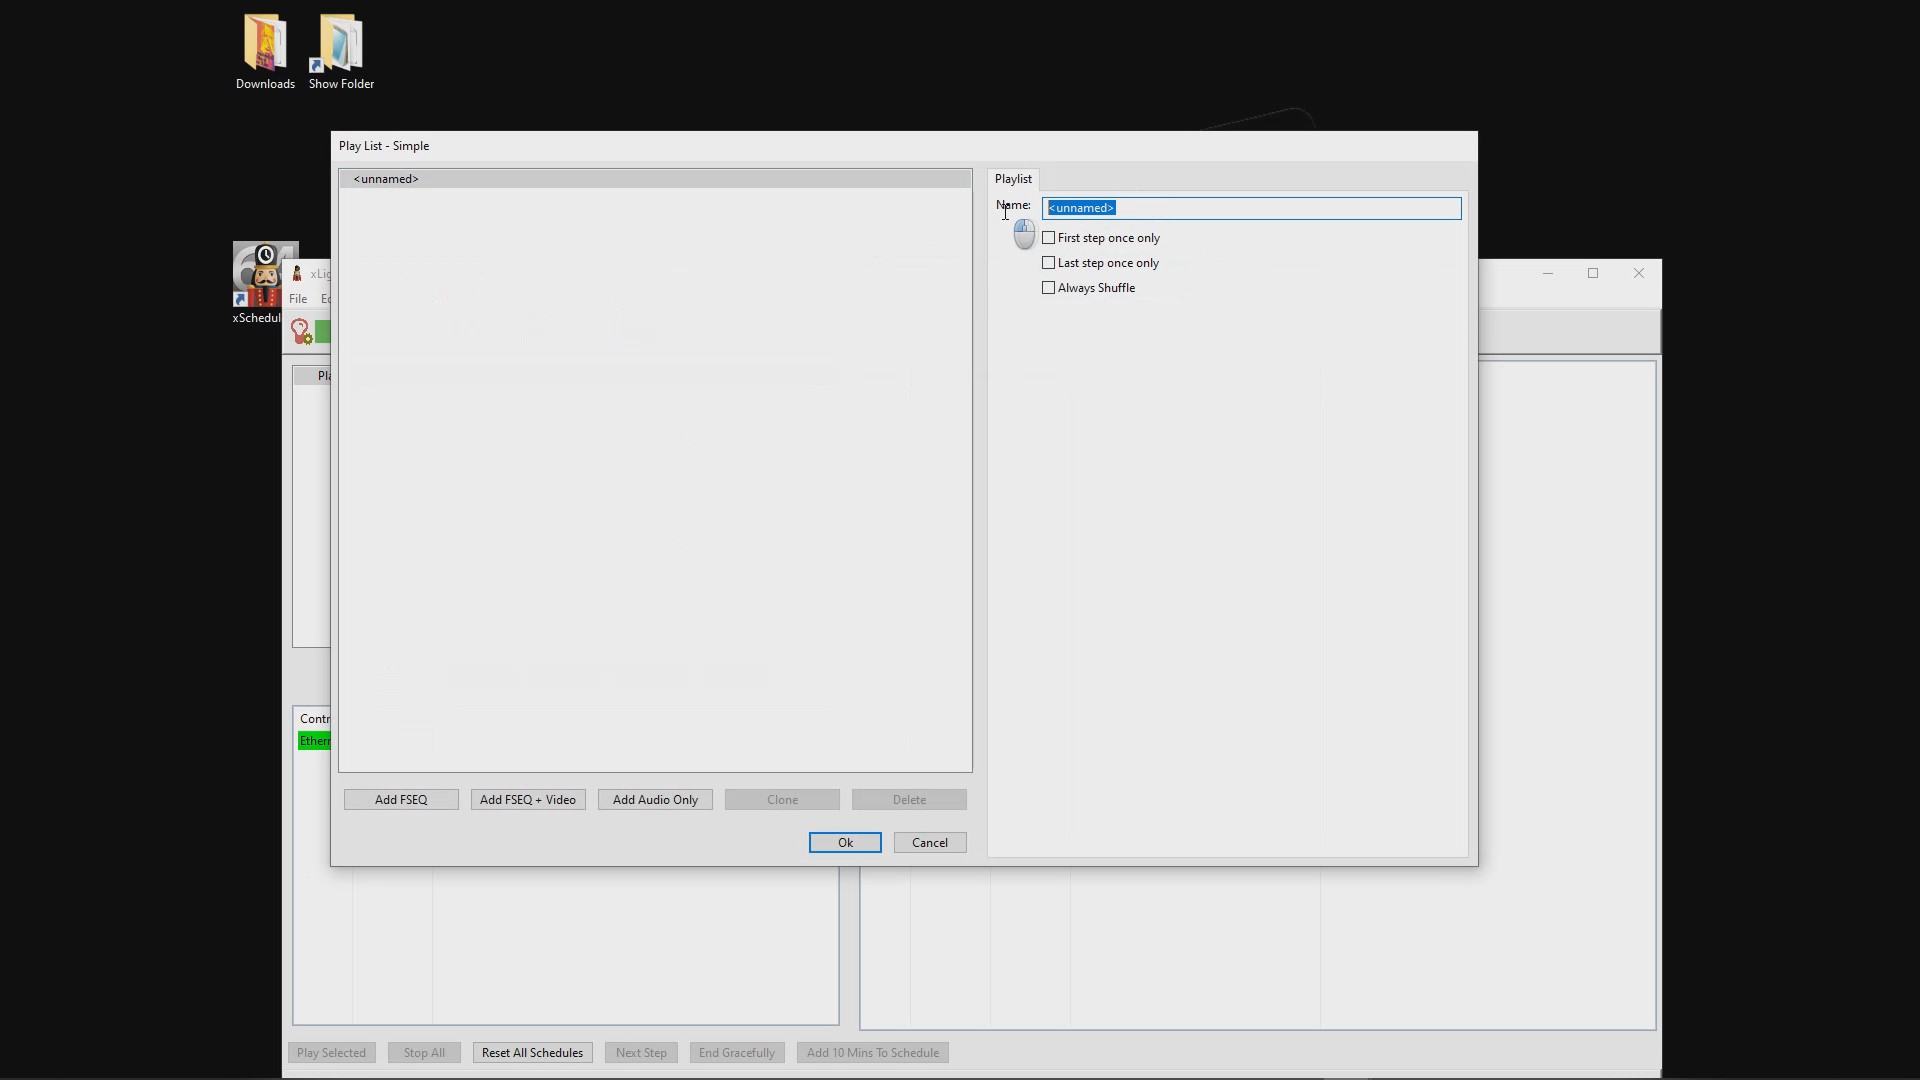
Click the ADD FSEQ button and browse to find your xLights show directory.
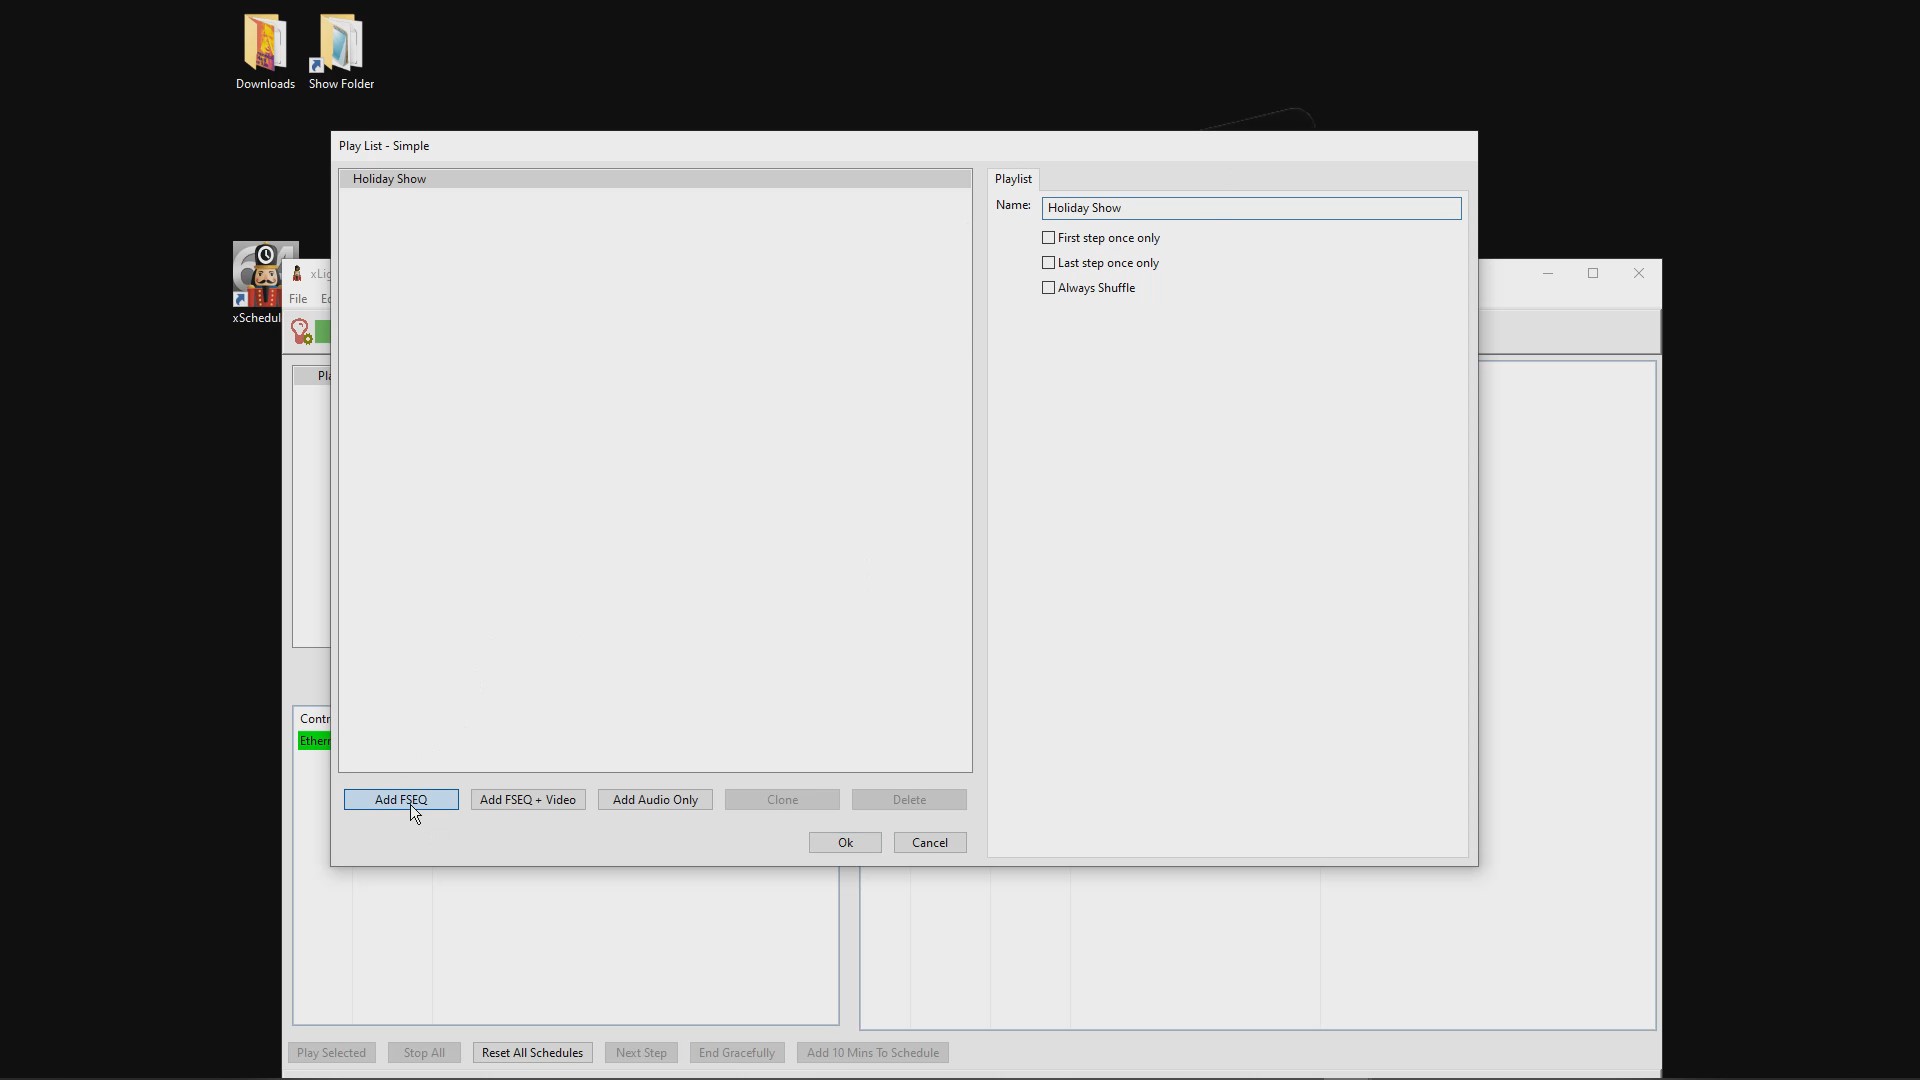
You can either double click on your FSEQ file, or select it, then click the OPEN button. This will add the sequence to your play list.
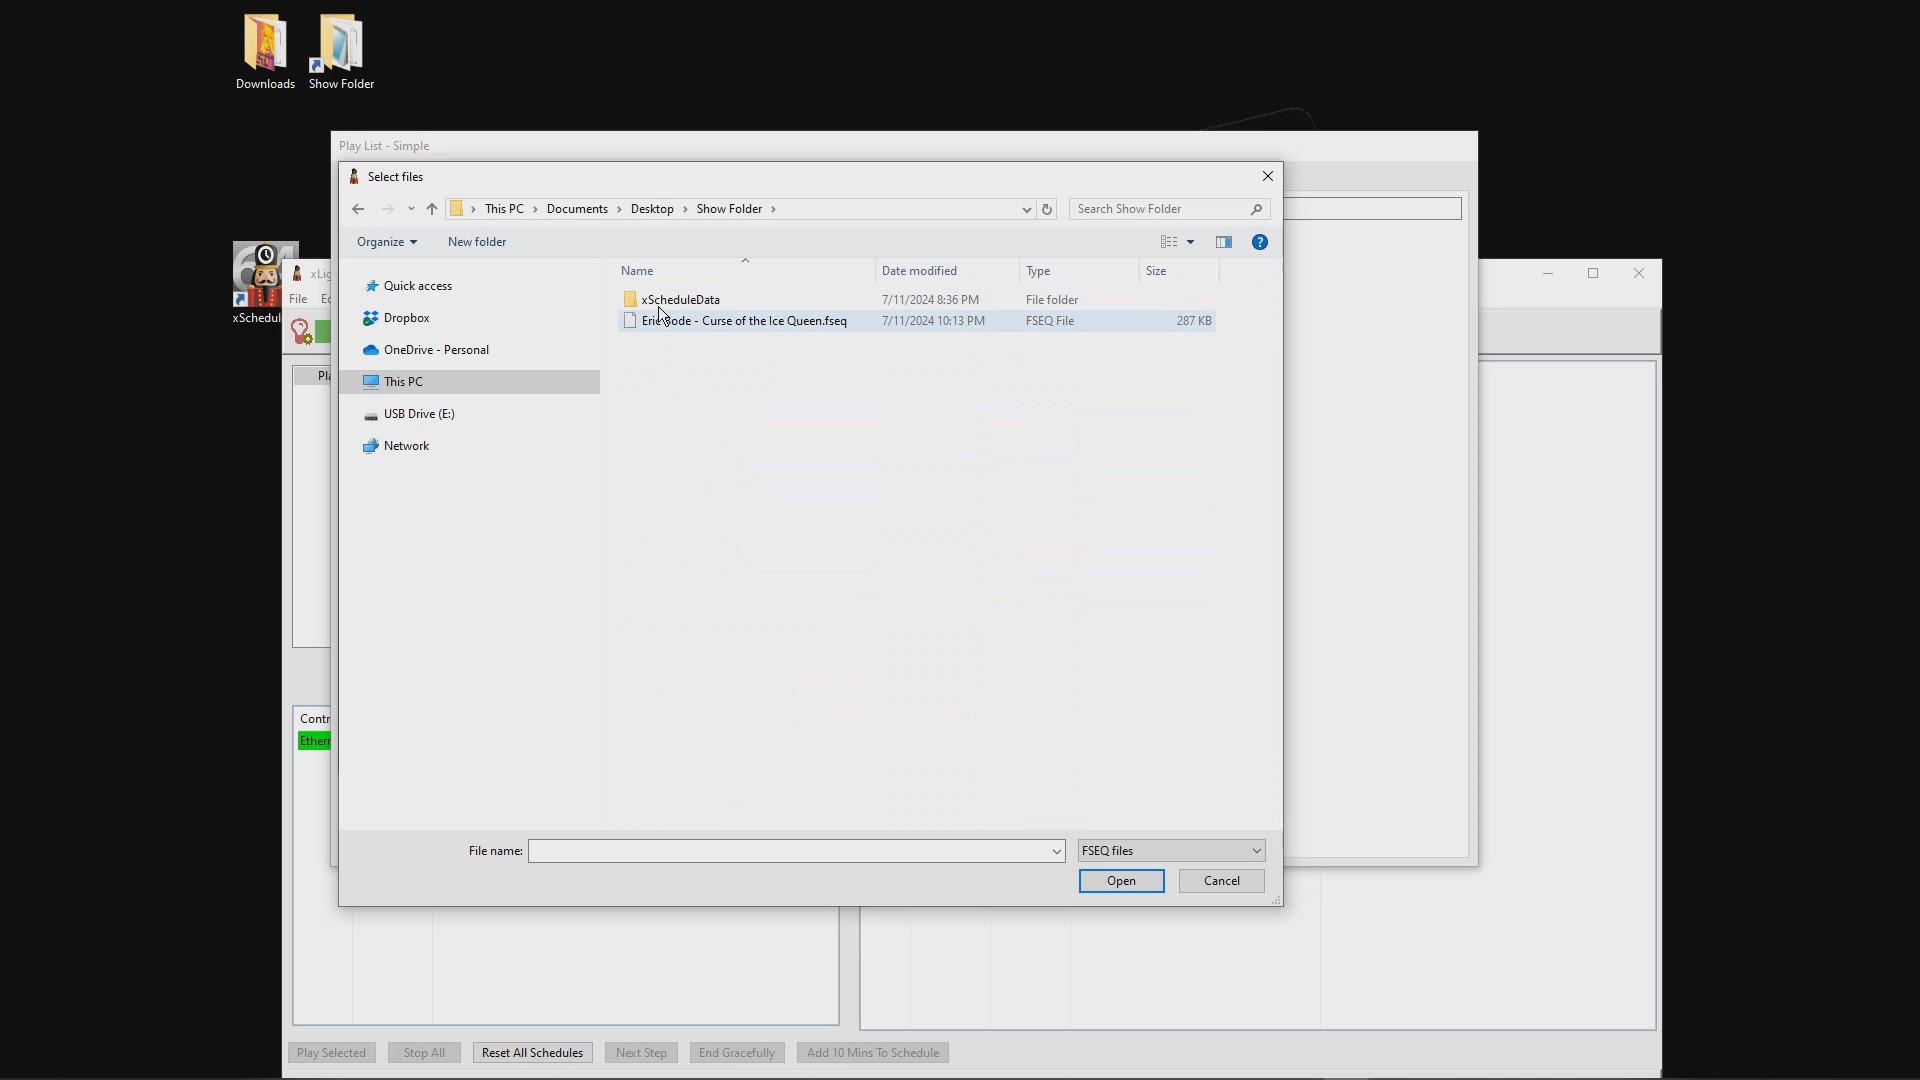
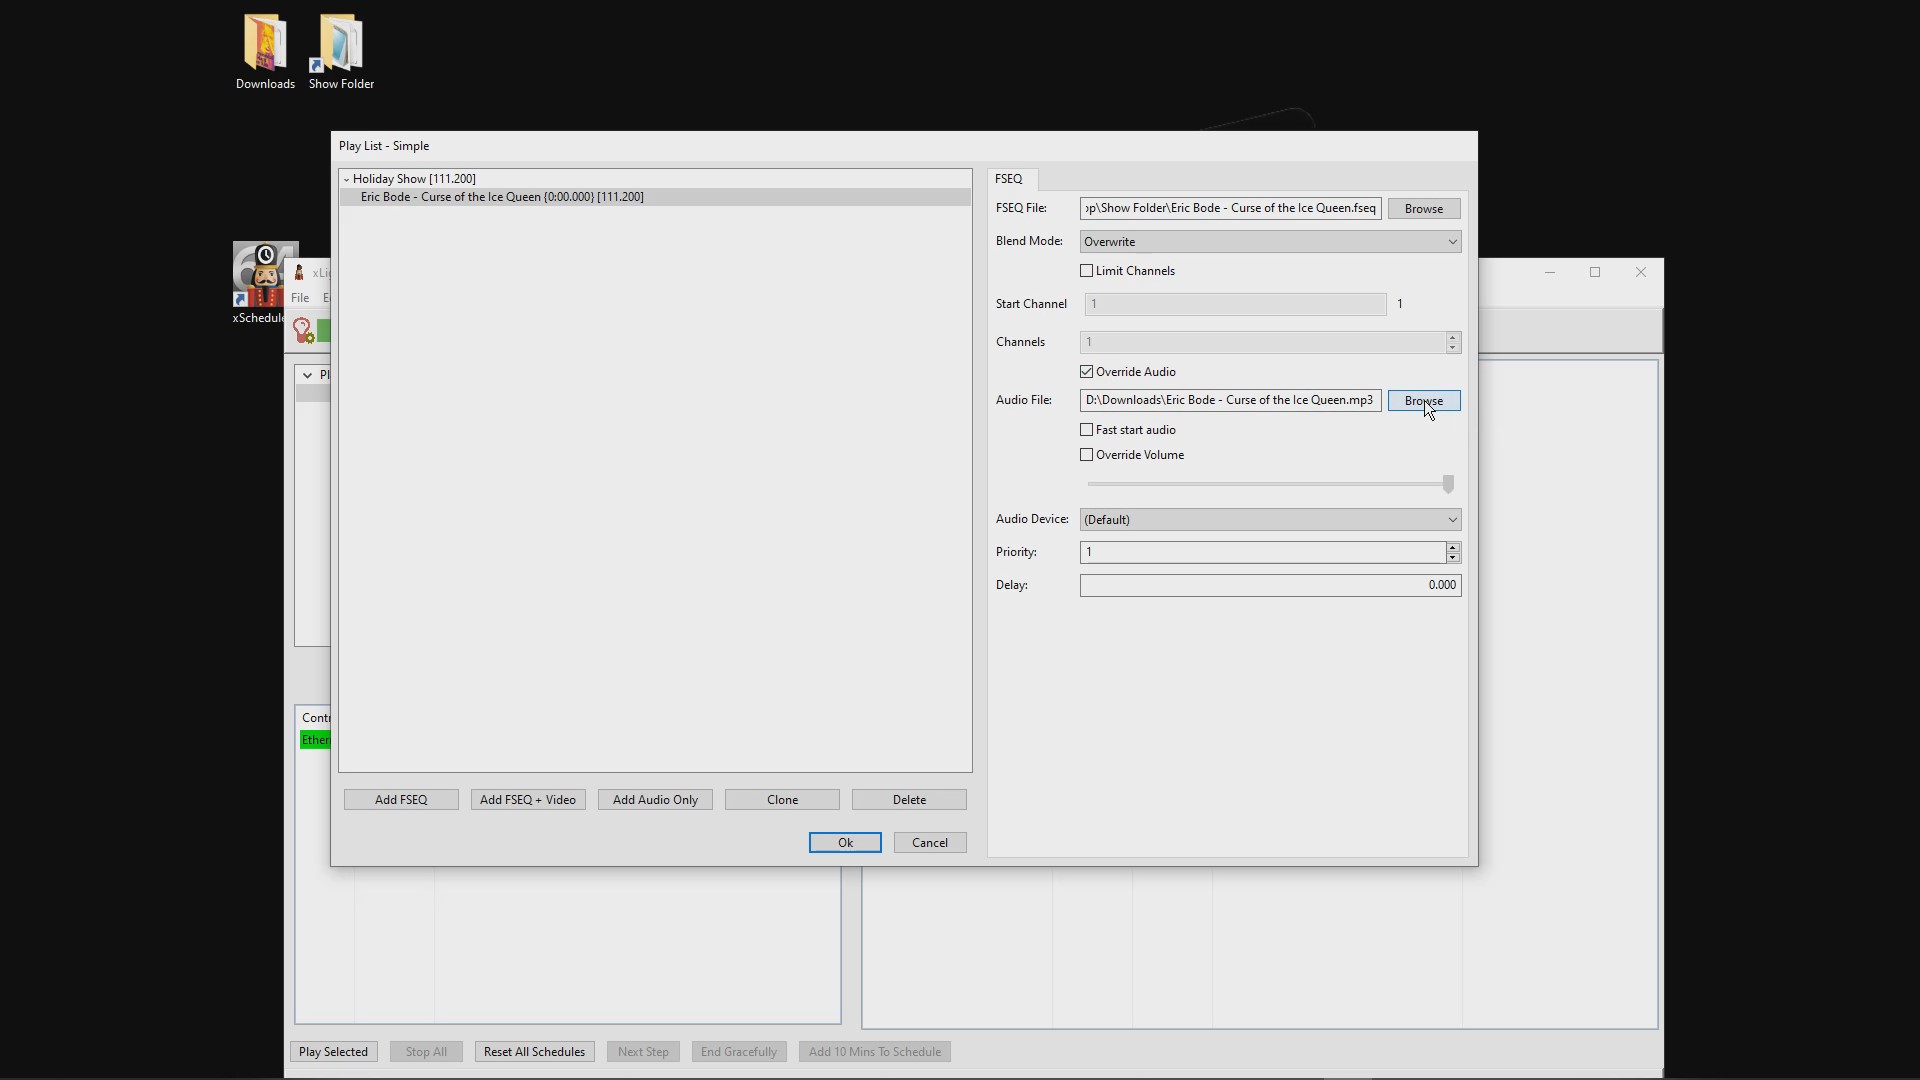
Next, click on the sequence that has been added to the list. Check the box to Override Audio.
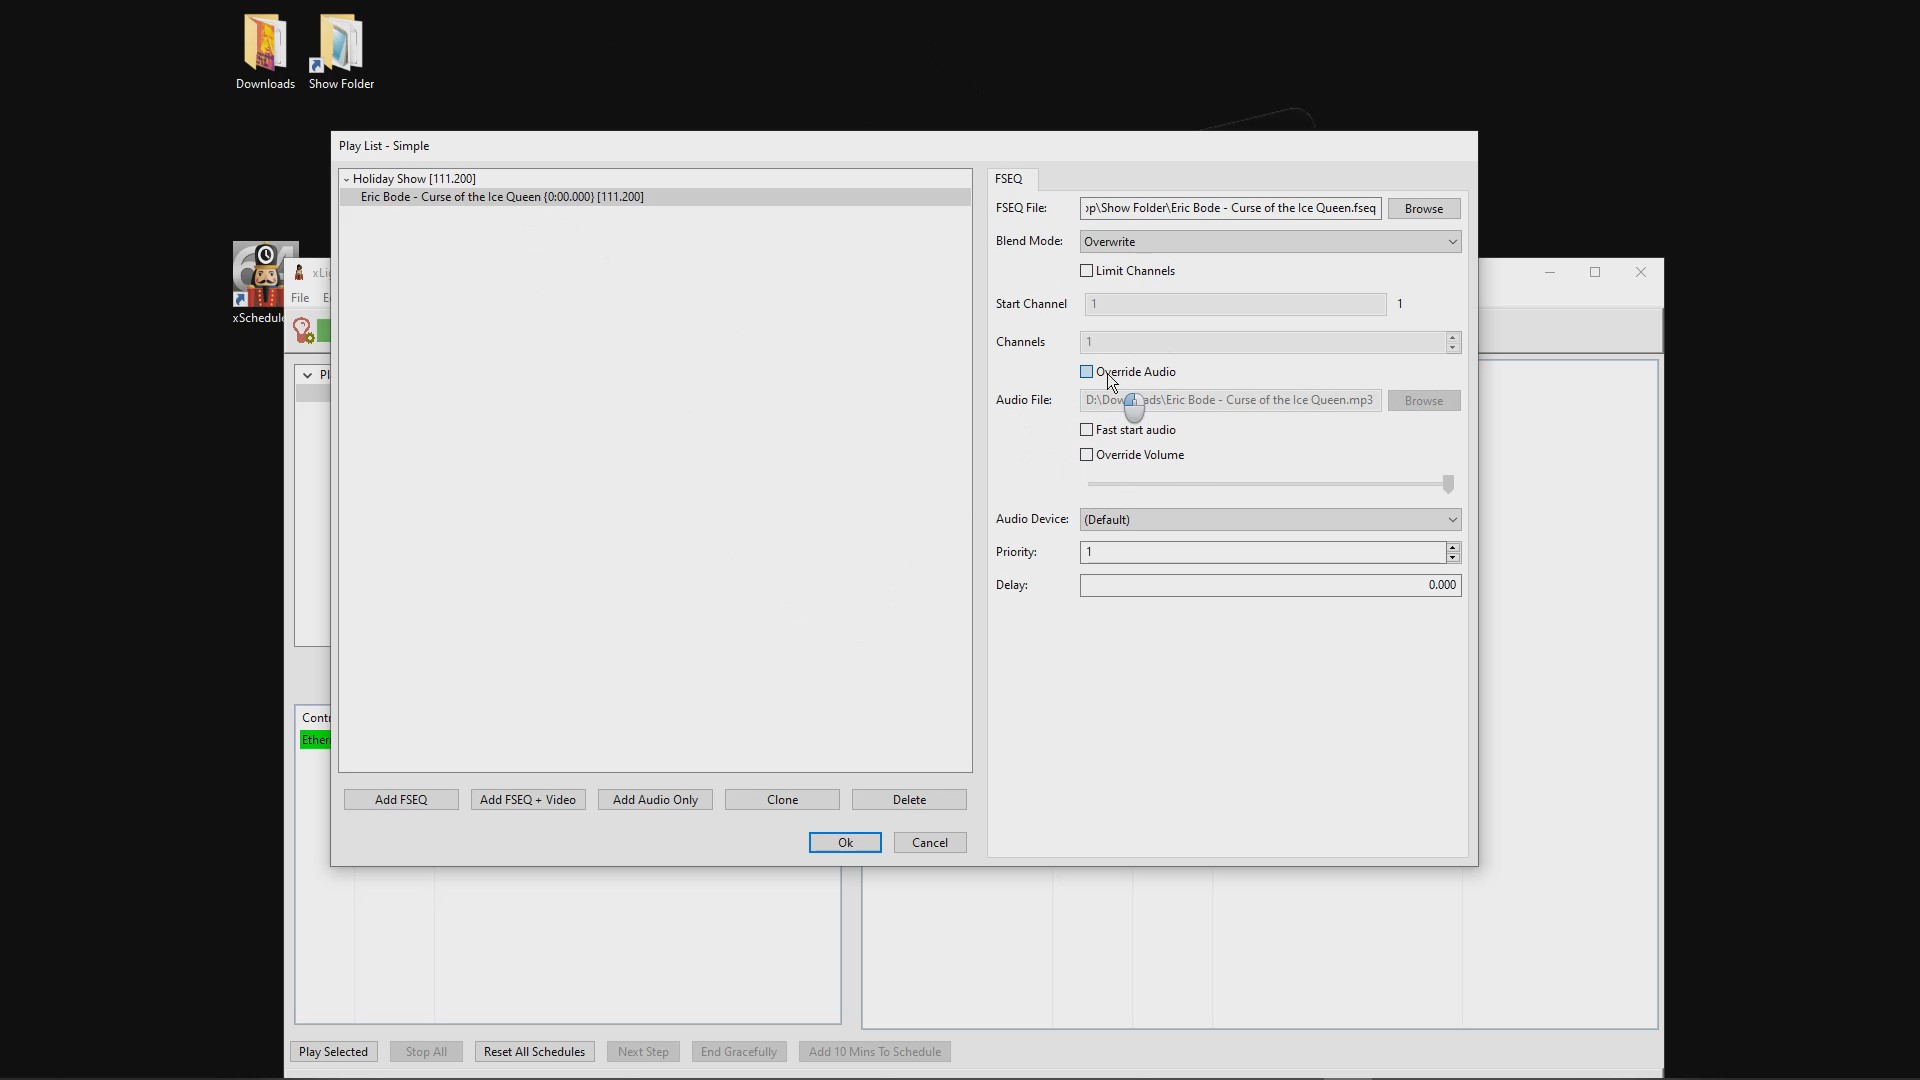
Then, click the Browse button next to the Audio File field.
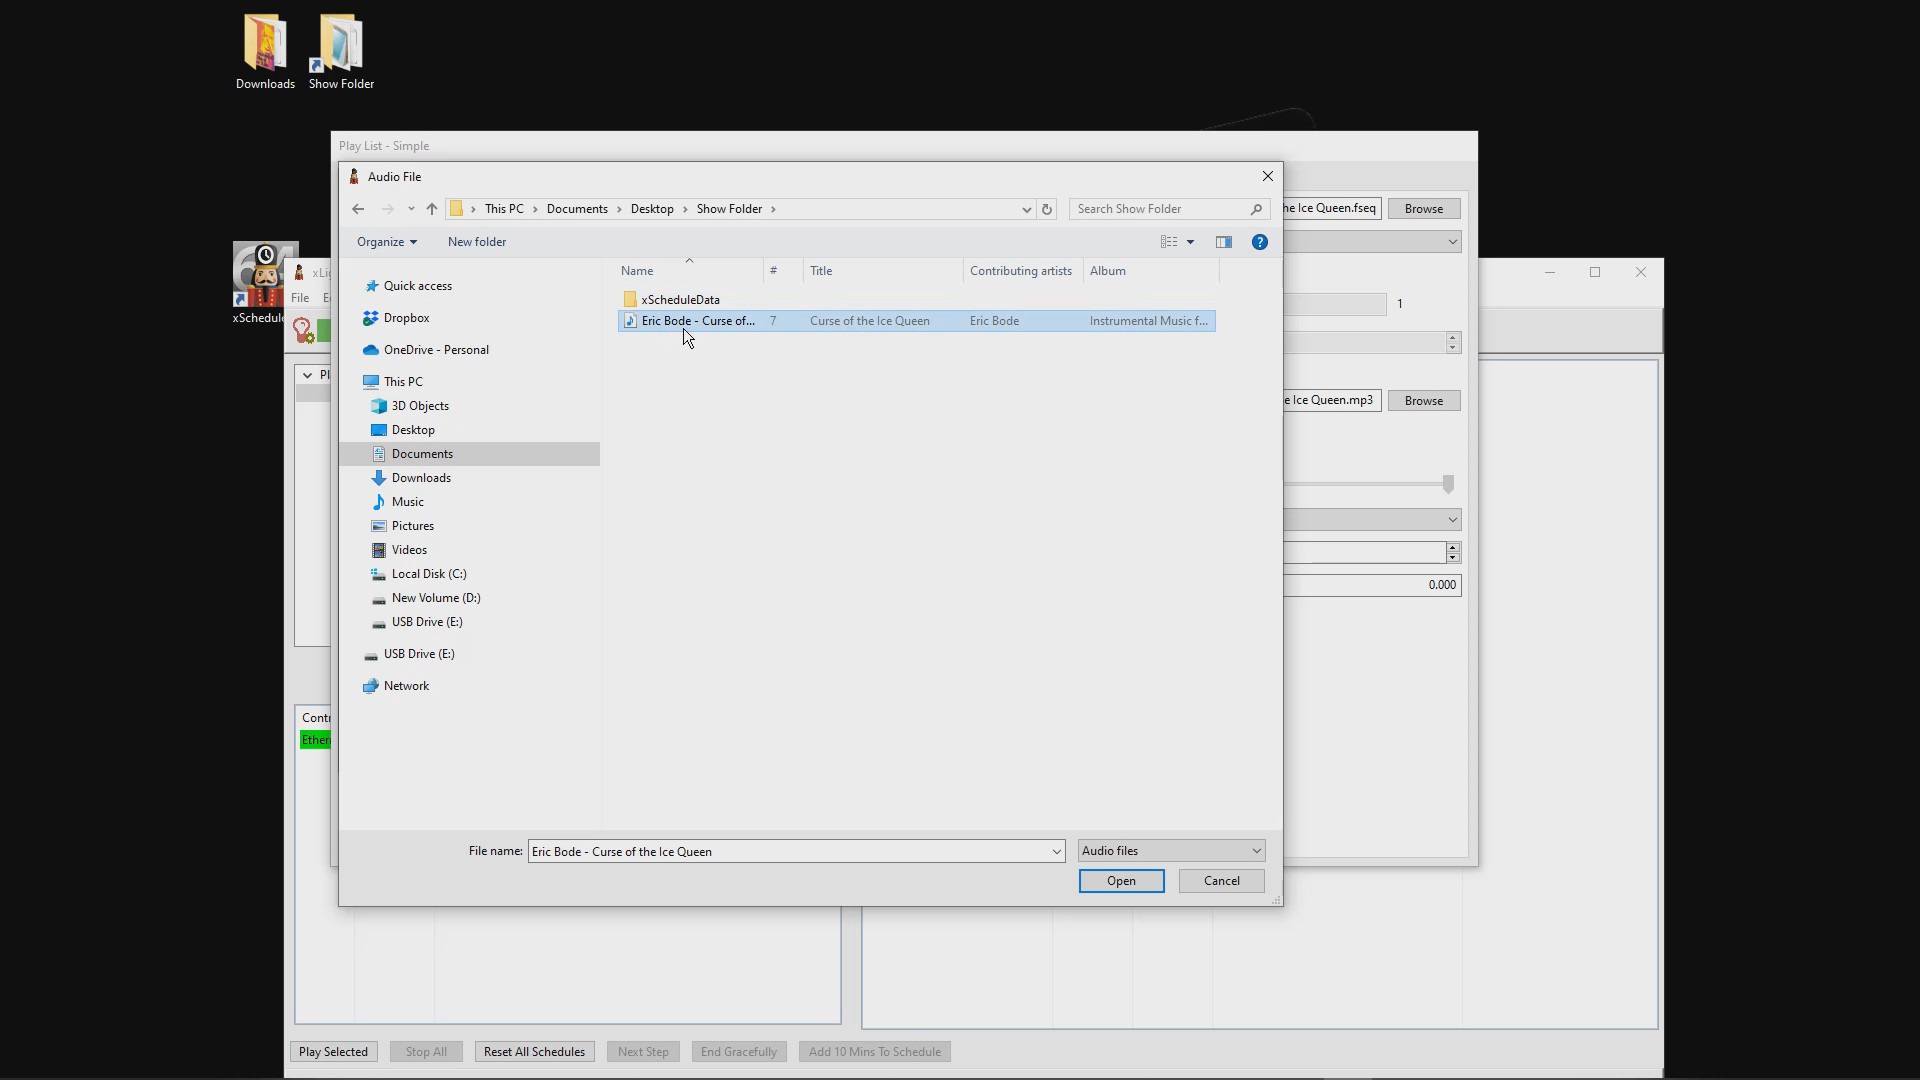
Navigate to your MP3 location. You can either double-click on the MP3 file or select it.
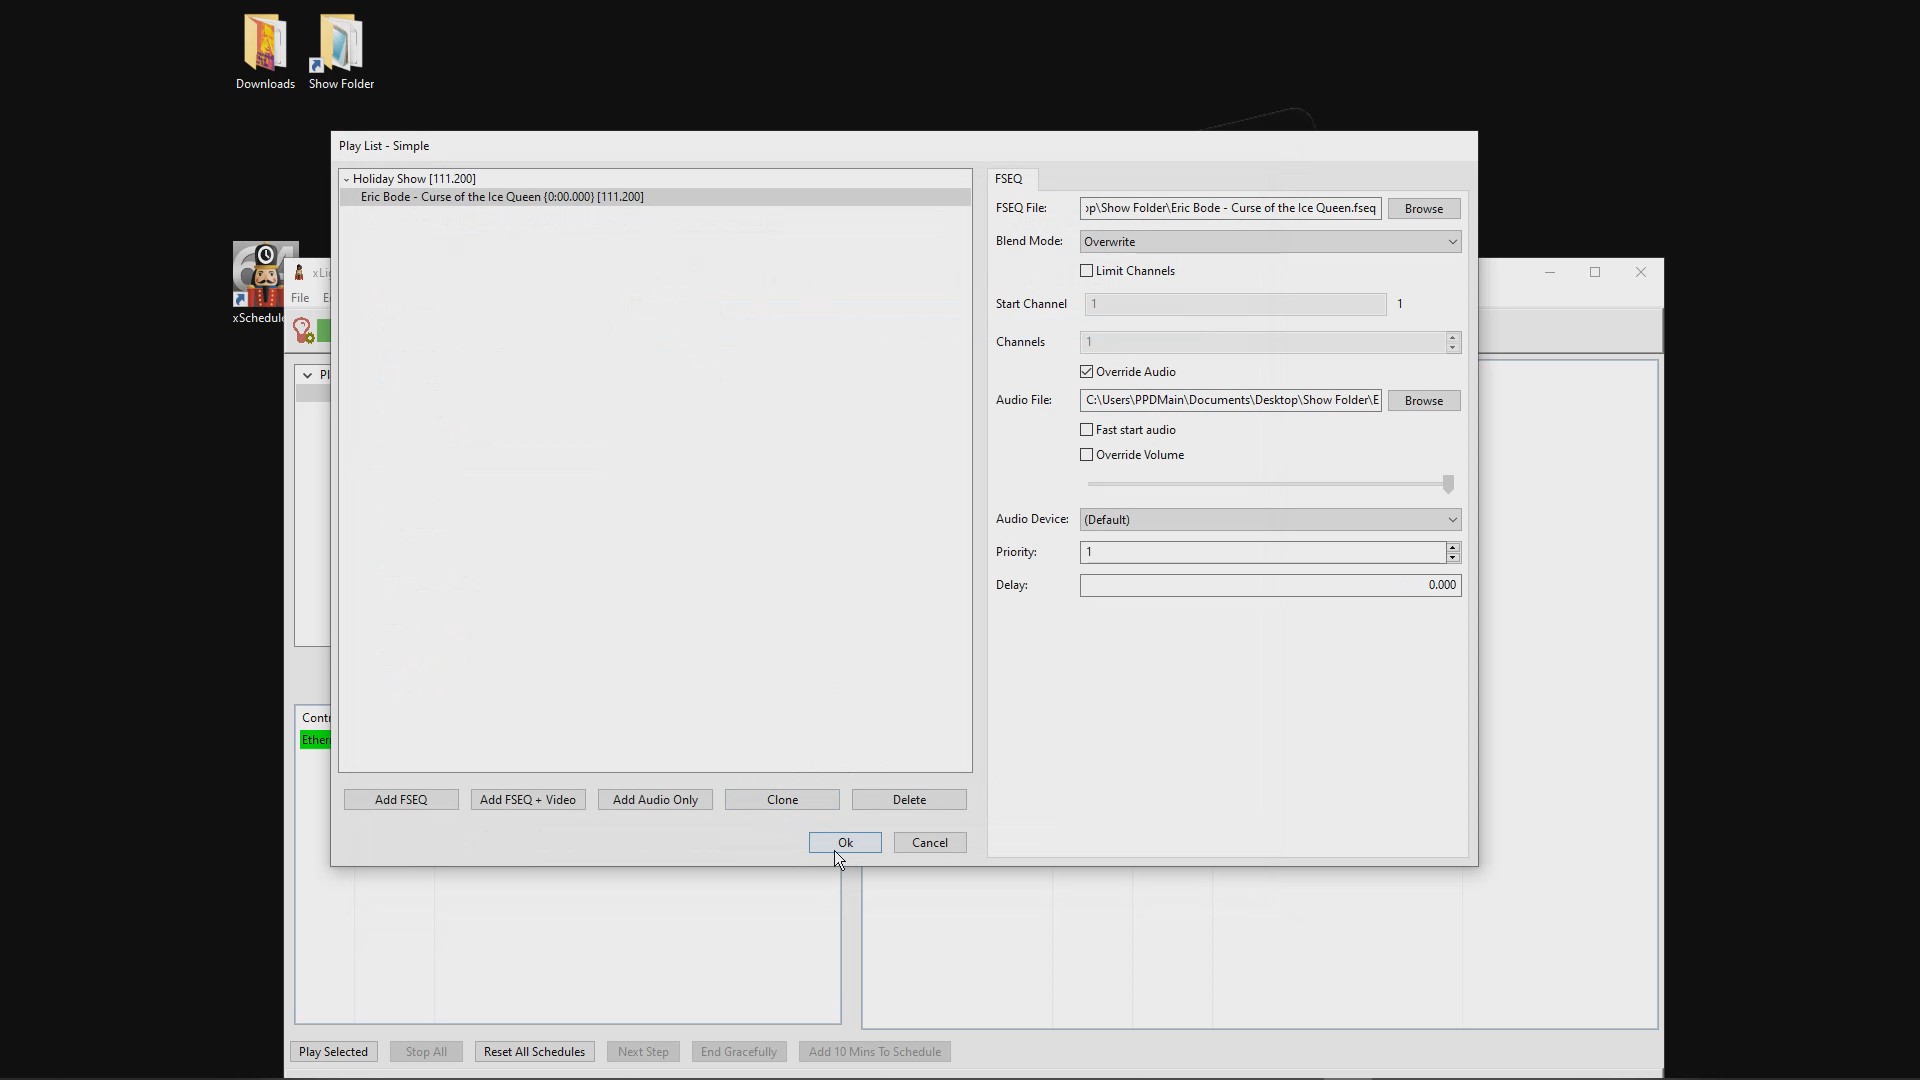
Finally, click the OK button in the Audio File Dialog box.
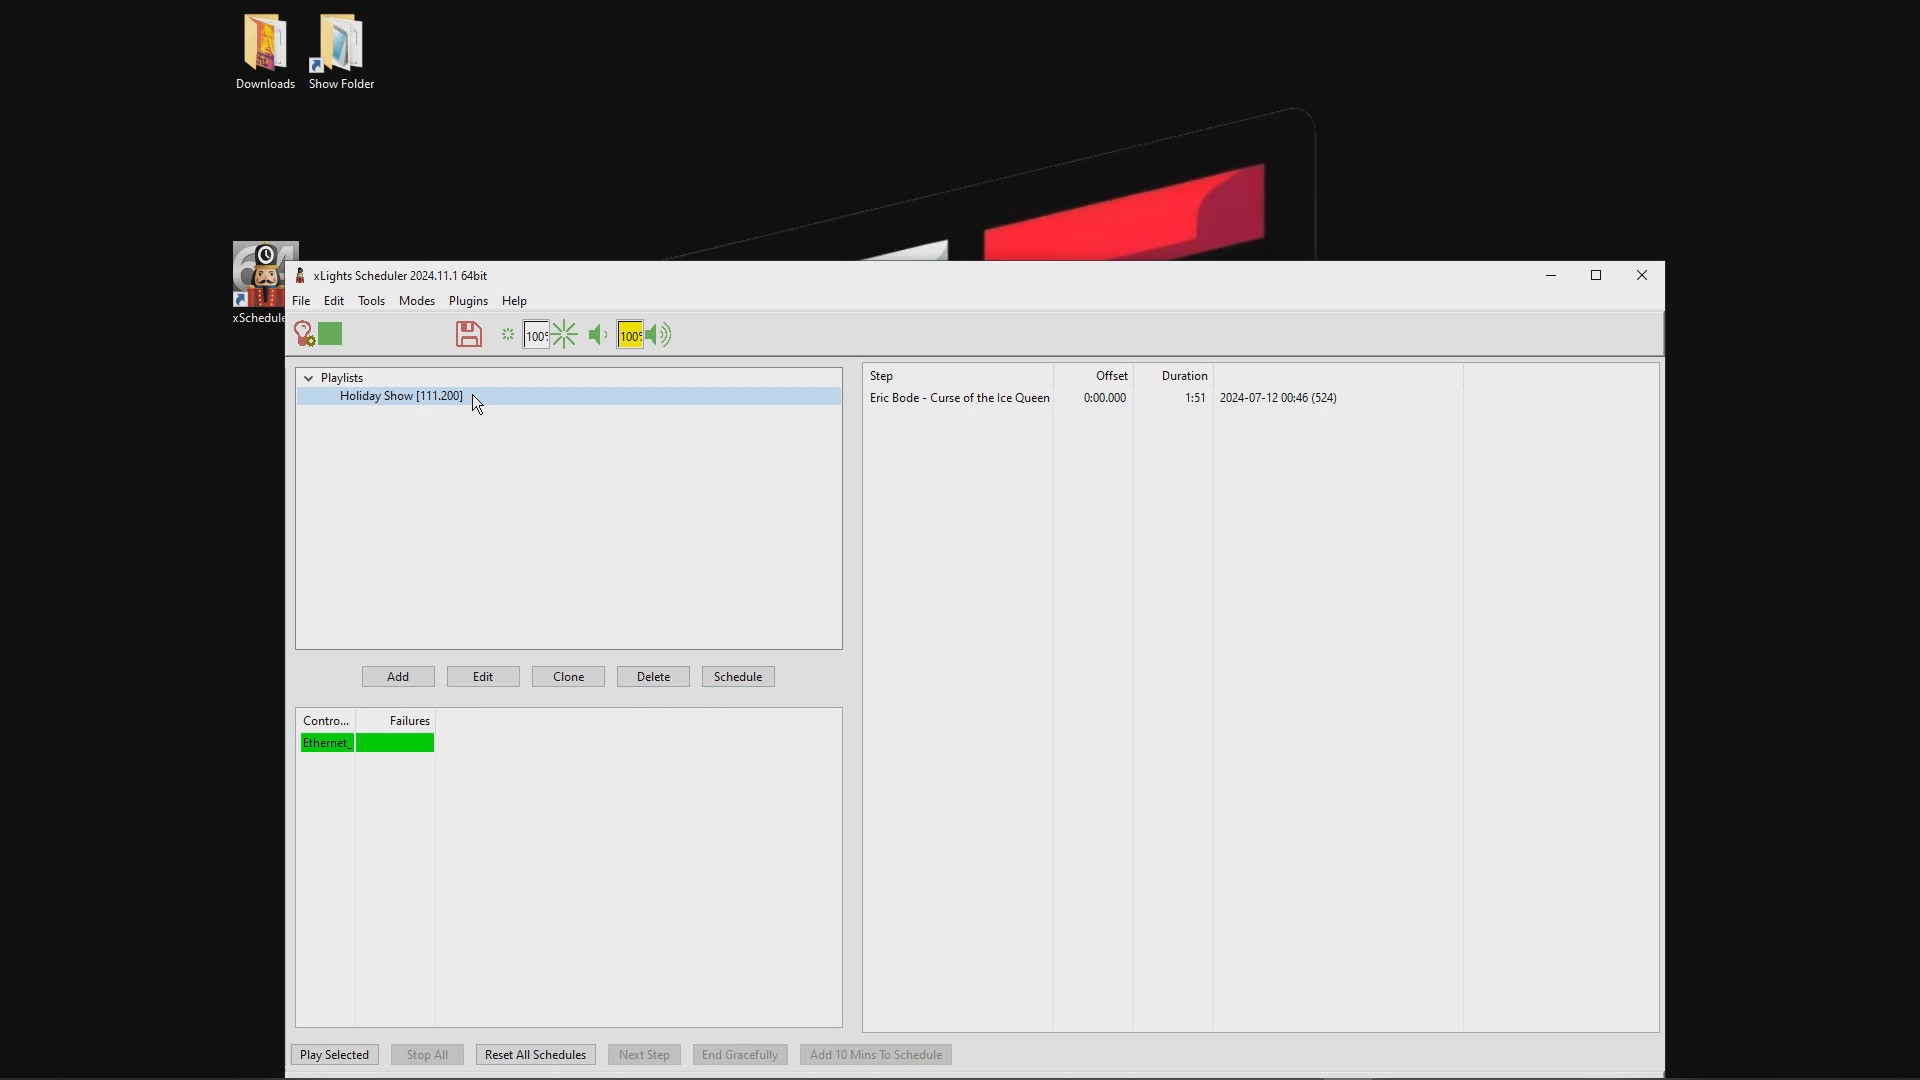
You can now schedule your show to run by selecting your newly created playlist and then clicking on the Schedule button.
You may name the playlist whatever you like.
Fill in the start and end dates for this playlist.
Check the boxes for the weekdays you wish to play your schedule.
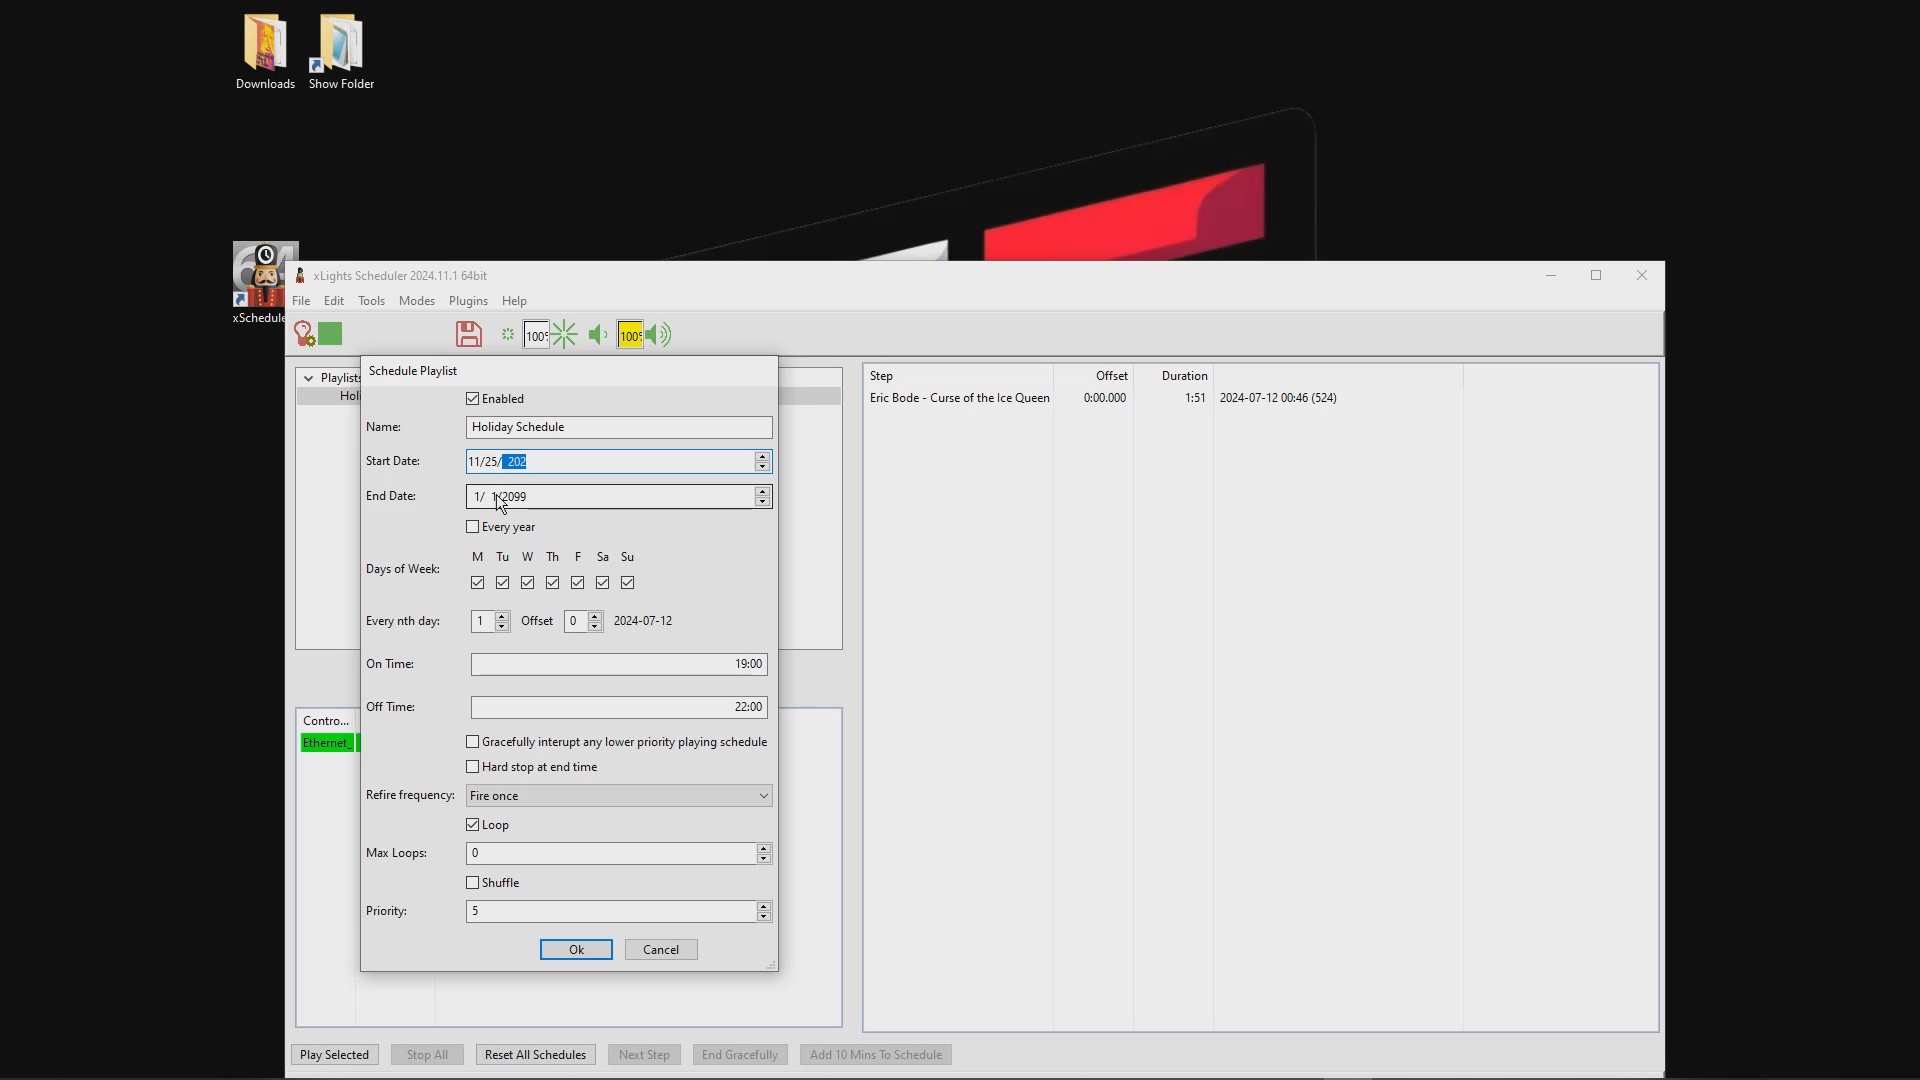
Use military time to schedule the On and Off times for when the show will play.
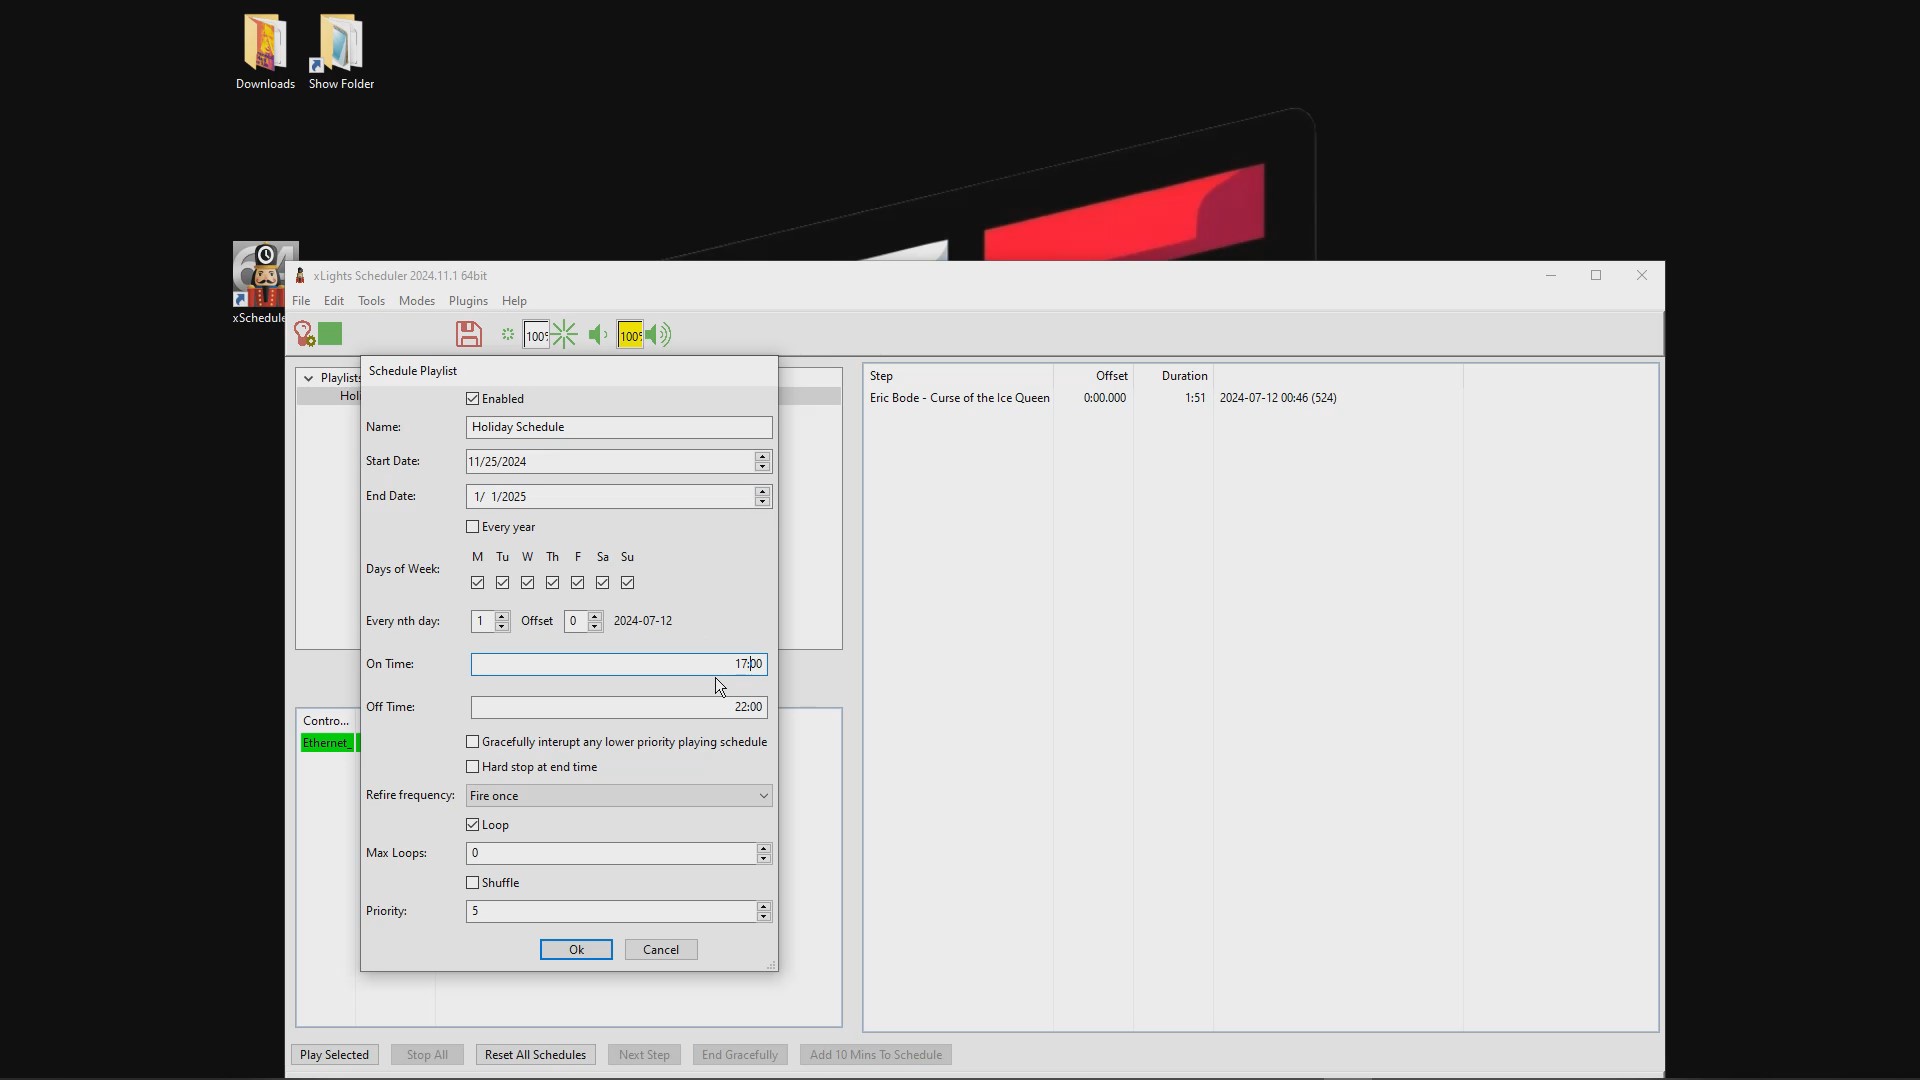
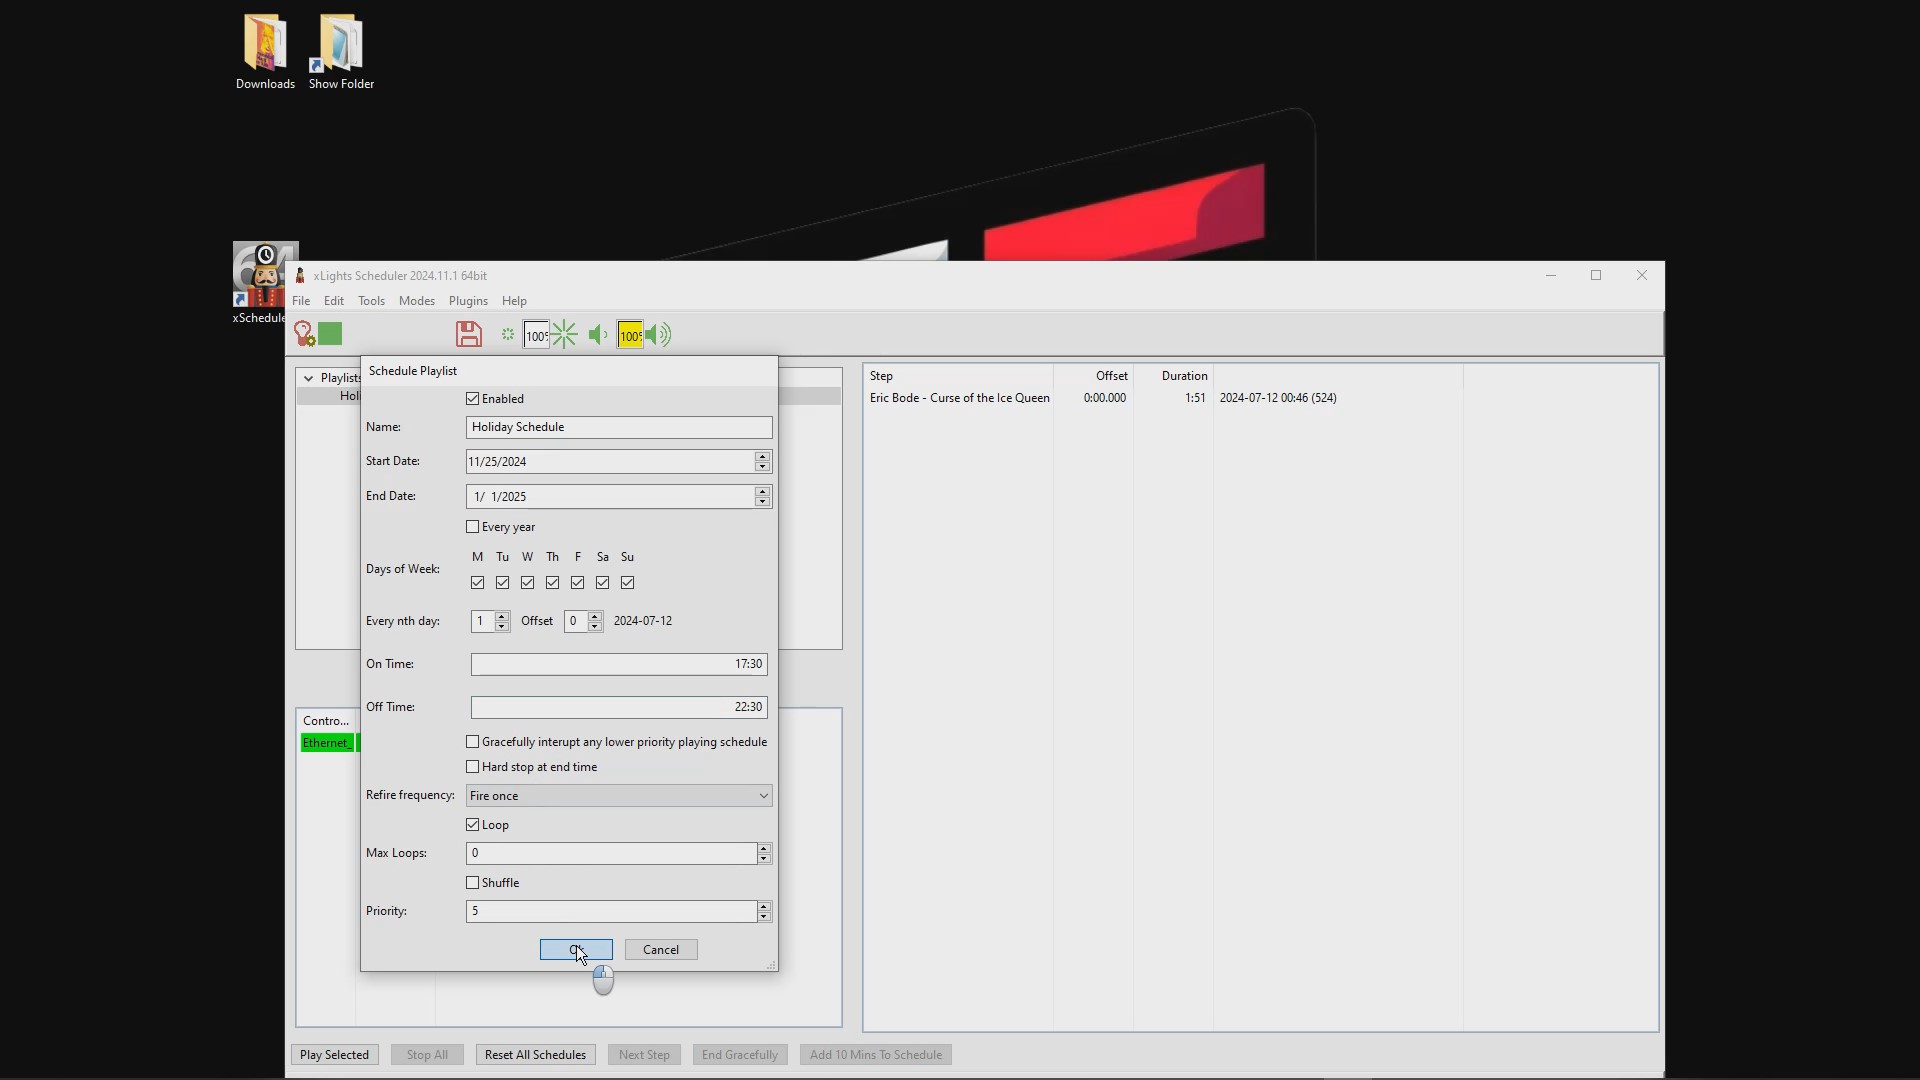
Click the OK button to close the schedule playlist.
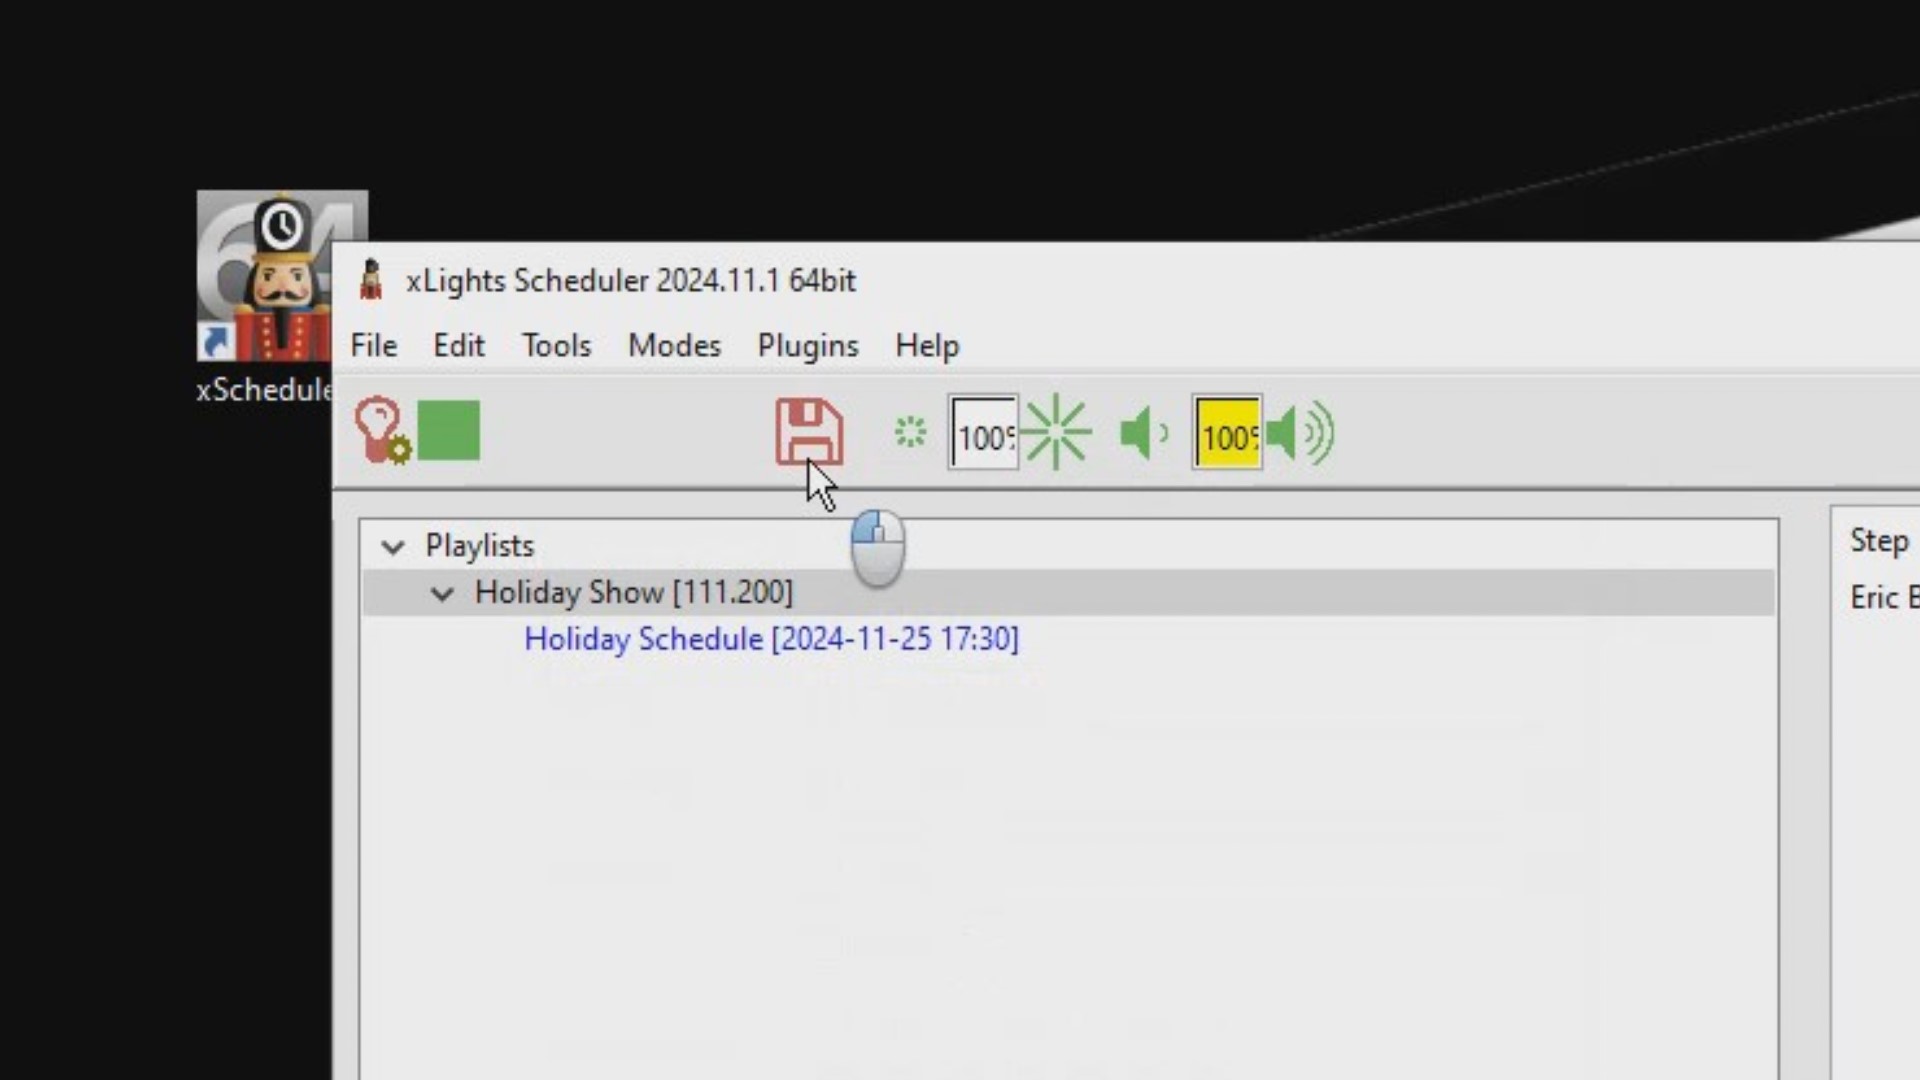
Be sure to click on the RED disk icon to save your xSchedule playlist and schedule settings.
You can play your sequence at any time by selecting any playlist and then clicking the Play Selected button.
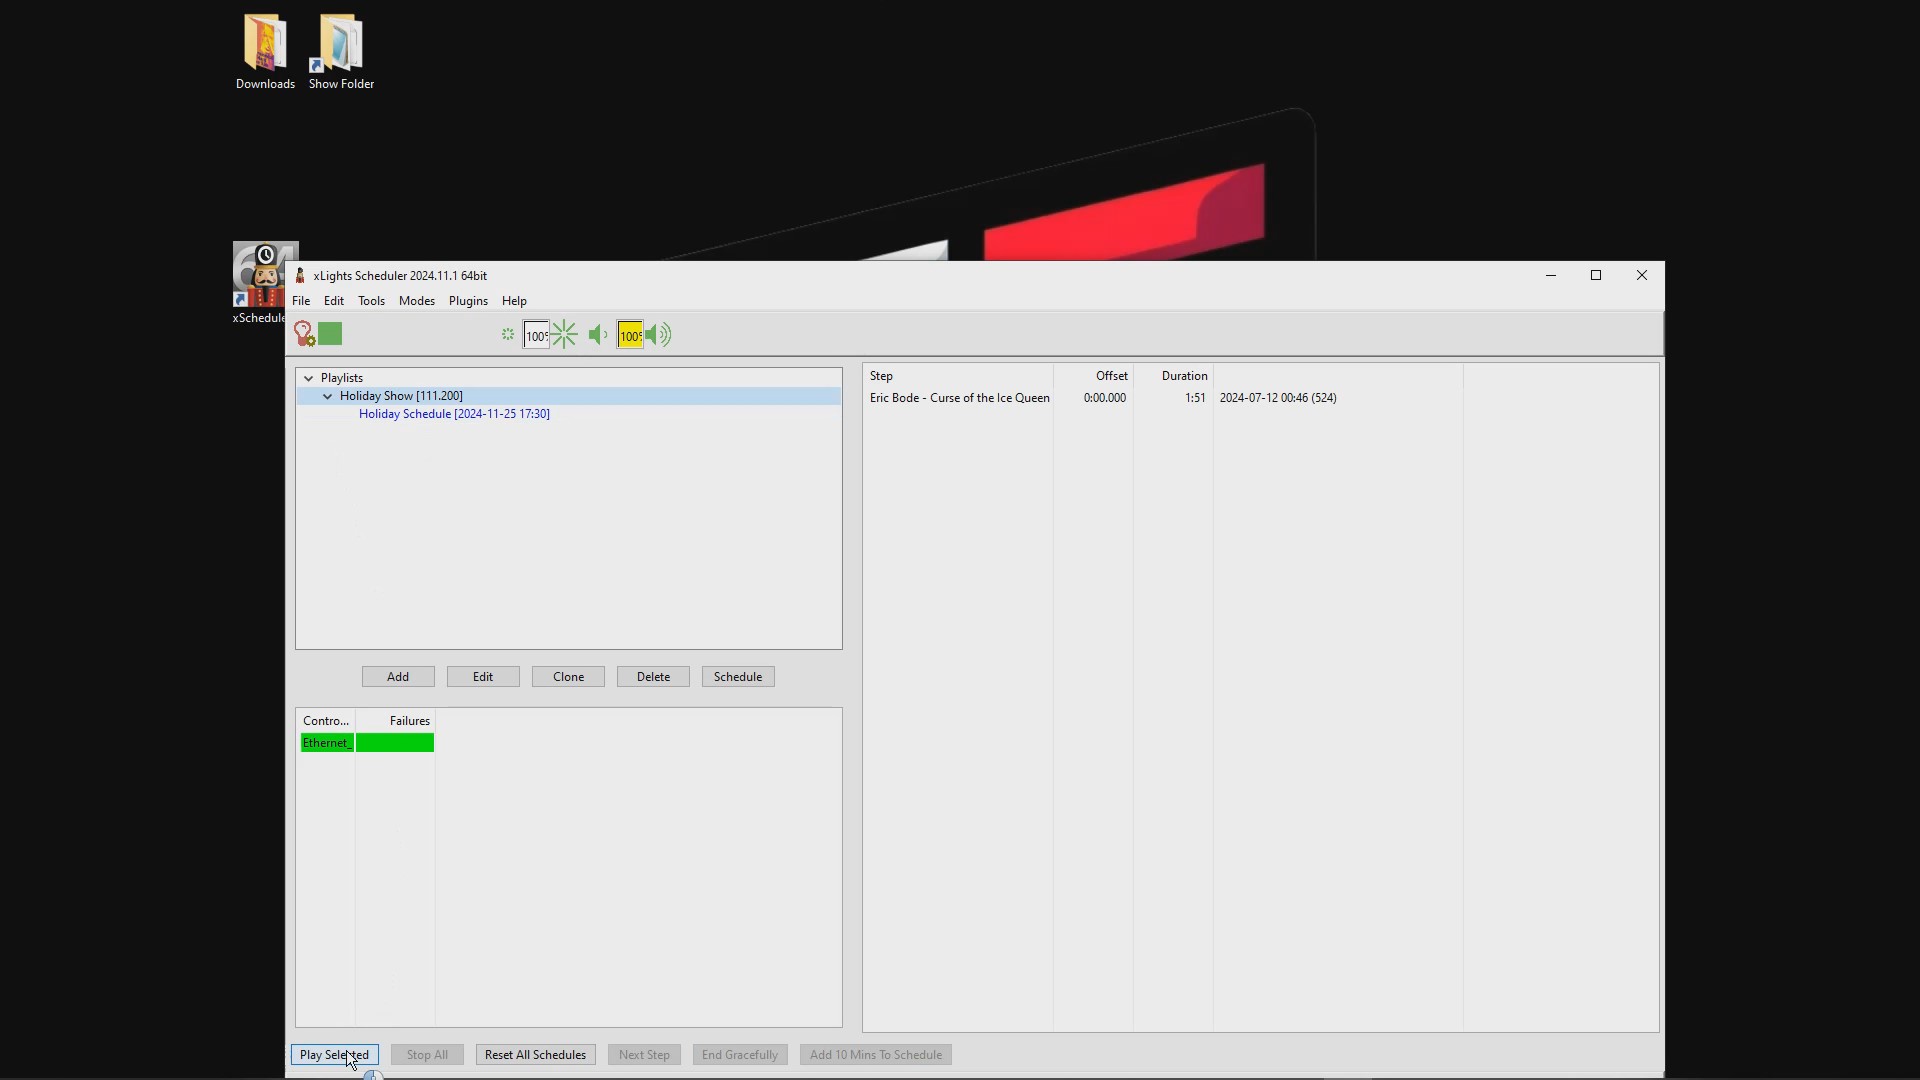
We hope this guide has helped you set up your xSchedule show player.
This document will walk you step-by-step through the process of adding your downloaded sequence files
and music files to your Falcon Pi Player.
First, locate and retrieve your downloaded FSEQ file and the accompanying music file. Usually, these files
are located in your Downloads folder. It’s a good idea to name the files exactly the same, to help the
Falcon Pi Player quickly recognize the files match and should play together.
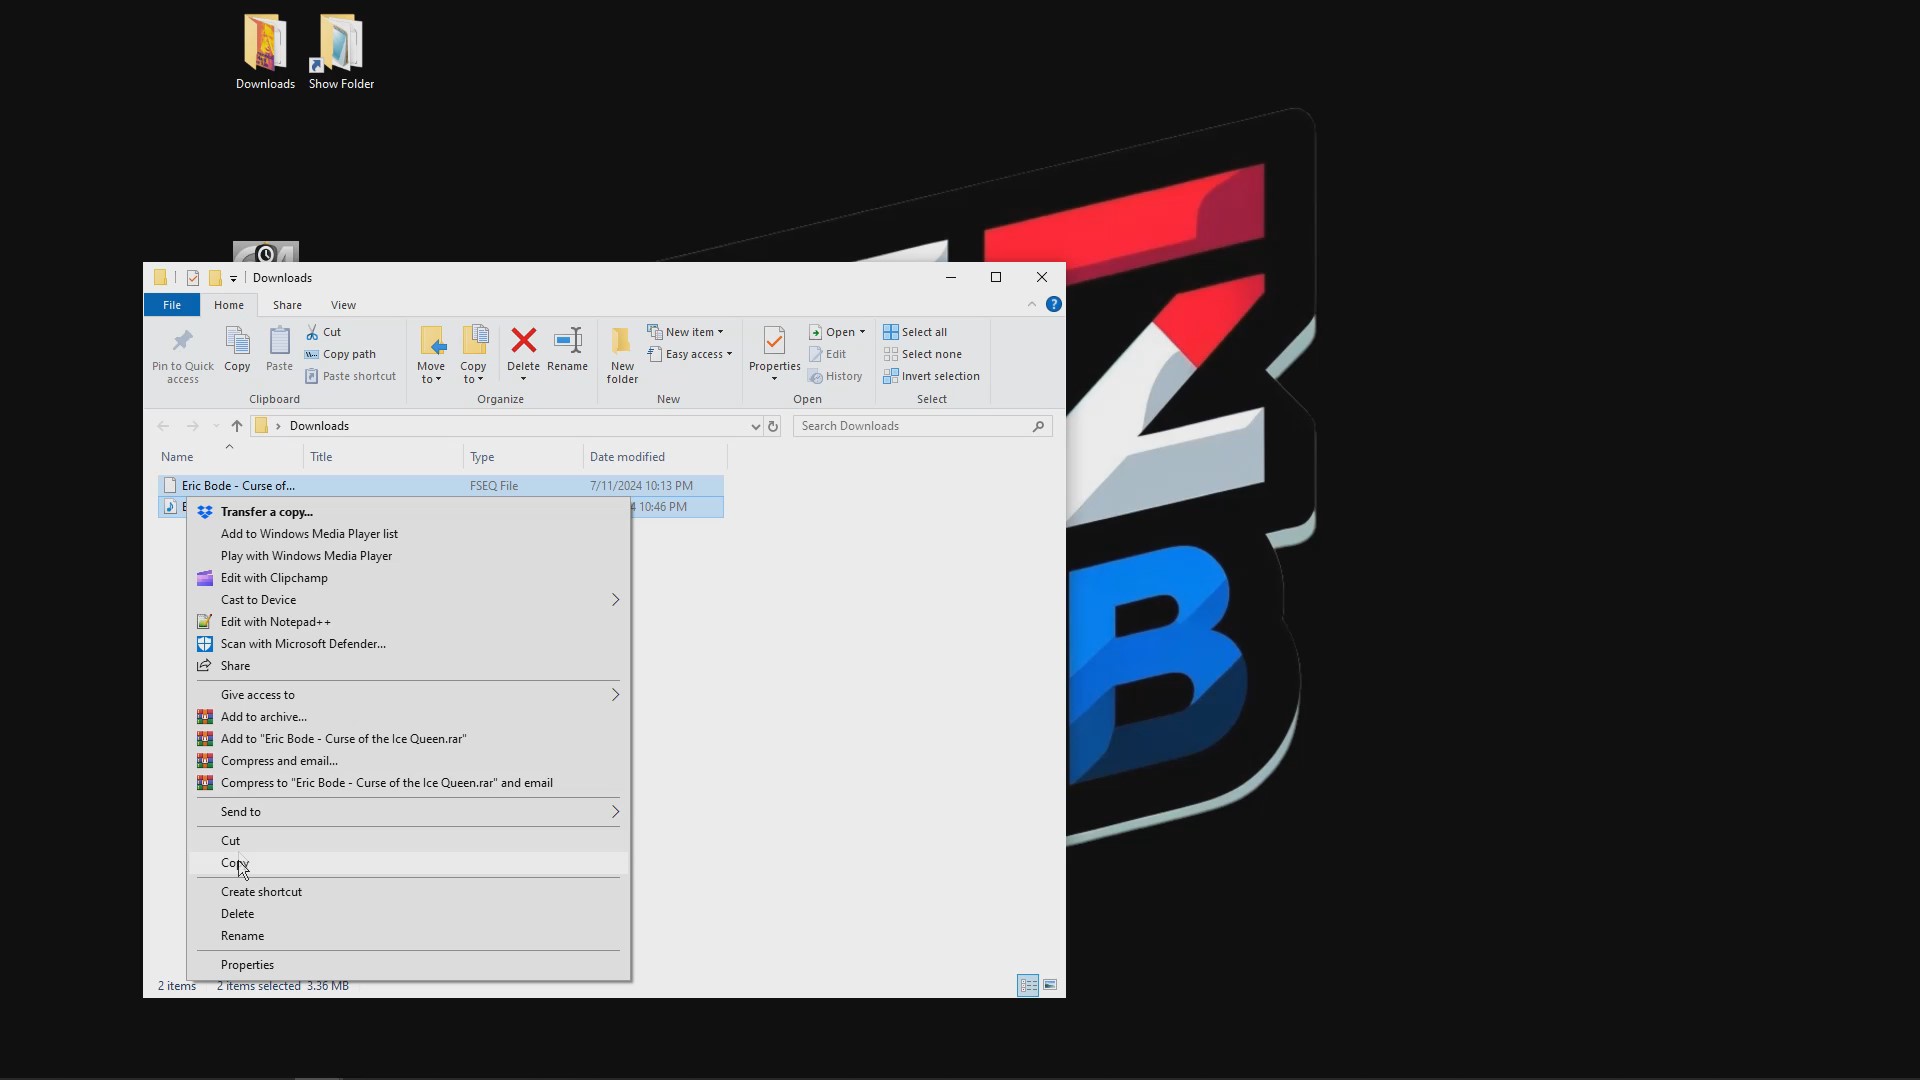
Select both files and right-click and “copy” these files.
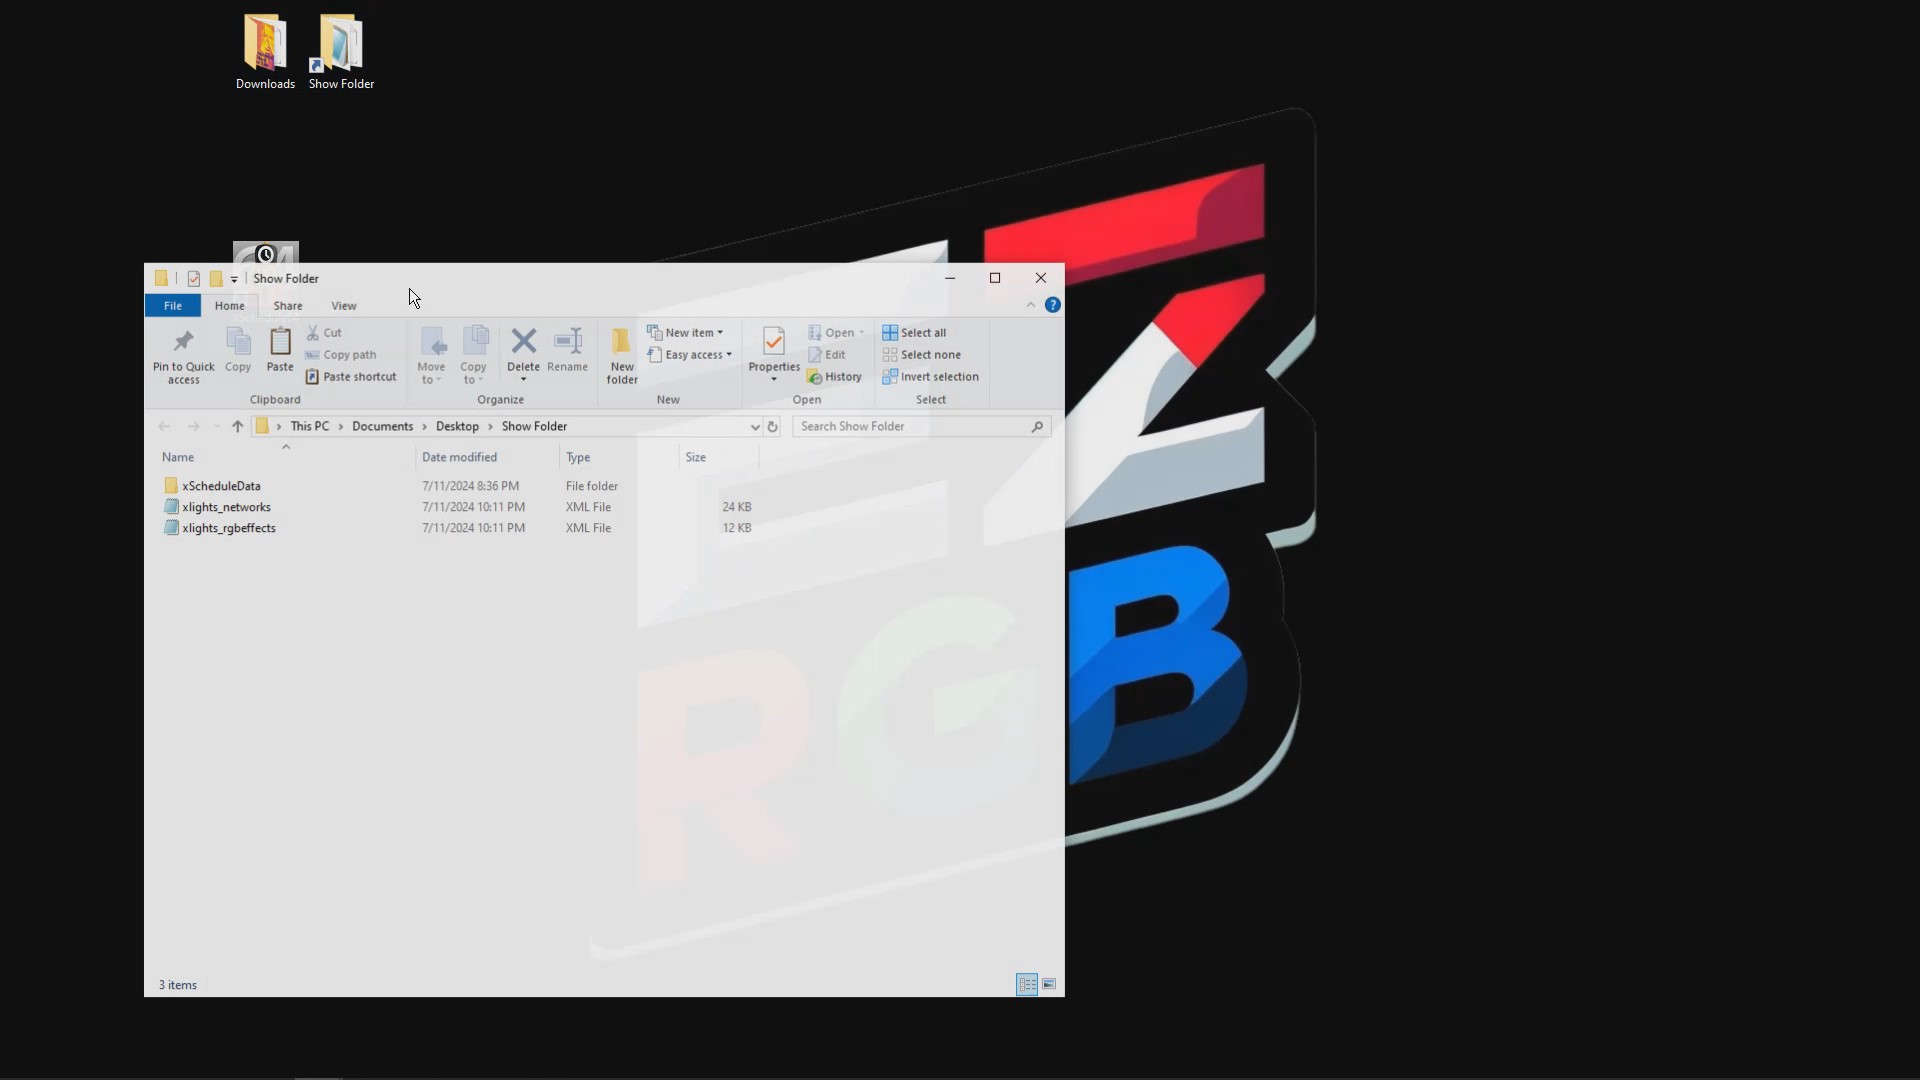
Next, open your xLights show folder and paste both of these files inside to get started.
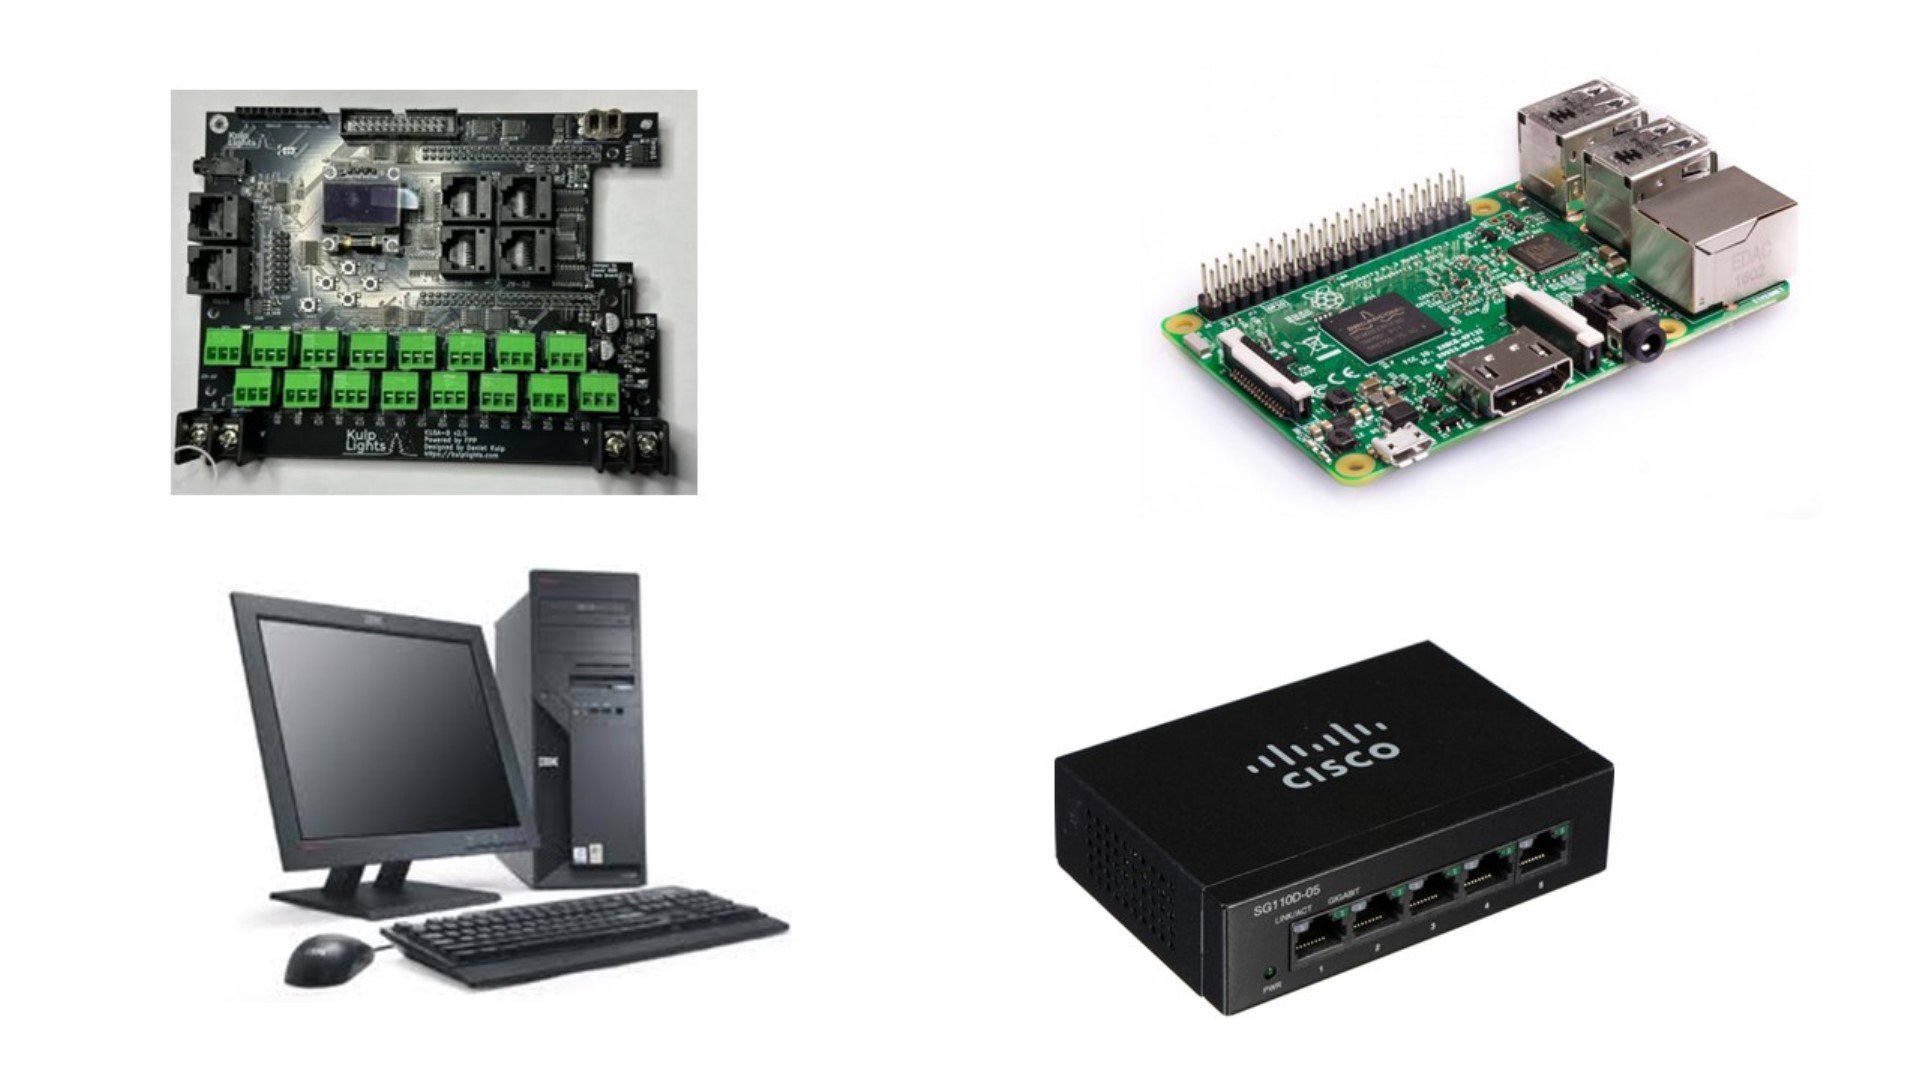
NOTE: For the following steps, this guide assumes you have already completed the necessary setup to
load FPP onto your Raspberry Pi or BeagleBone Black.
Next, connect your Falcon Pi Player (FPP) Controller to your computer network and power up the device.
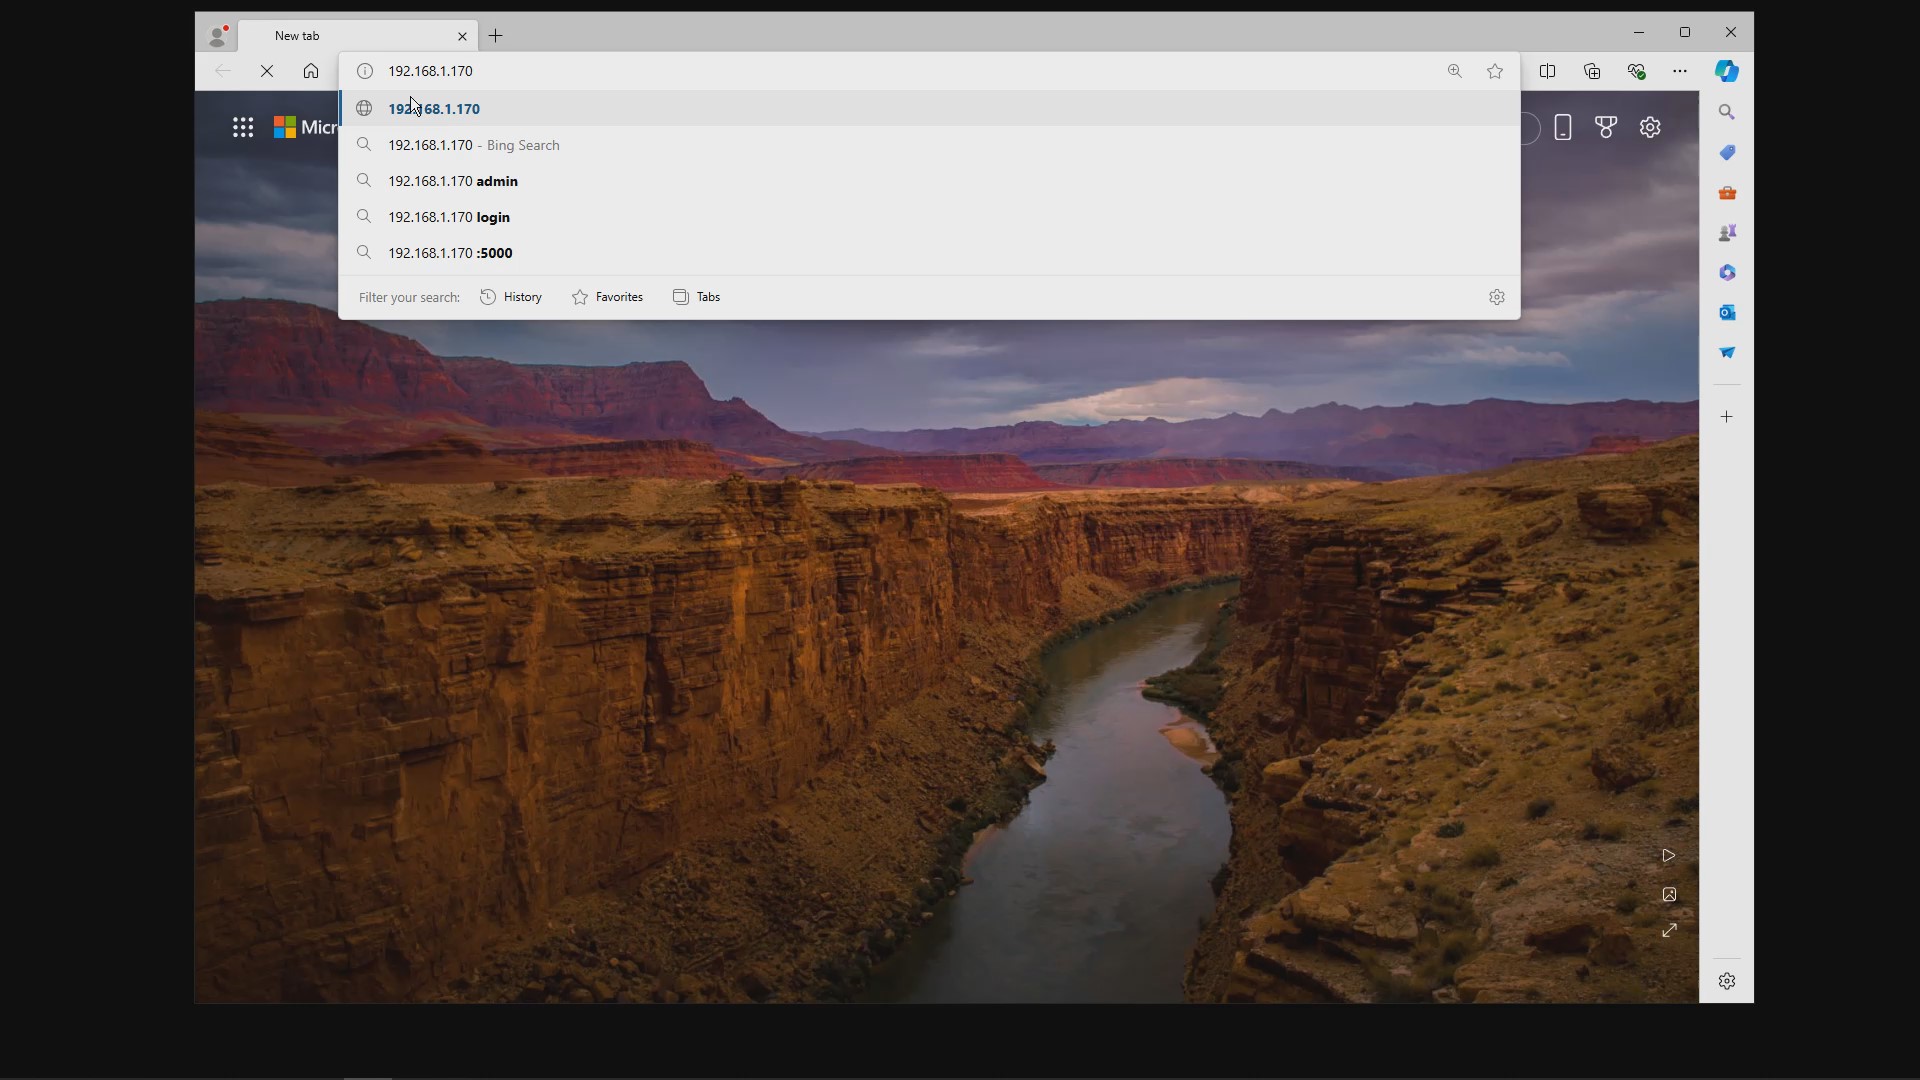
Log into your FPP device by opening your web browser and entering its assigned IP address into the
address field.
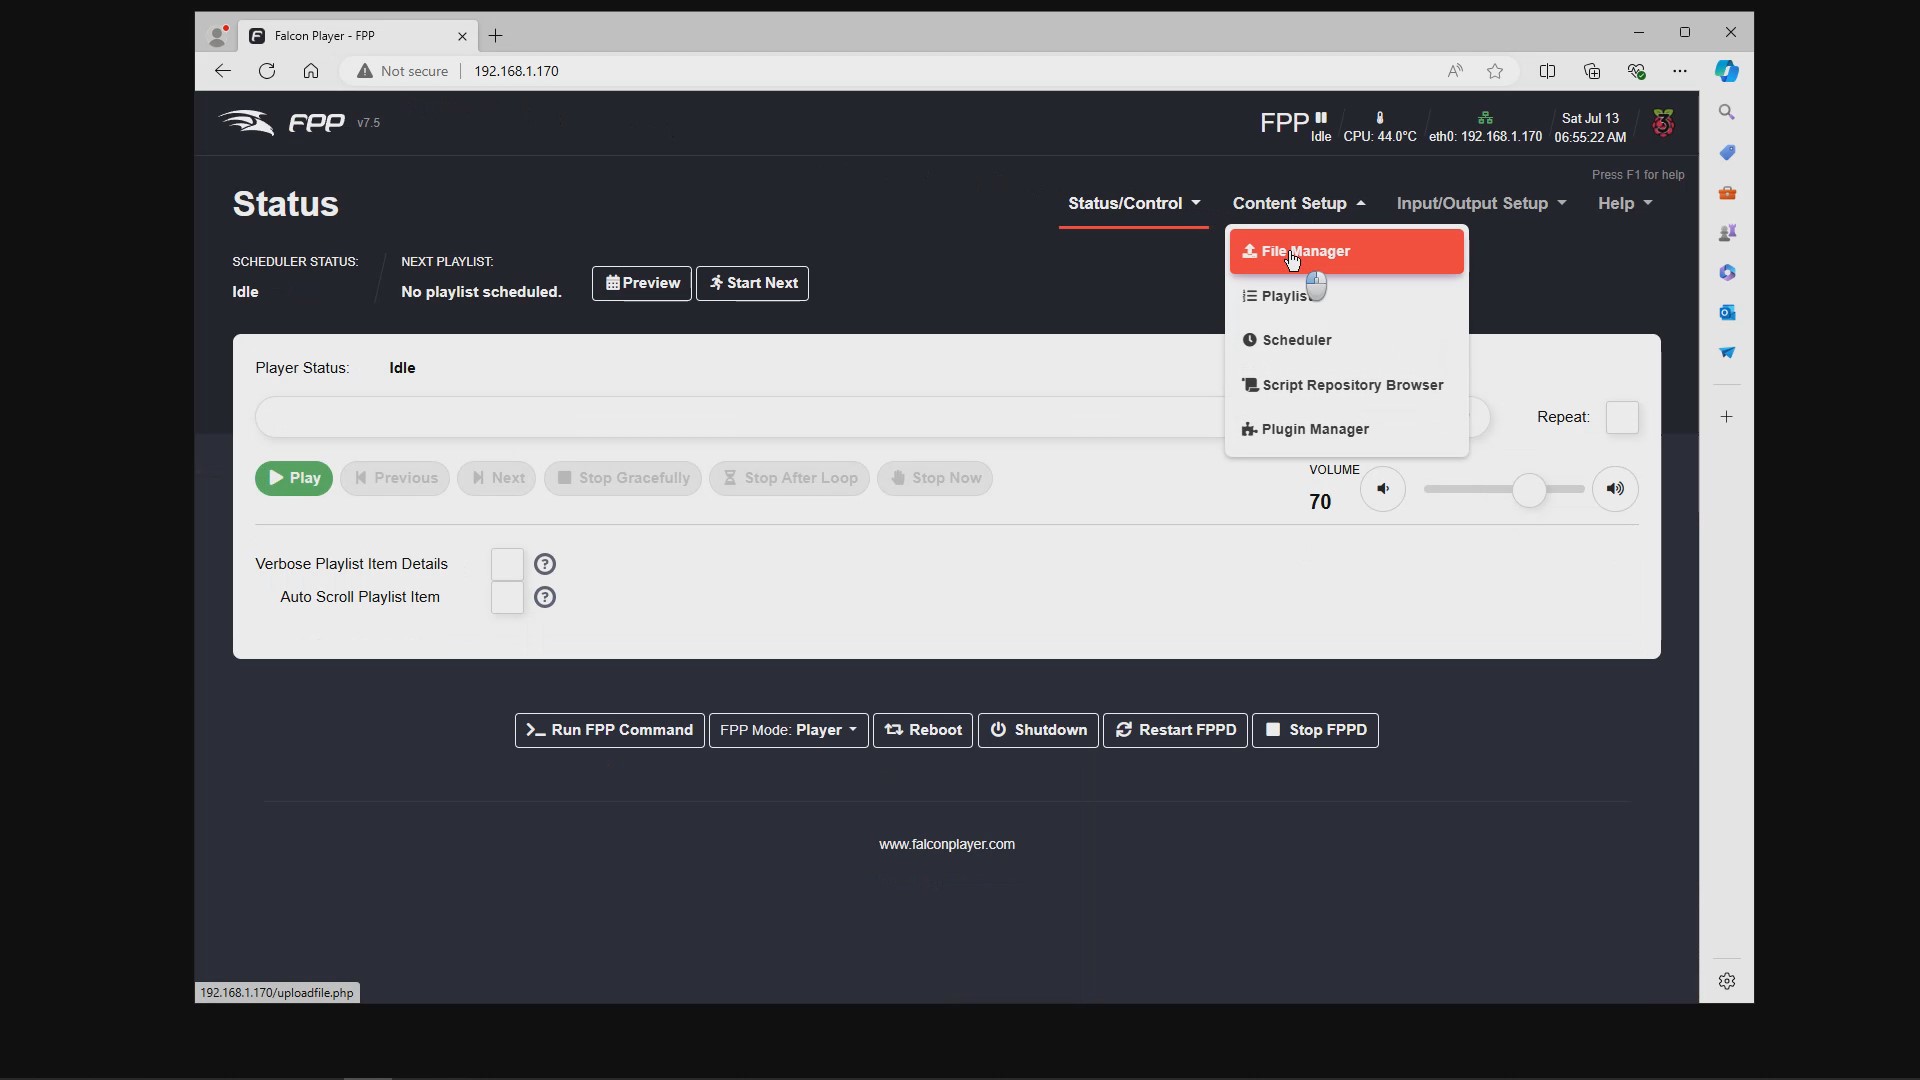
From the FPP main screen click on the “Content Setup” menu at the top of the page. Then, select the “File
Manager” option.
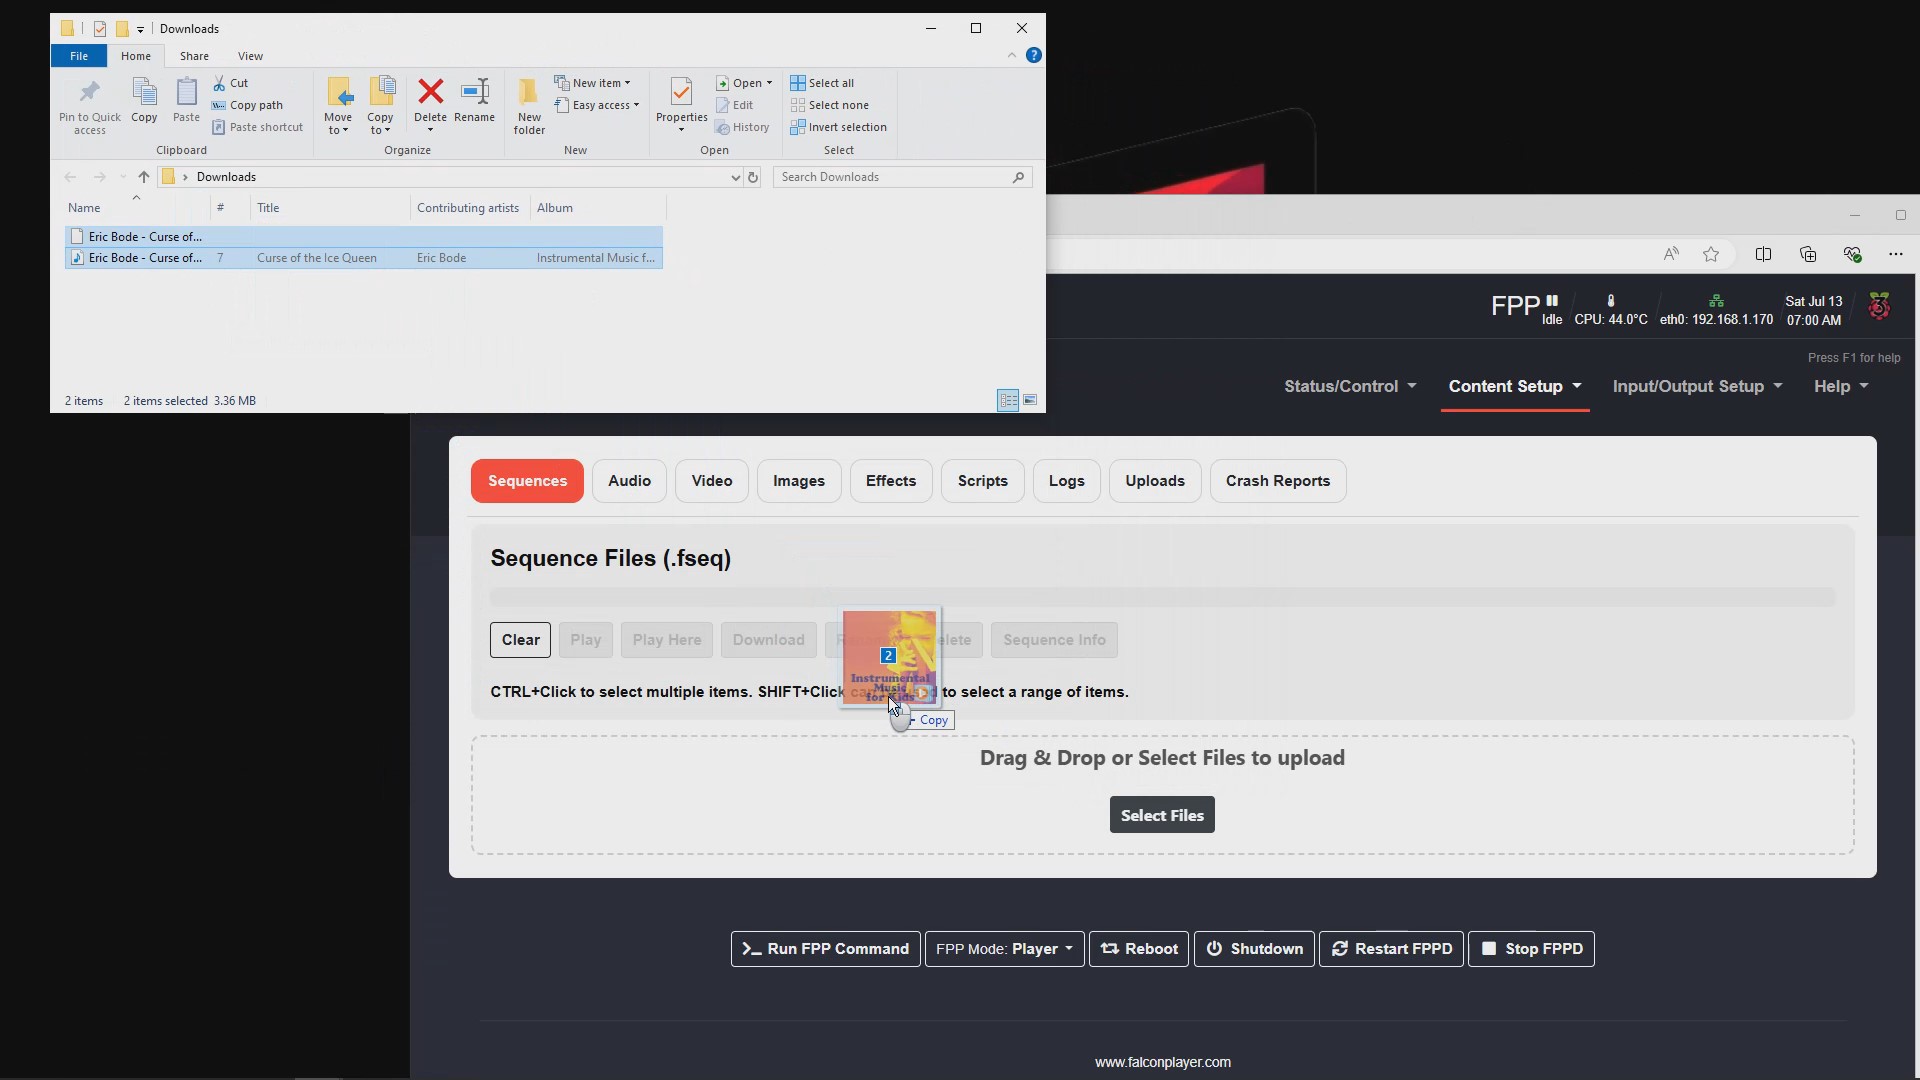
Next, return to your original download folder and select the sequence file and the MP3 file.
Drag both files into the Drag and Drop section of the FPP File Manager.
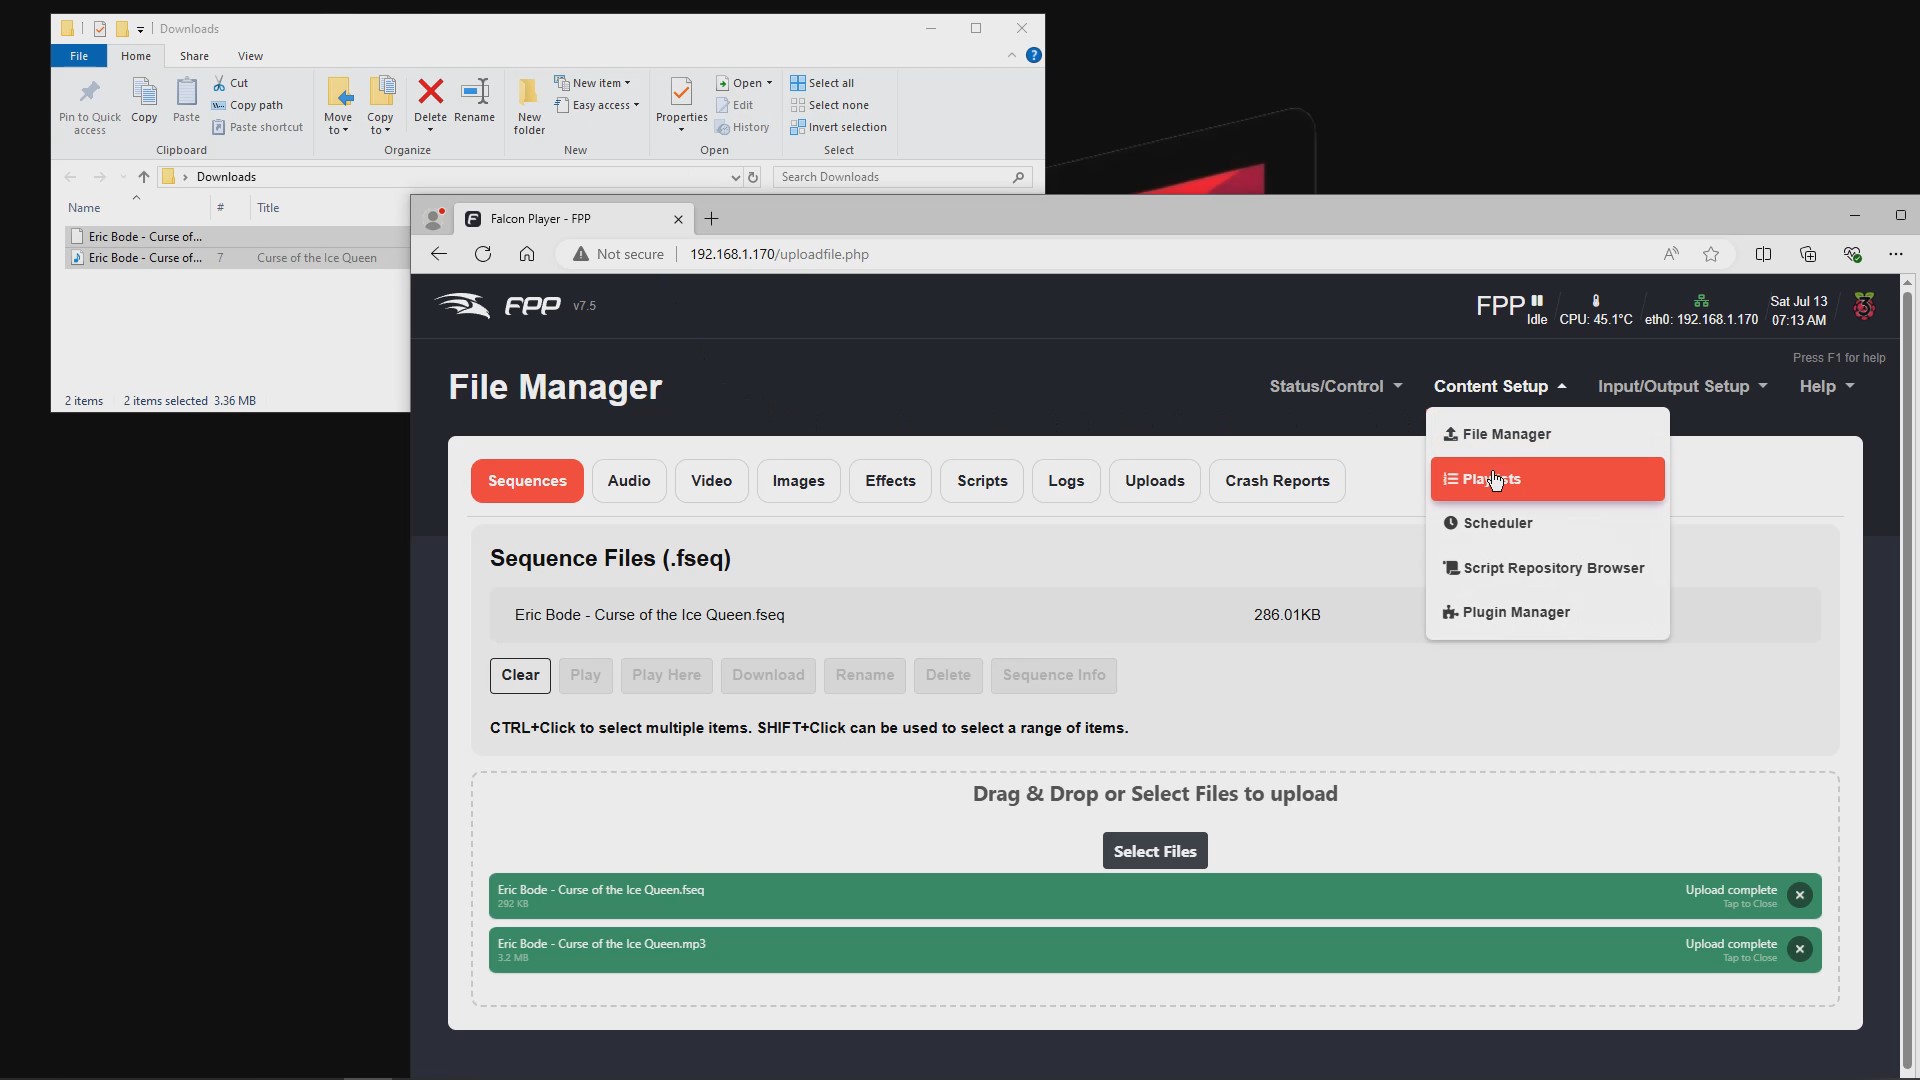
Now navigate to the “Content Setup” menu, then click on “Playlists.”
From the Playlist page, click the “Add New Playlist” button.
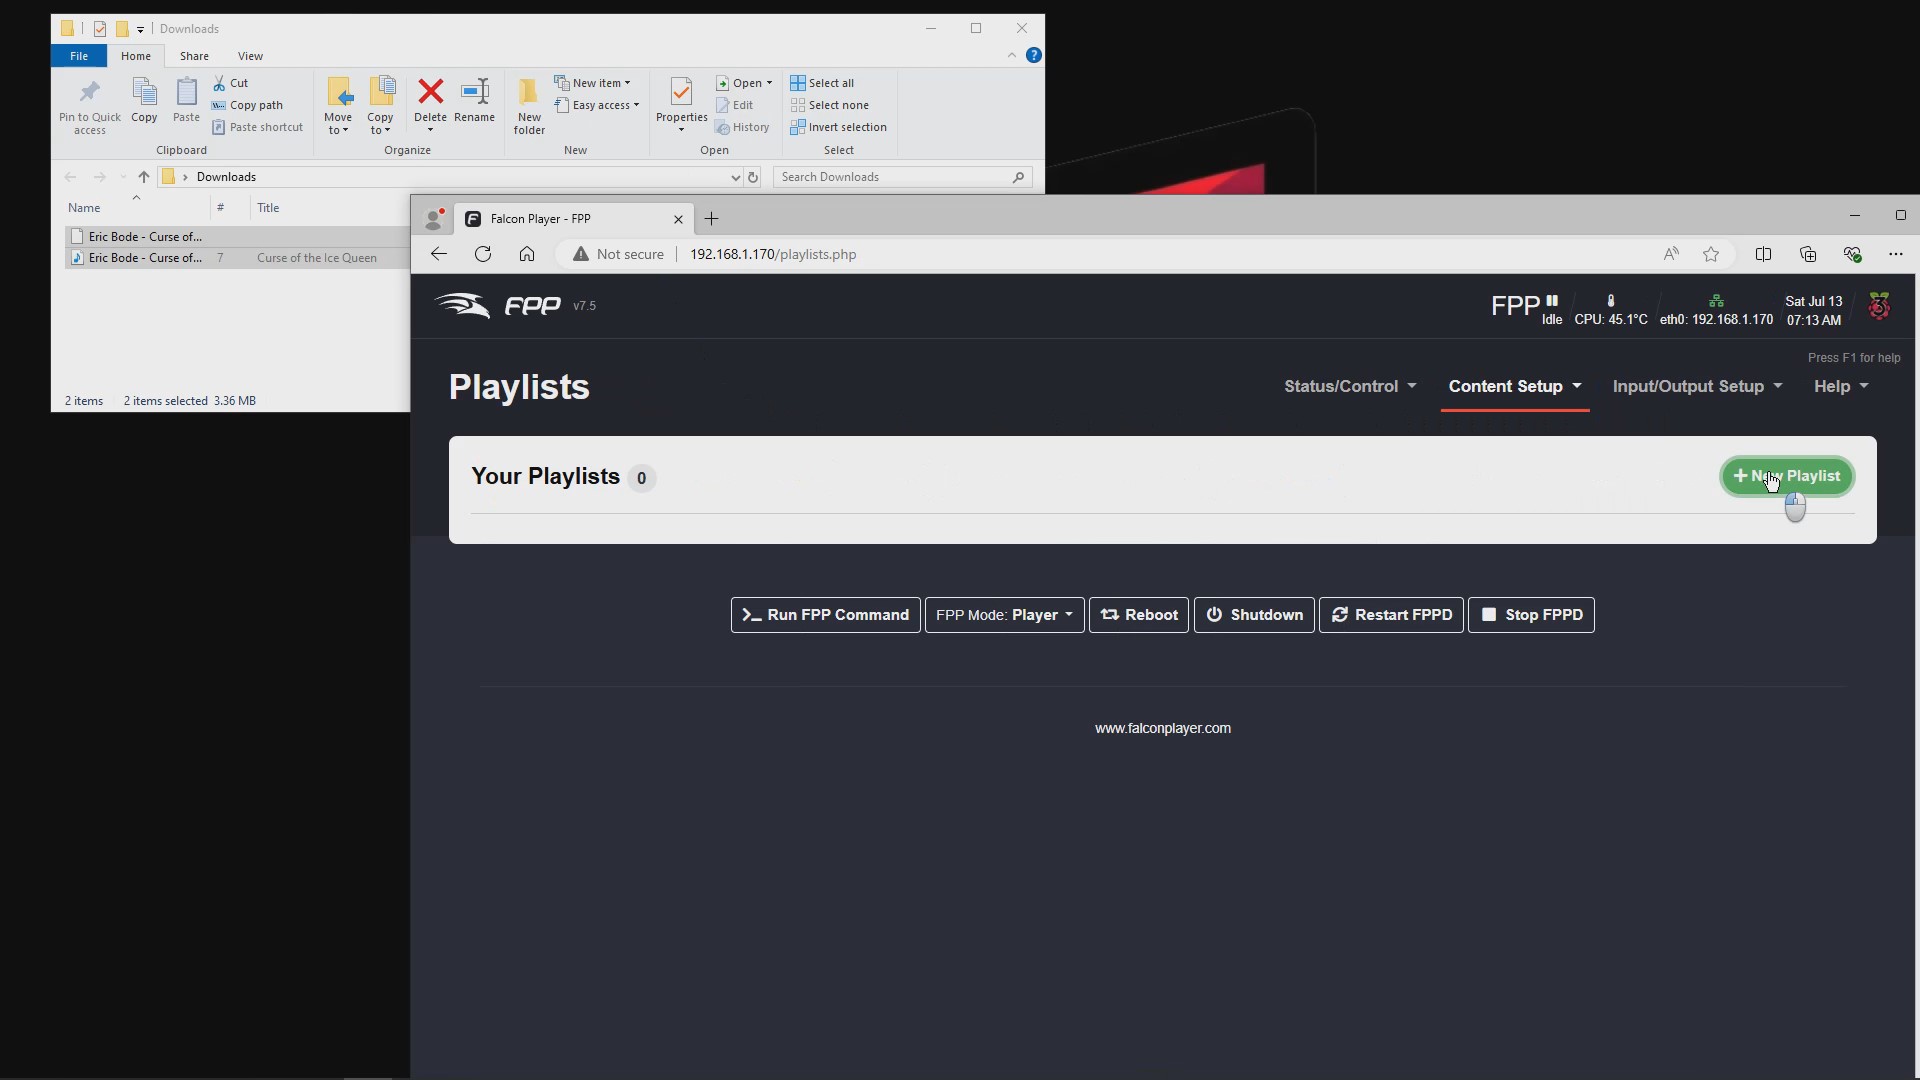
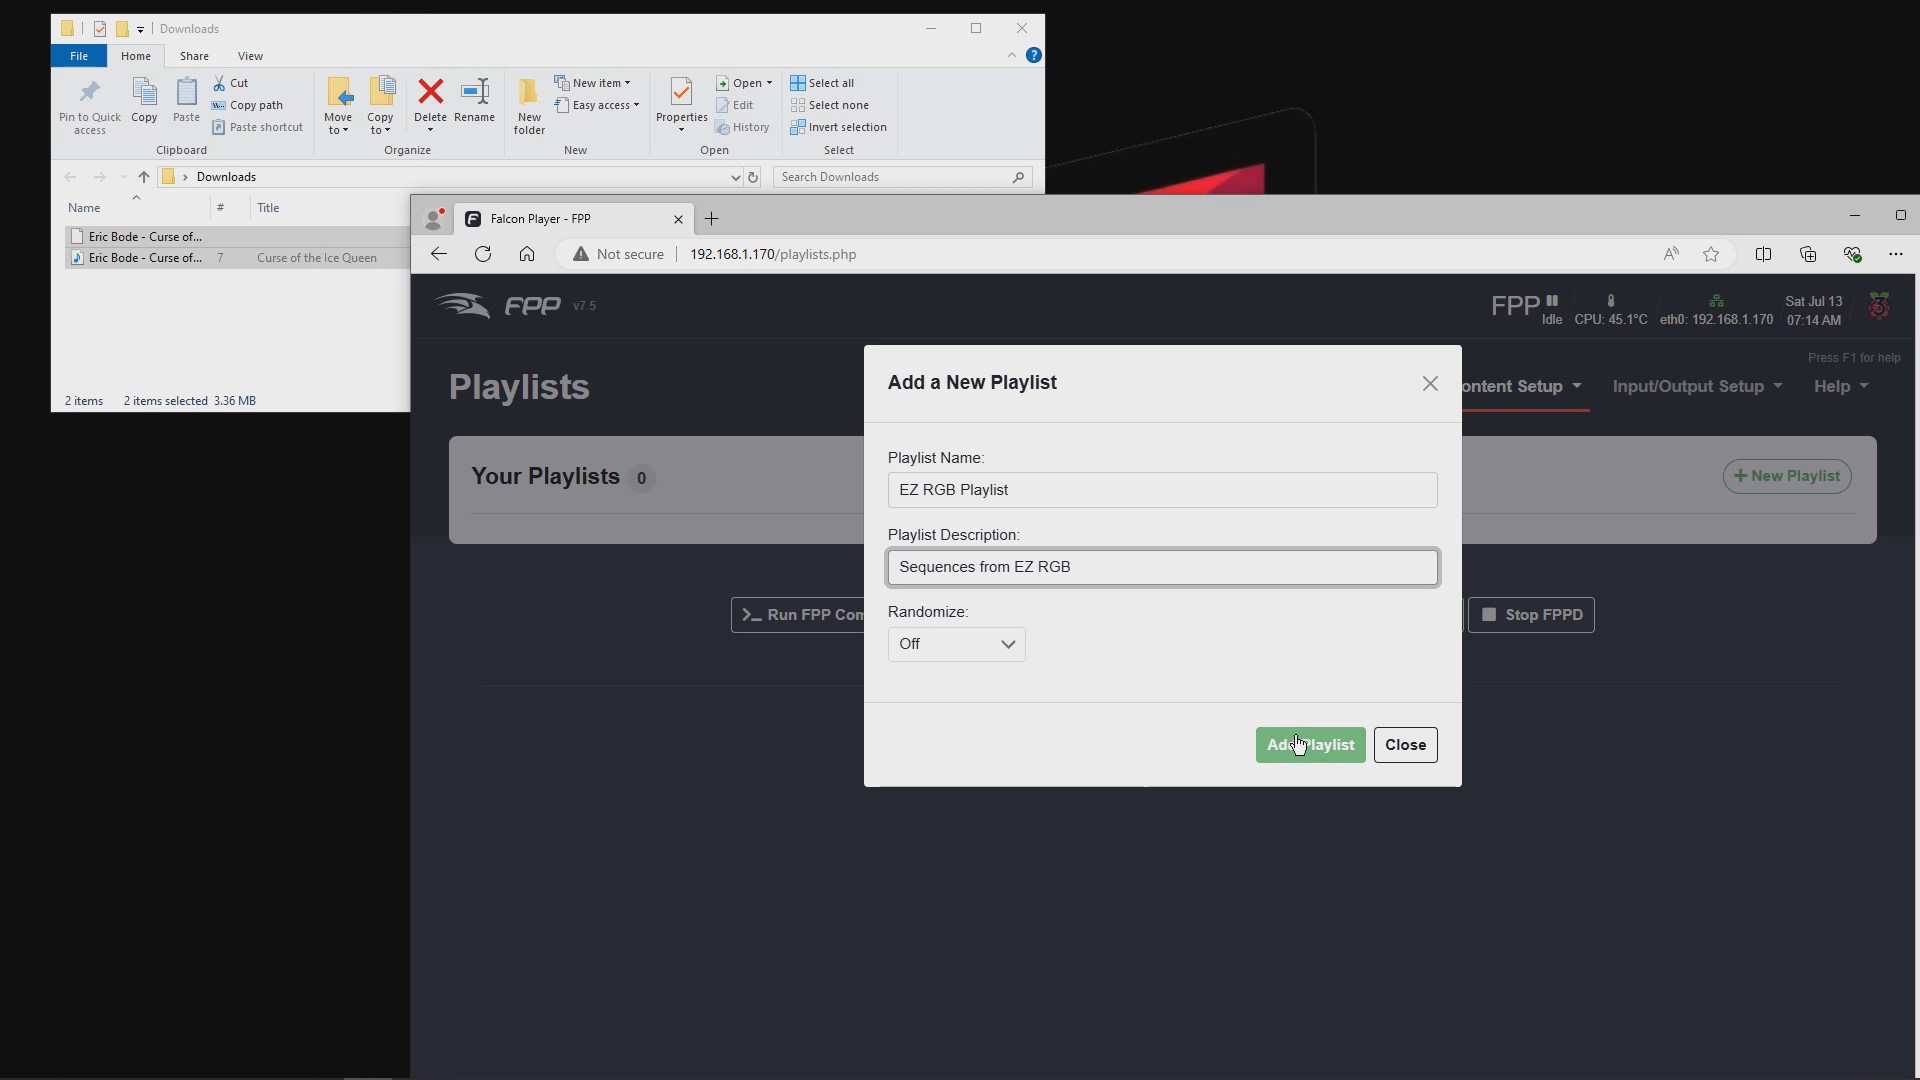
Fill in the Playlist Name with any title you like.
You may also give a description of this playlist in the Playlist Description box.
Now you can click the “Add Playlist” button to create this new playlist.
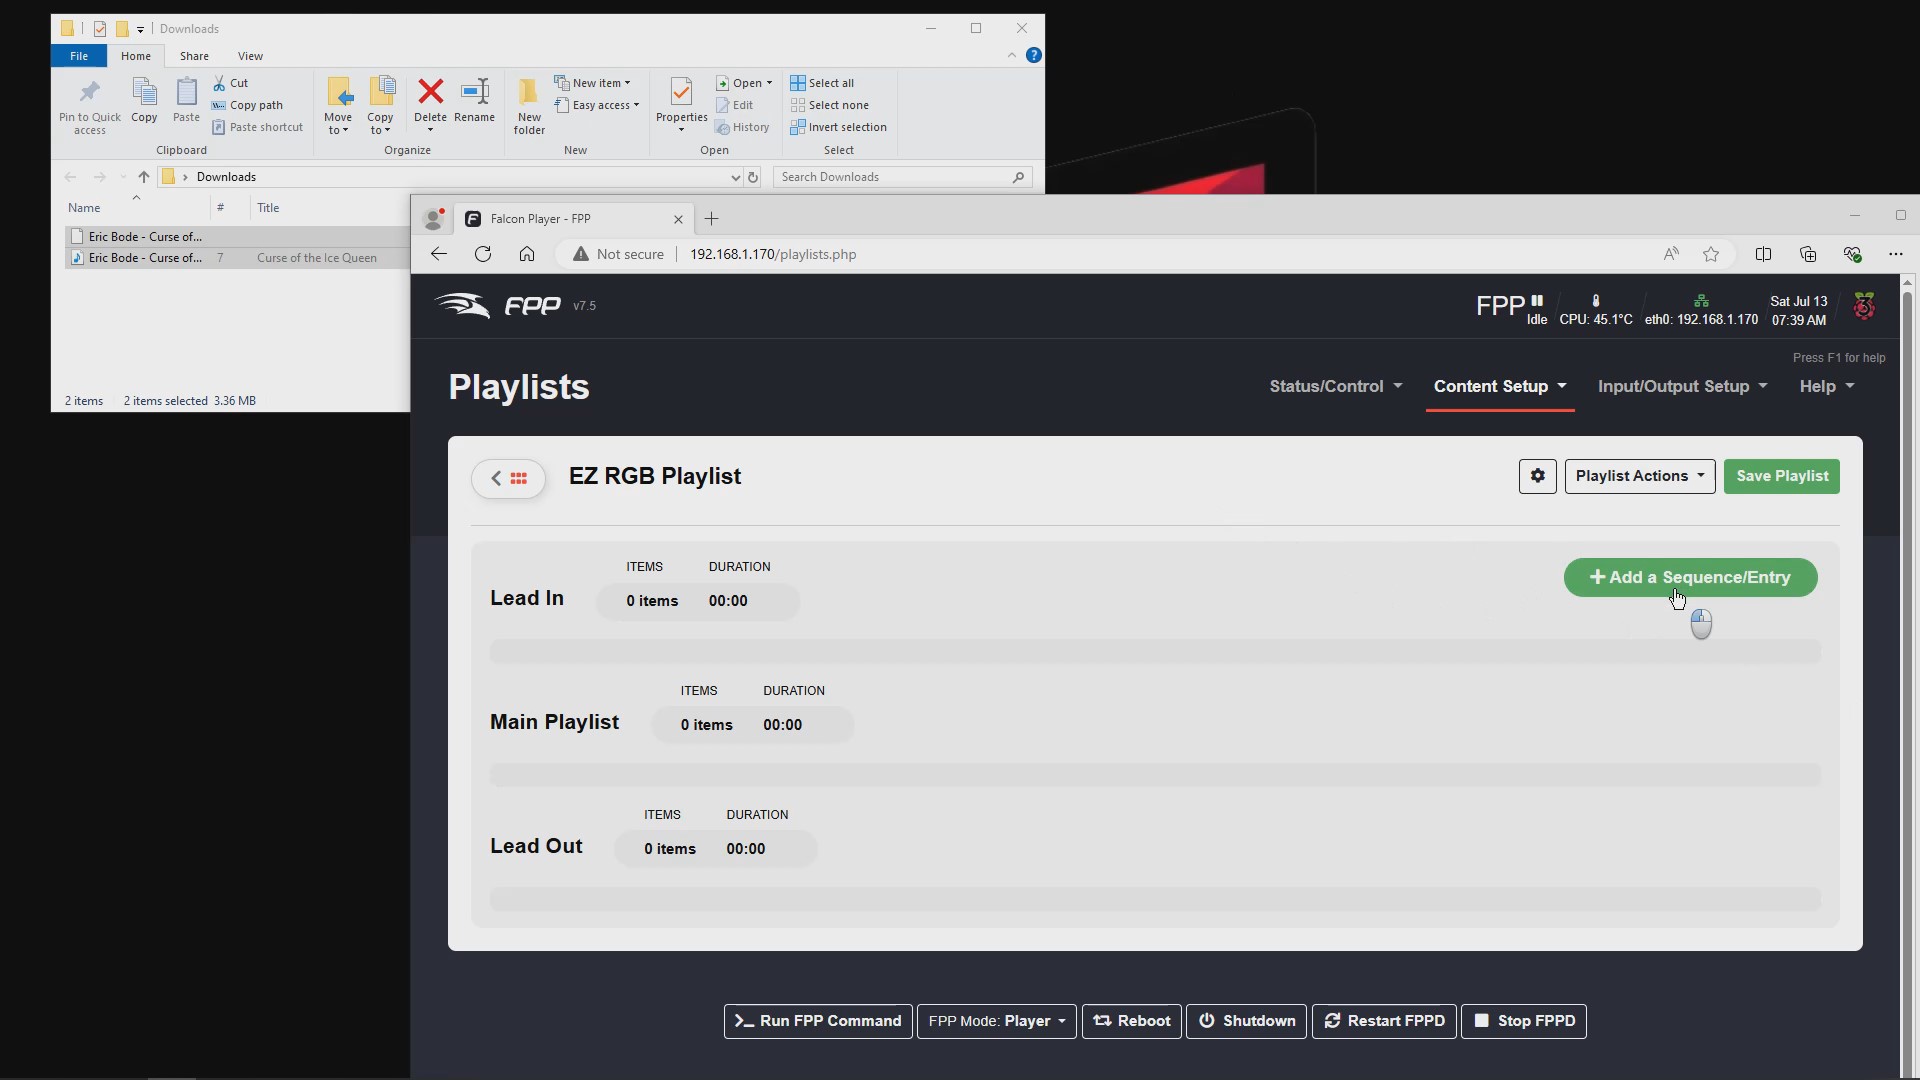
Next, click on the “Add A Sequence/Entry” button.
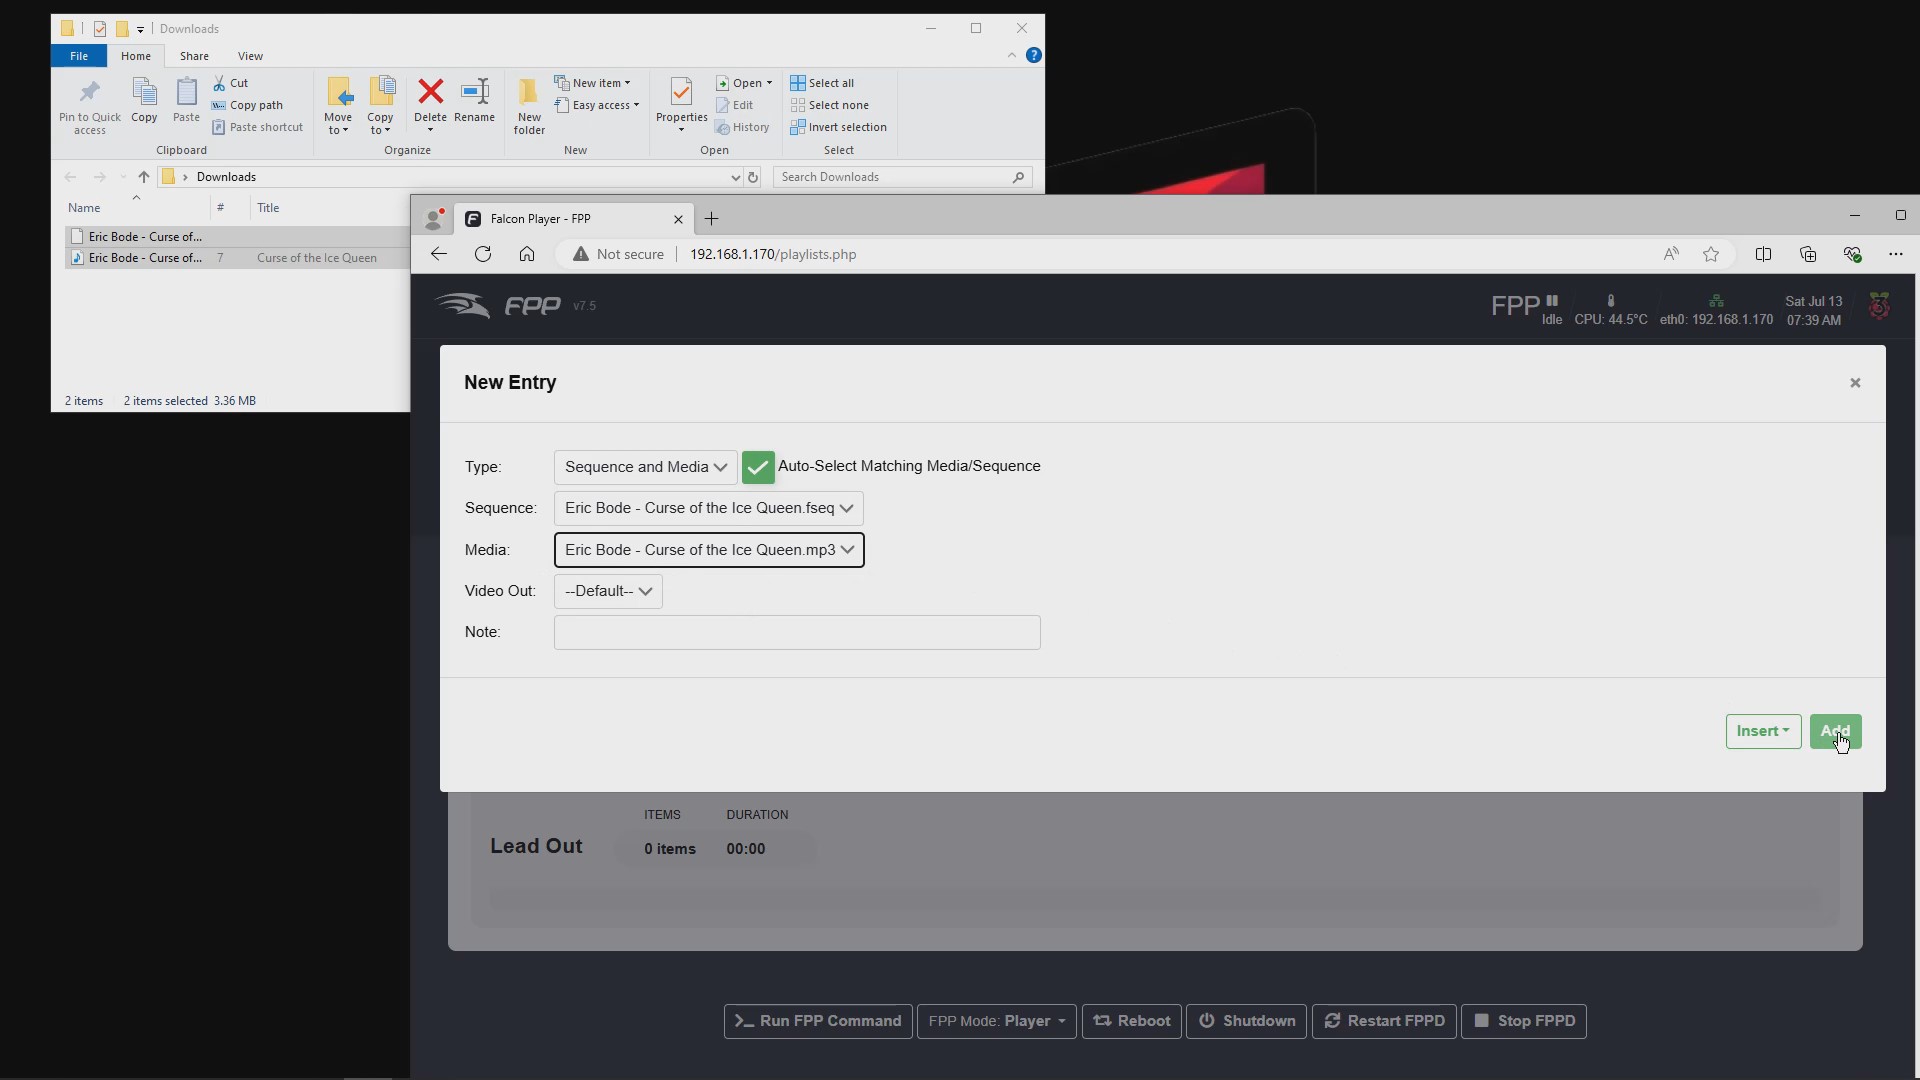
Select the sequence FSEQ file in the Sequence dropdown box.
Next, select the corresponding MP3 file in the Media dropdown box.
Then, click the “Add” button at the bottom right of the page.
Make sure to save the playlist by clicking the “Save Playlist” button.
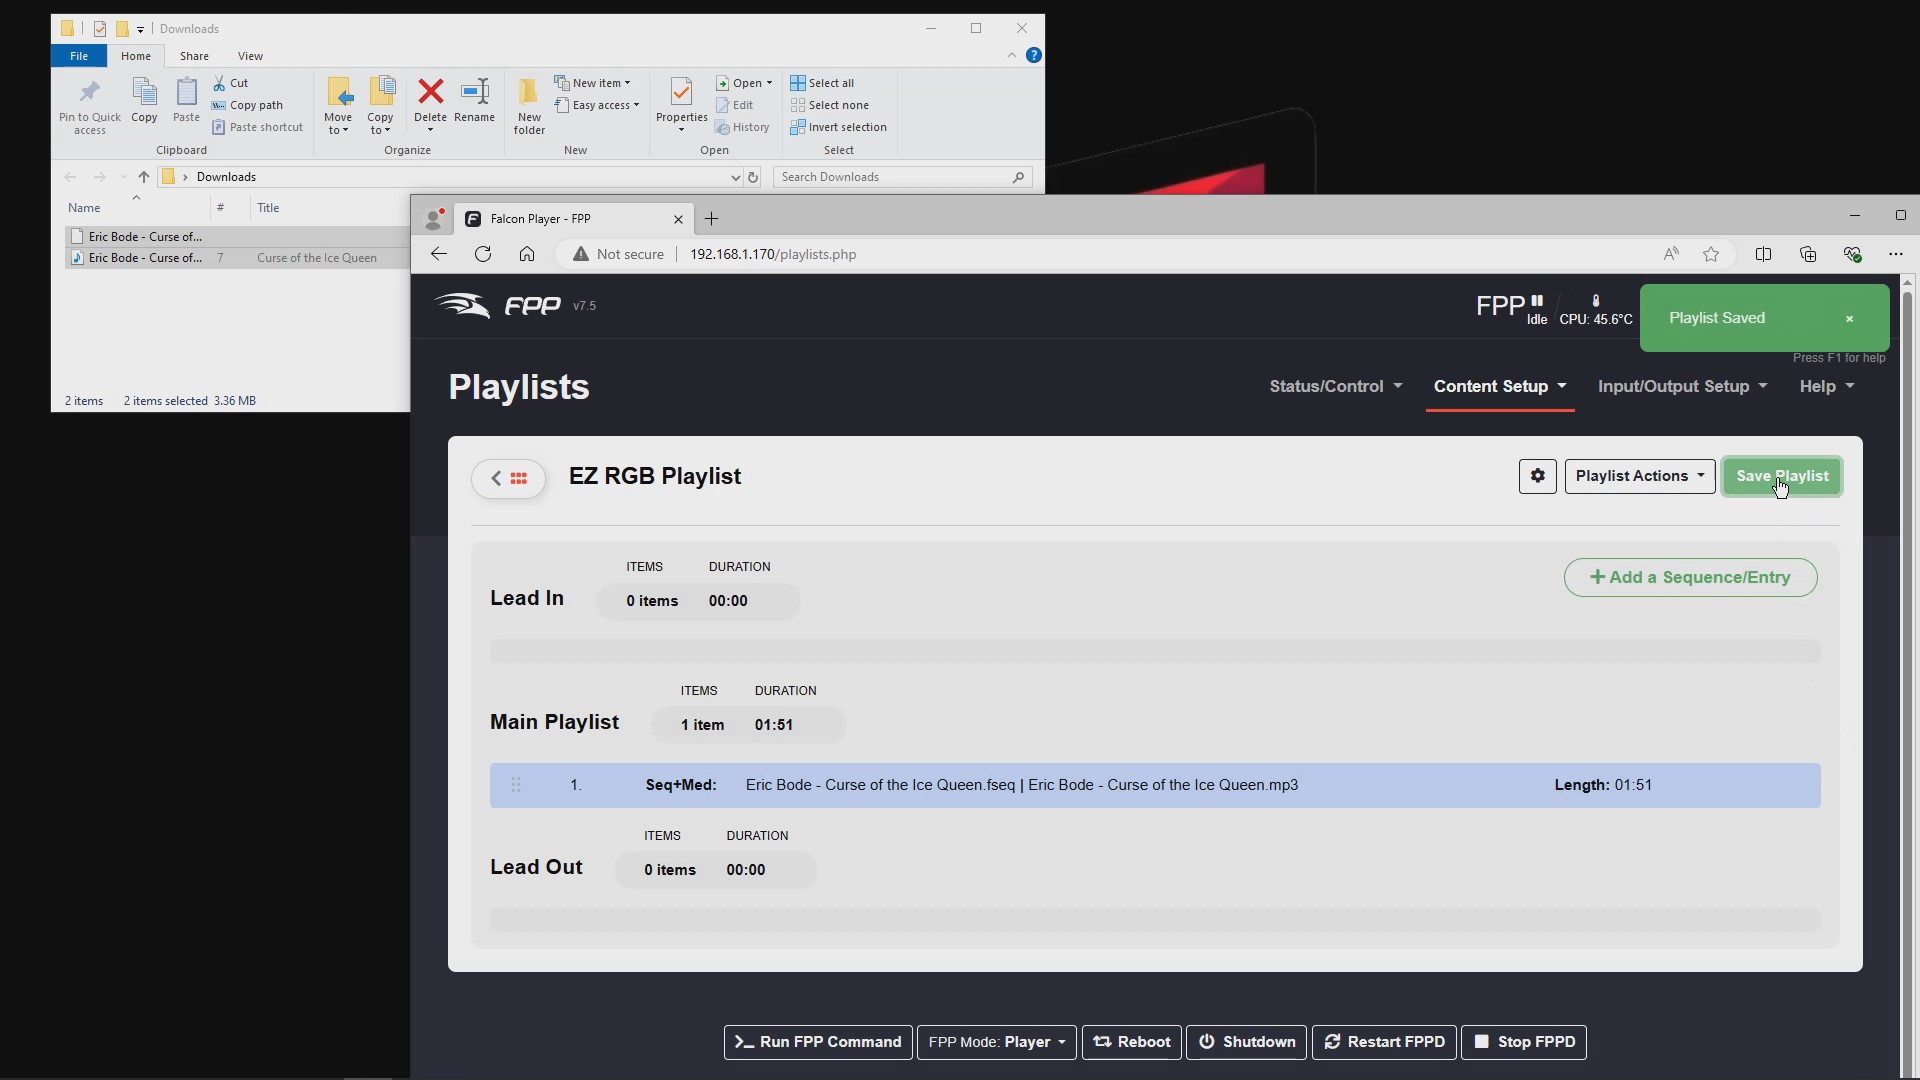
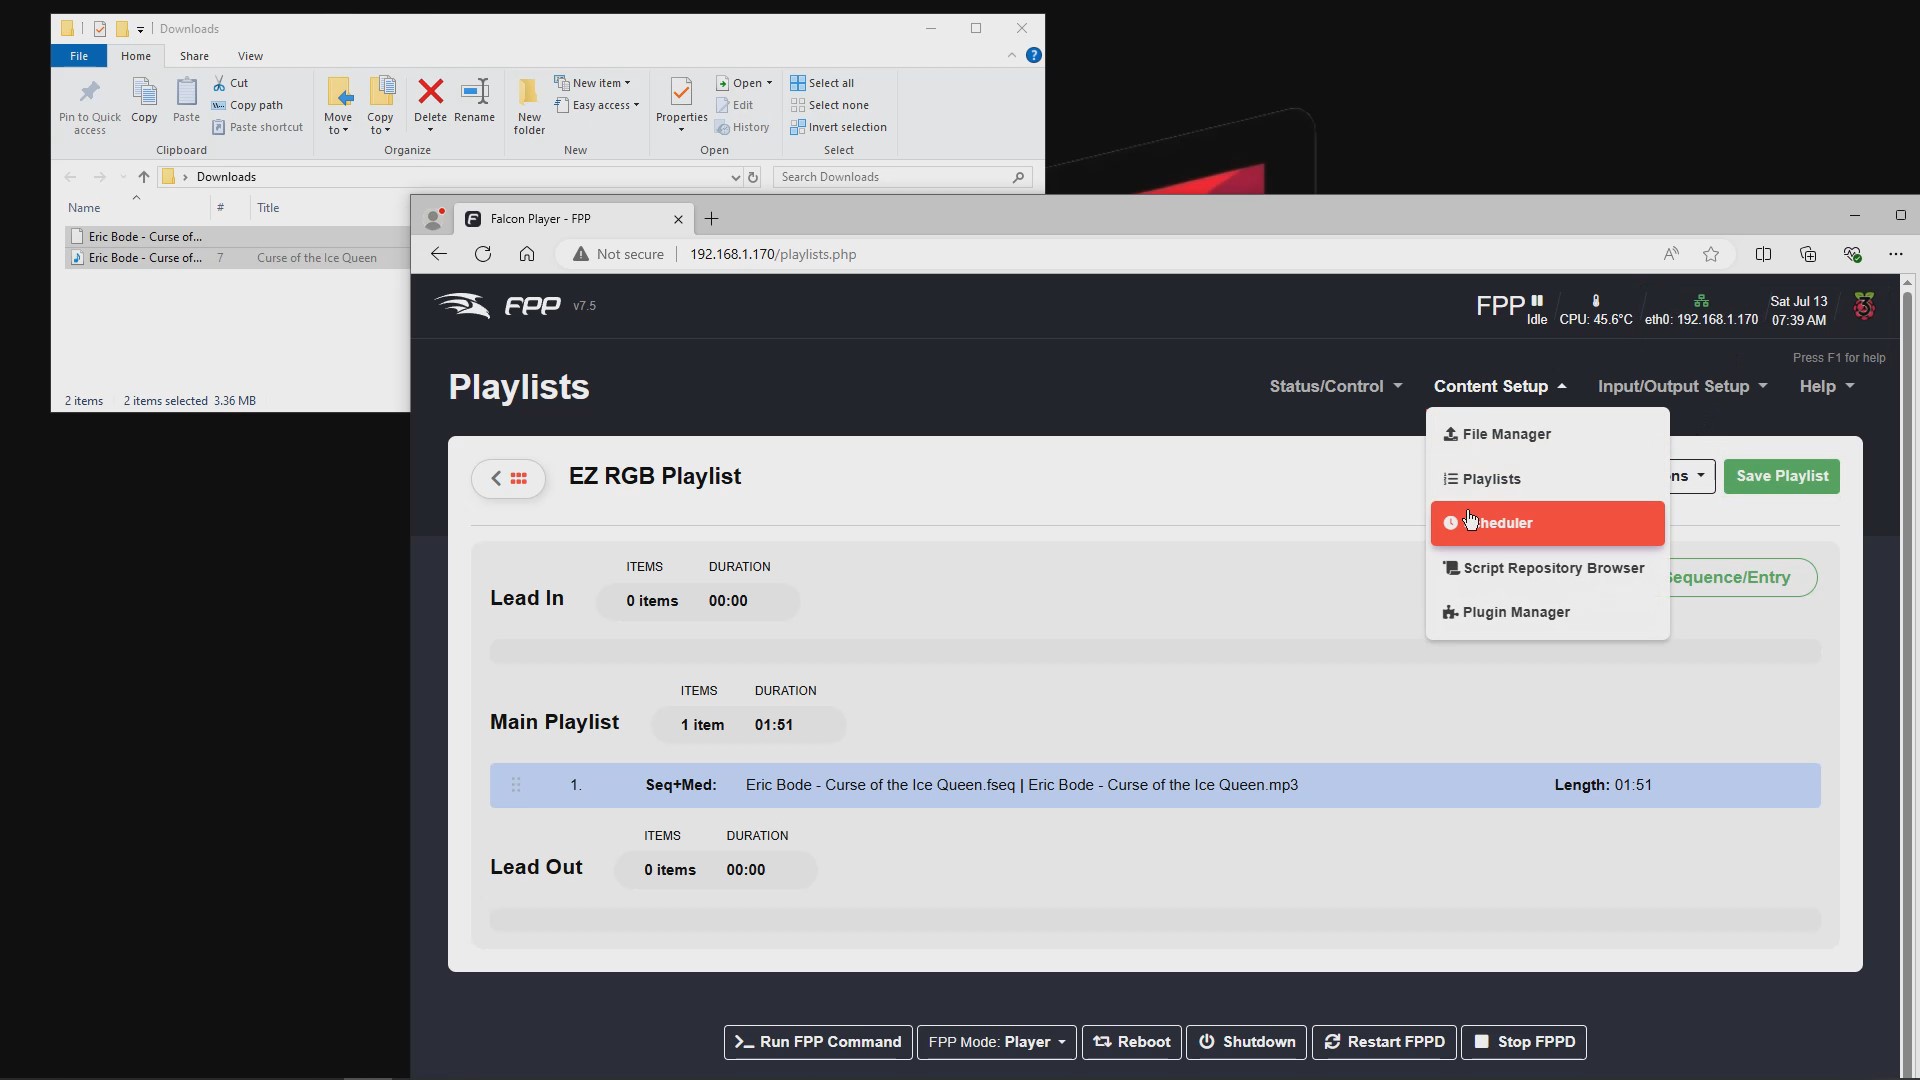
Now let’s go back to the “Content Setup” menu and click on the “Scheduler.”
On the Scheduler page, click the “Add” button to begin scheduling.
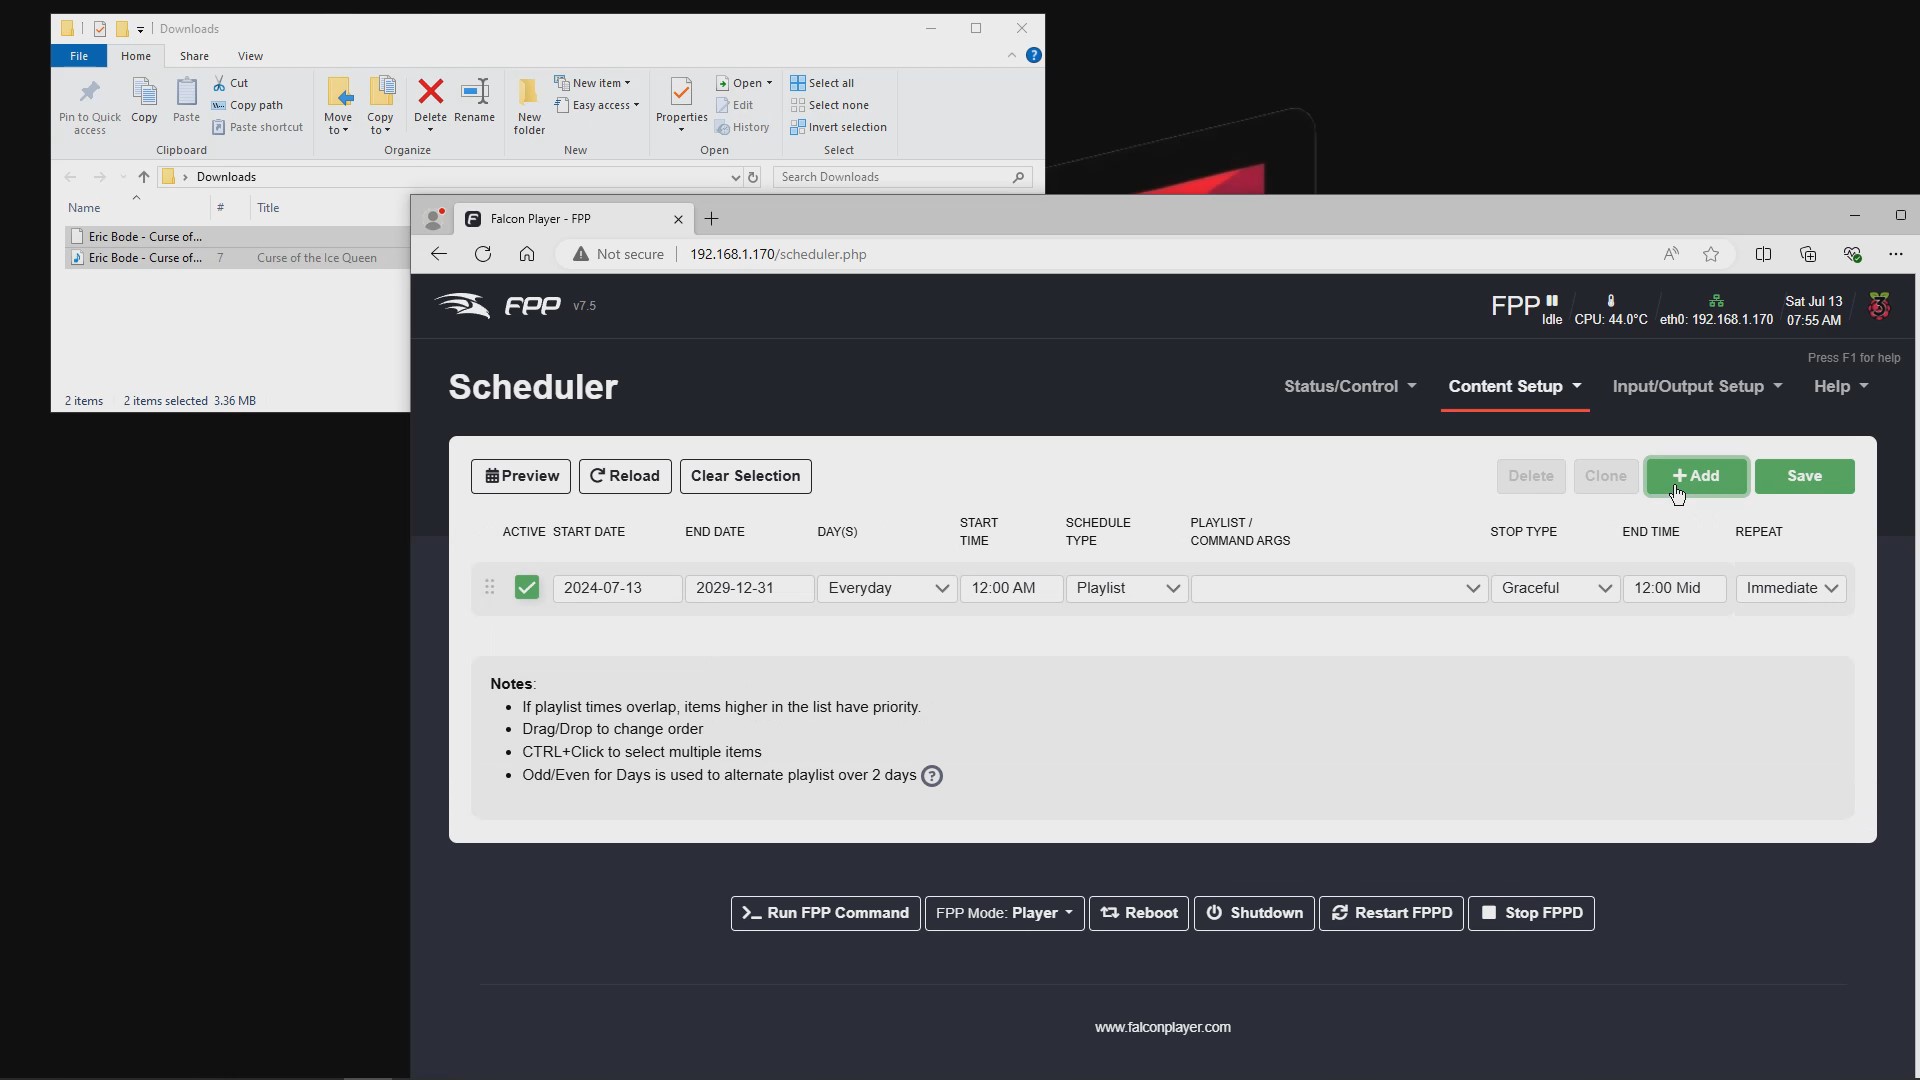
Fill in a start date and end date. Select the day or days for the schedule to play.
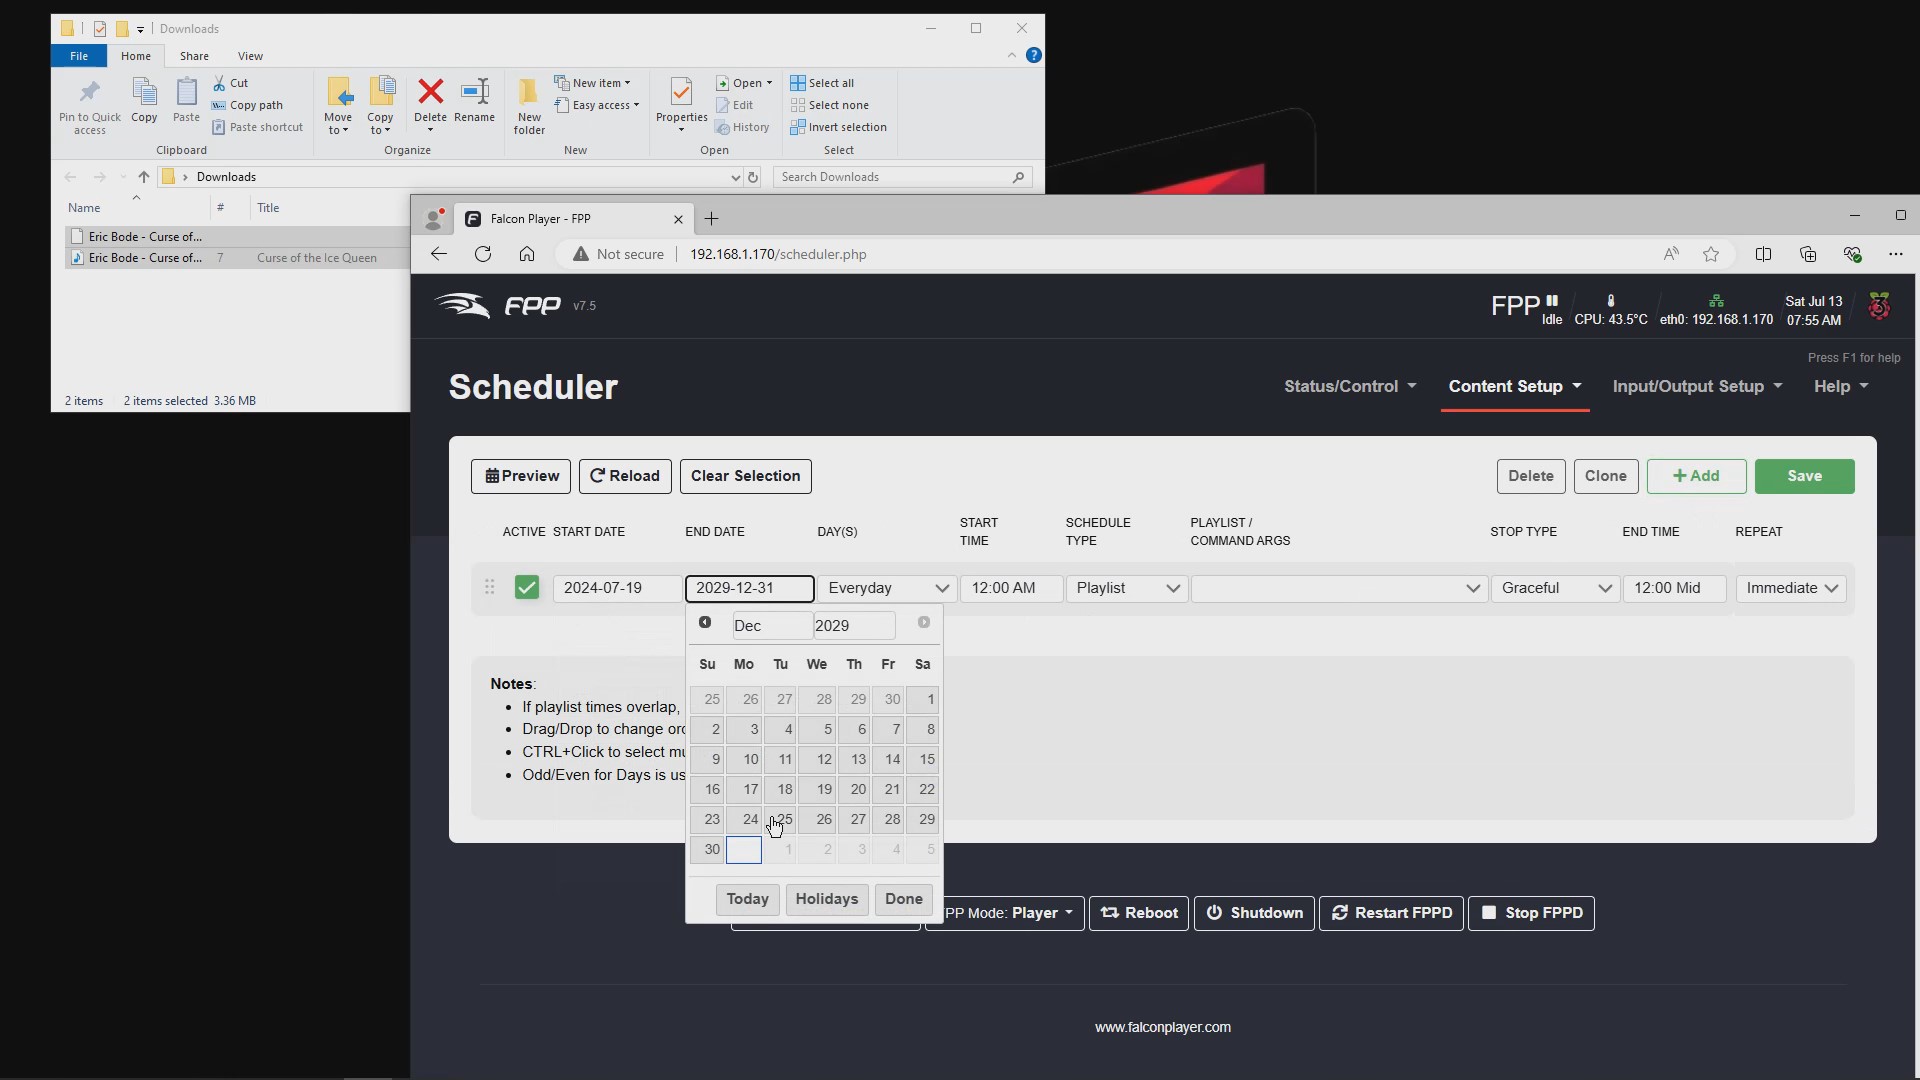
Click on the “Start Time” box and scroll to find the start time for this playlist to run.
Leave the “Schedule Type” dropdown at its default setting of “Playlist.”
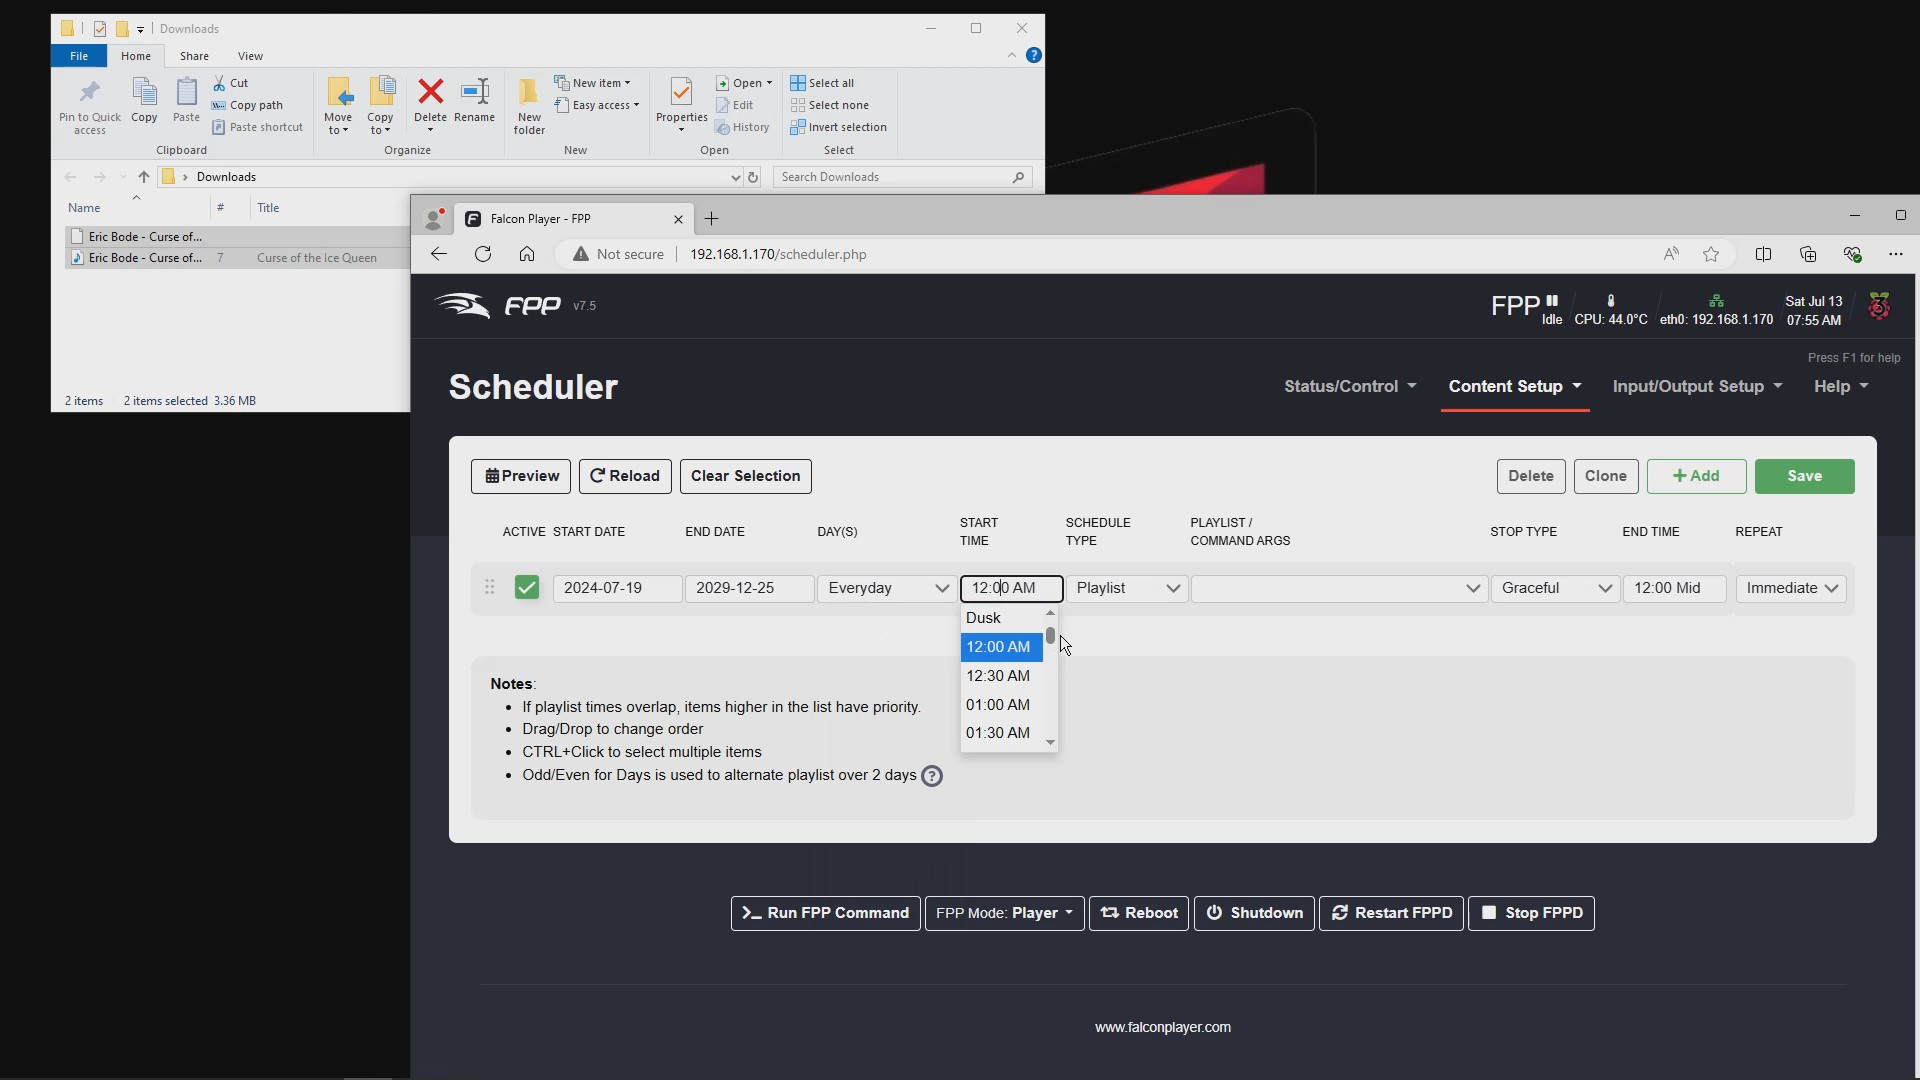
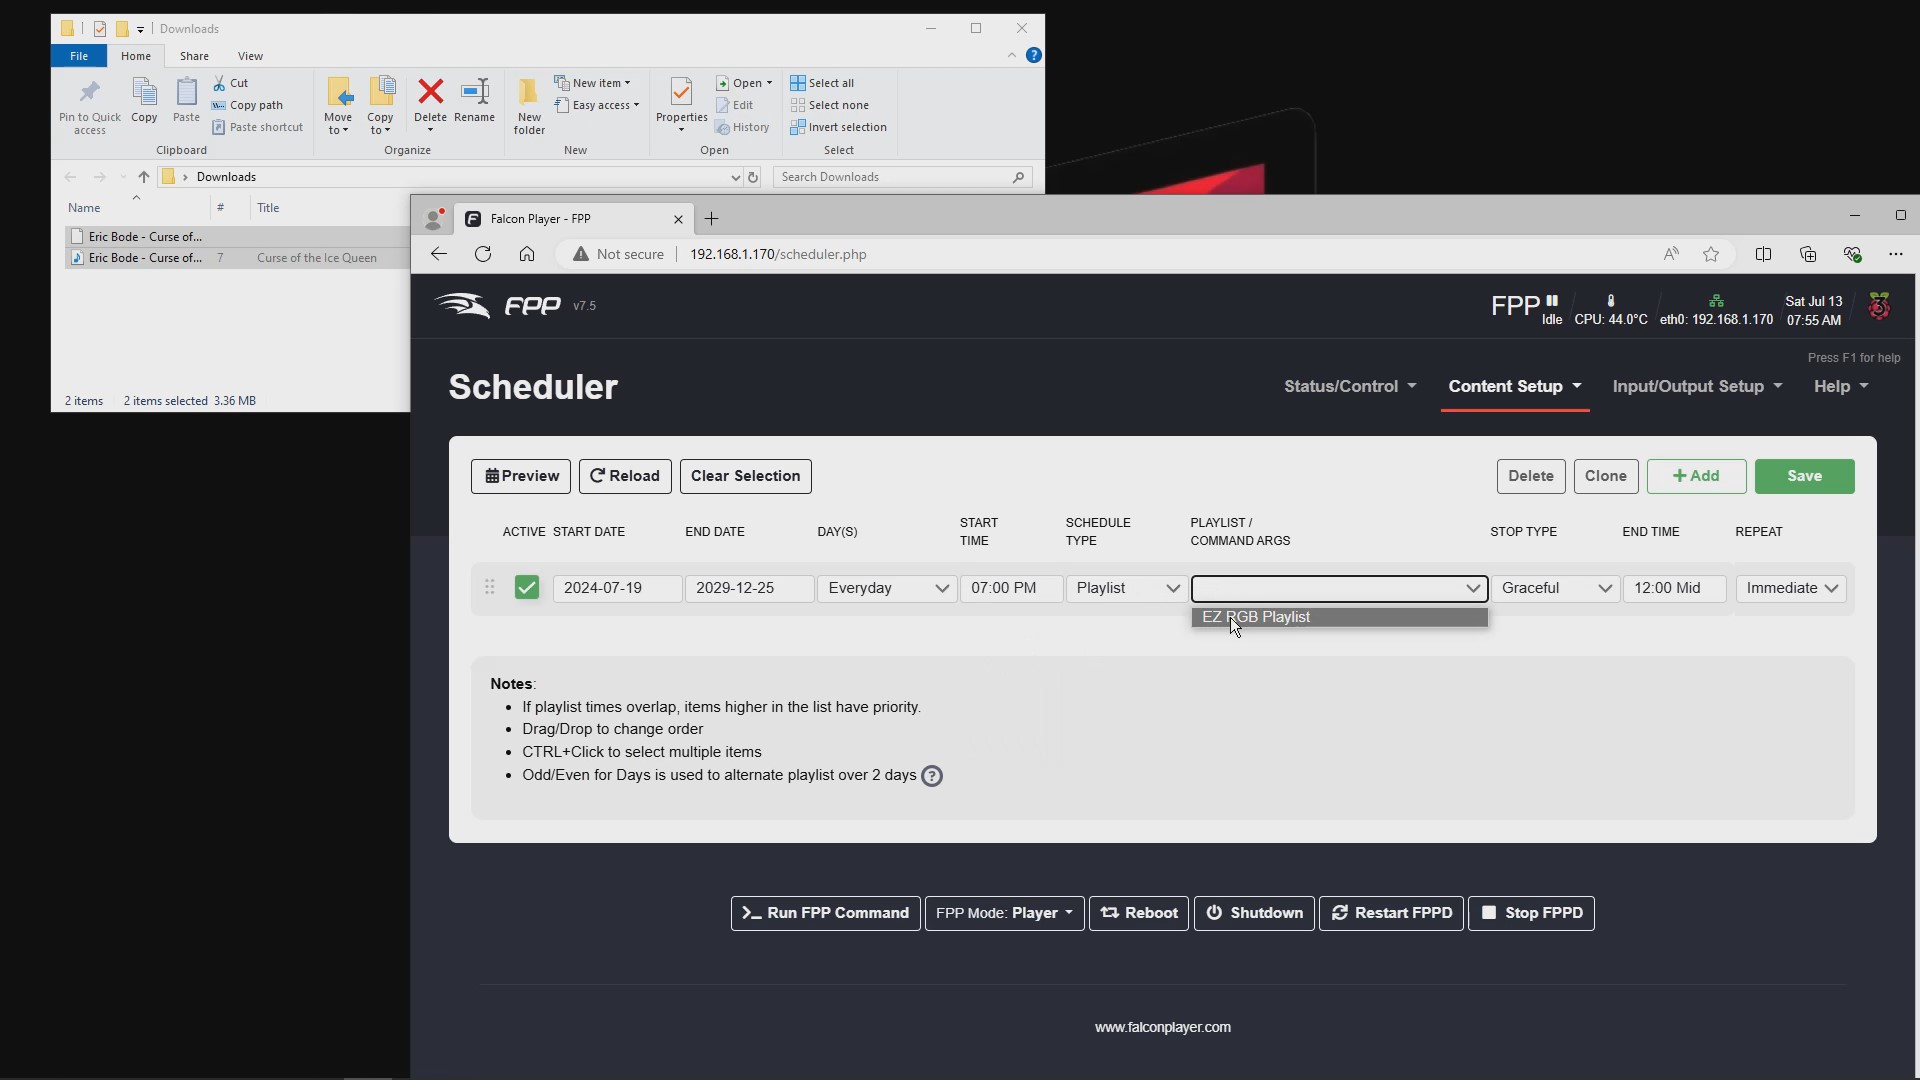
In the “Playlist/Command Args” field, you should see your playlist name. Select it.
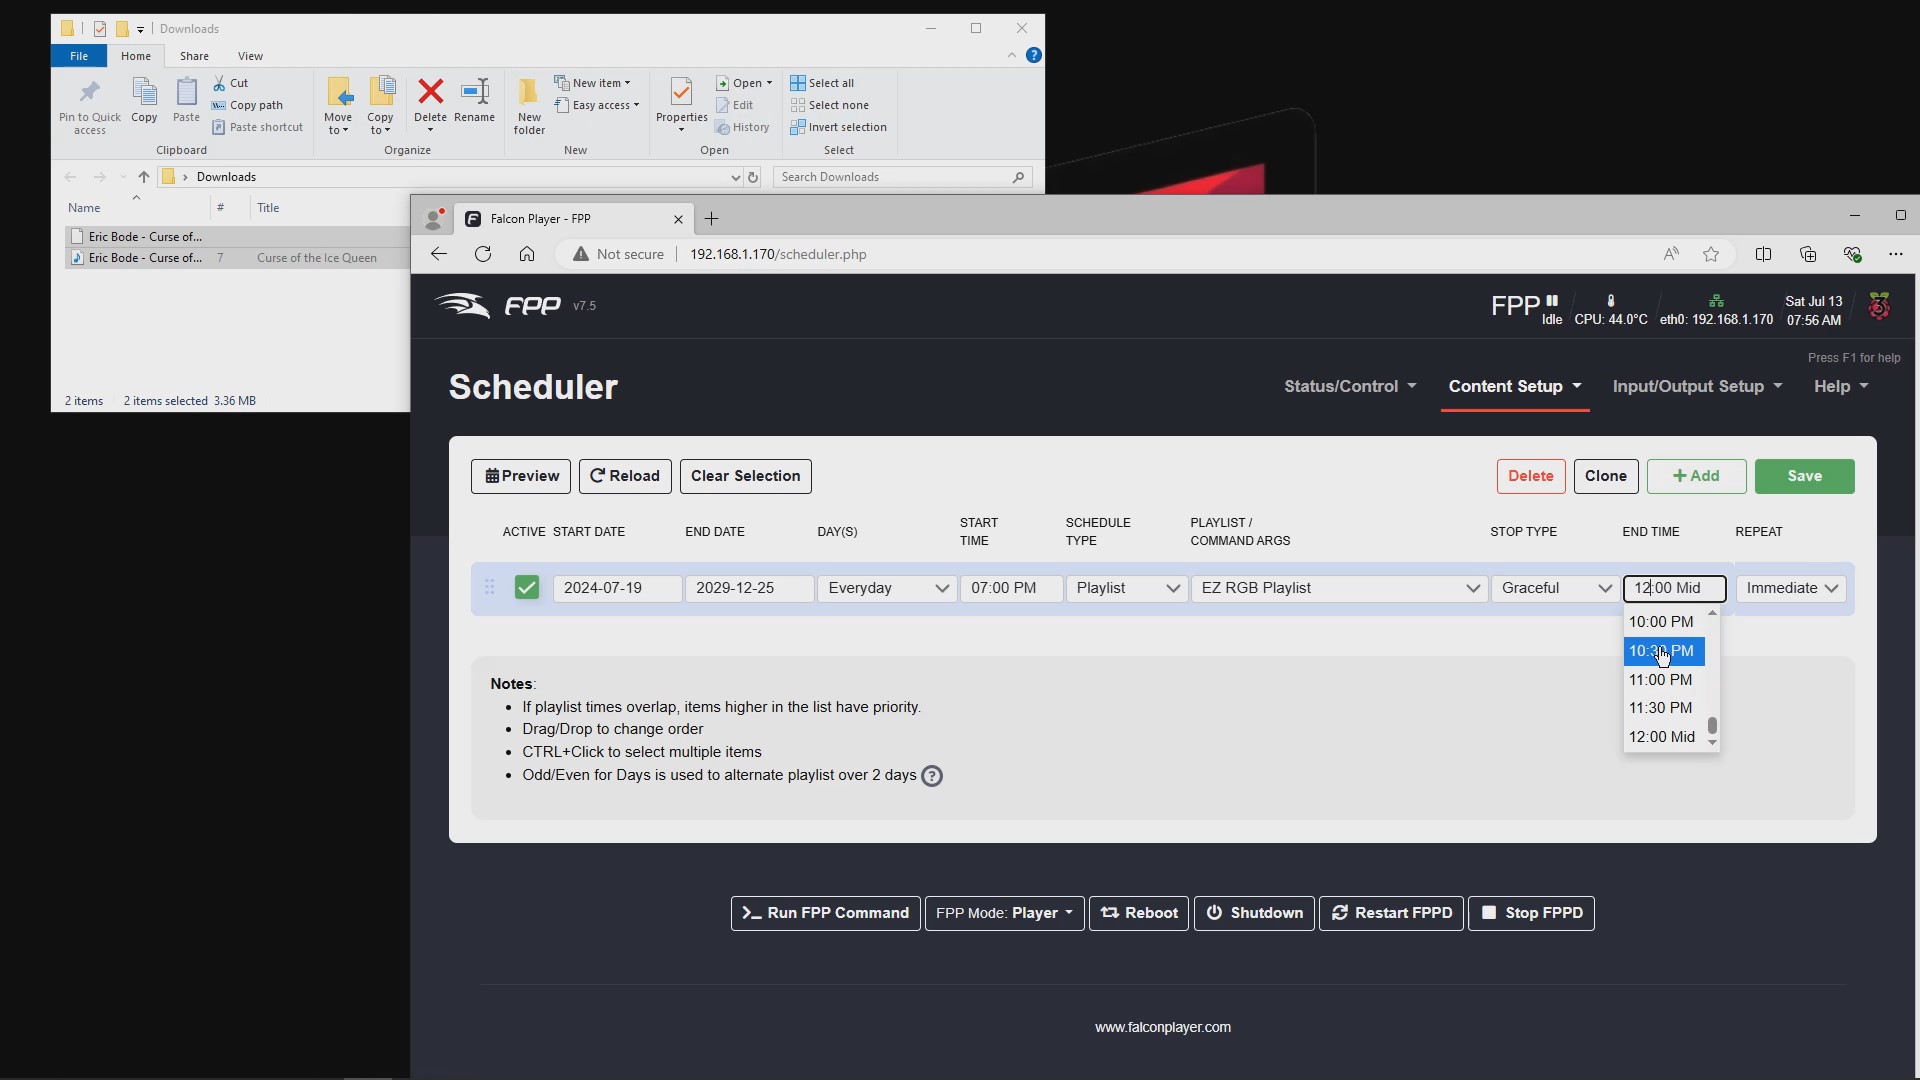
Select an end time for your playlist to stop playing. The “Stop Type” field will adjust based on how your
show ends.
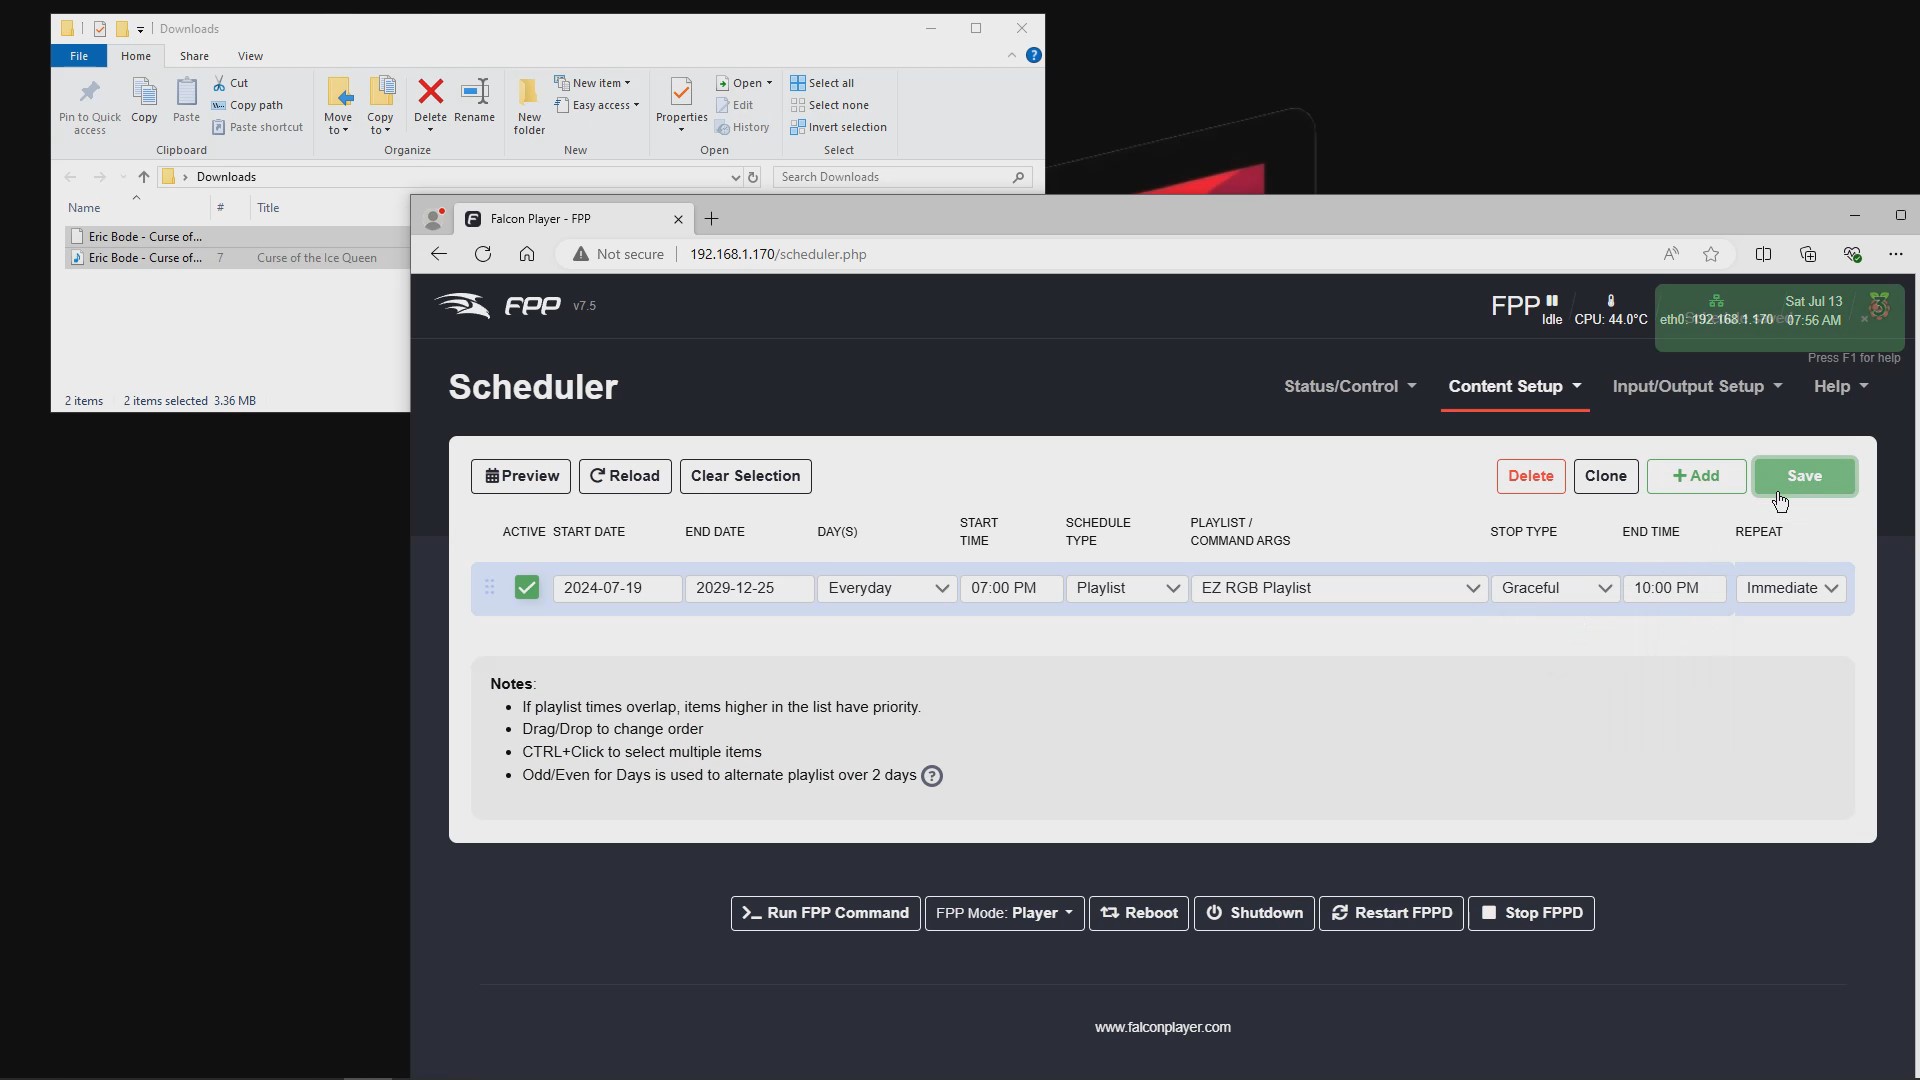
Finally, click the “Save” button.
You can play your sequence at any time by clicking on the “Status/Control” menu and selecting the
“Display Testing” option.
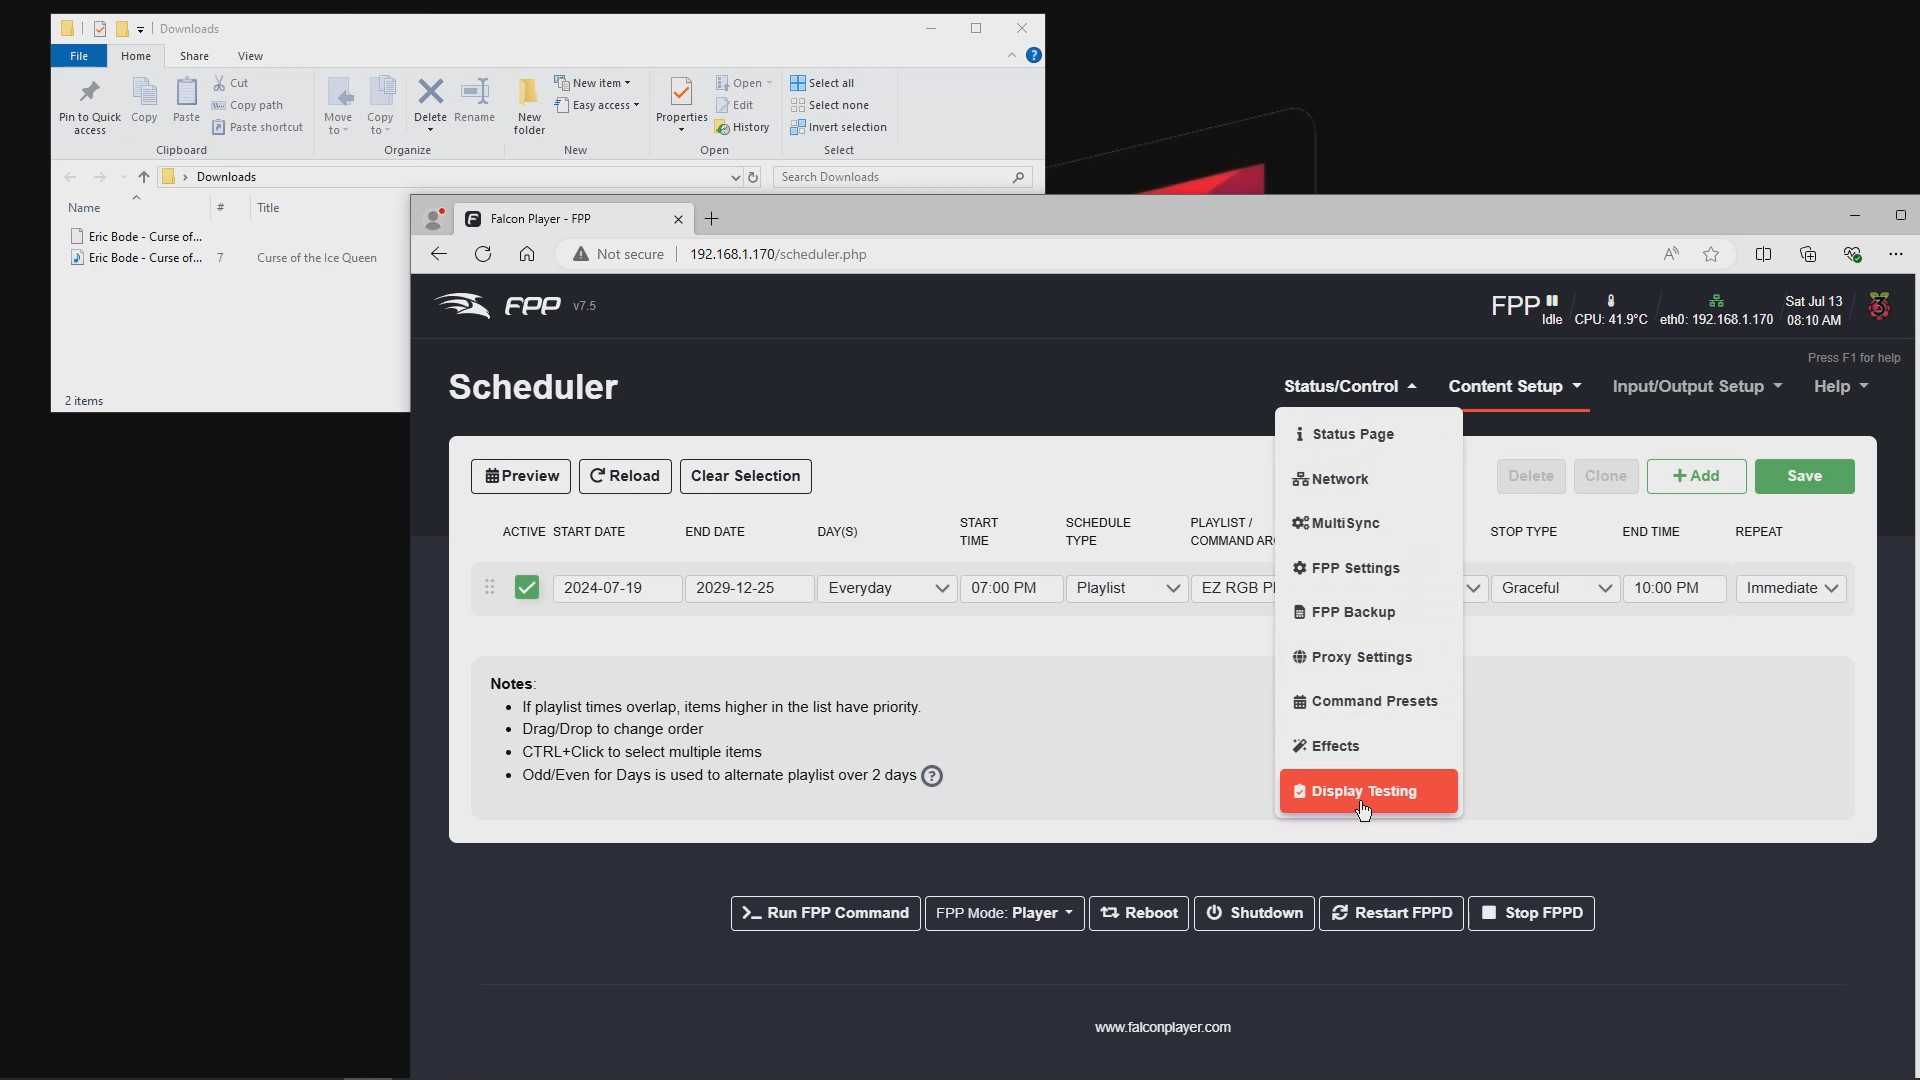
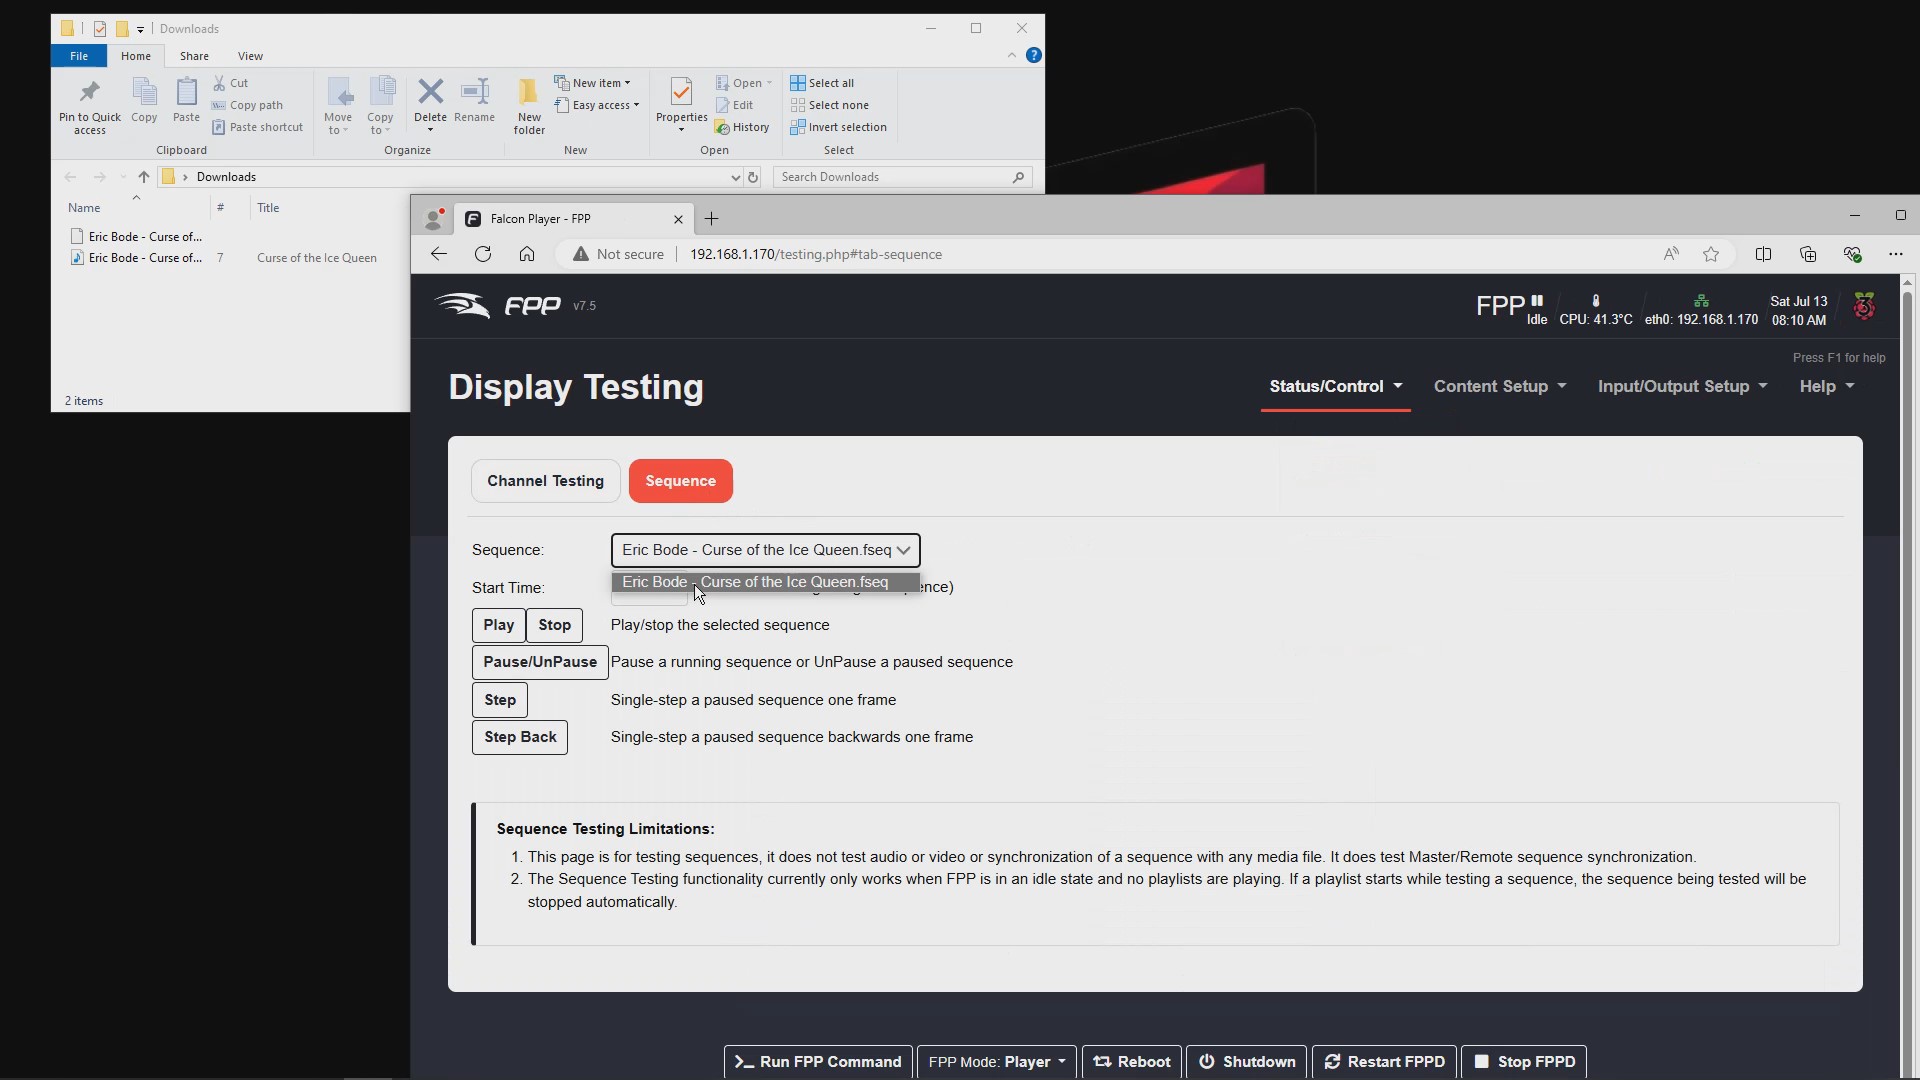
Click the “Sequence” button and select the sequence you would like to play from the Sequence
dropdown box.
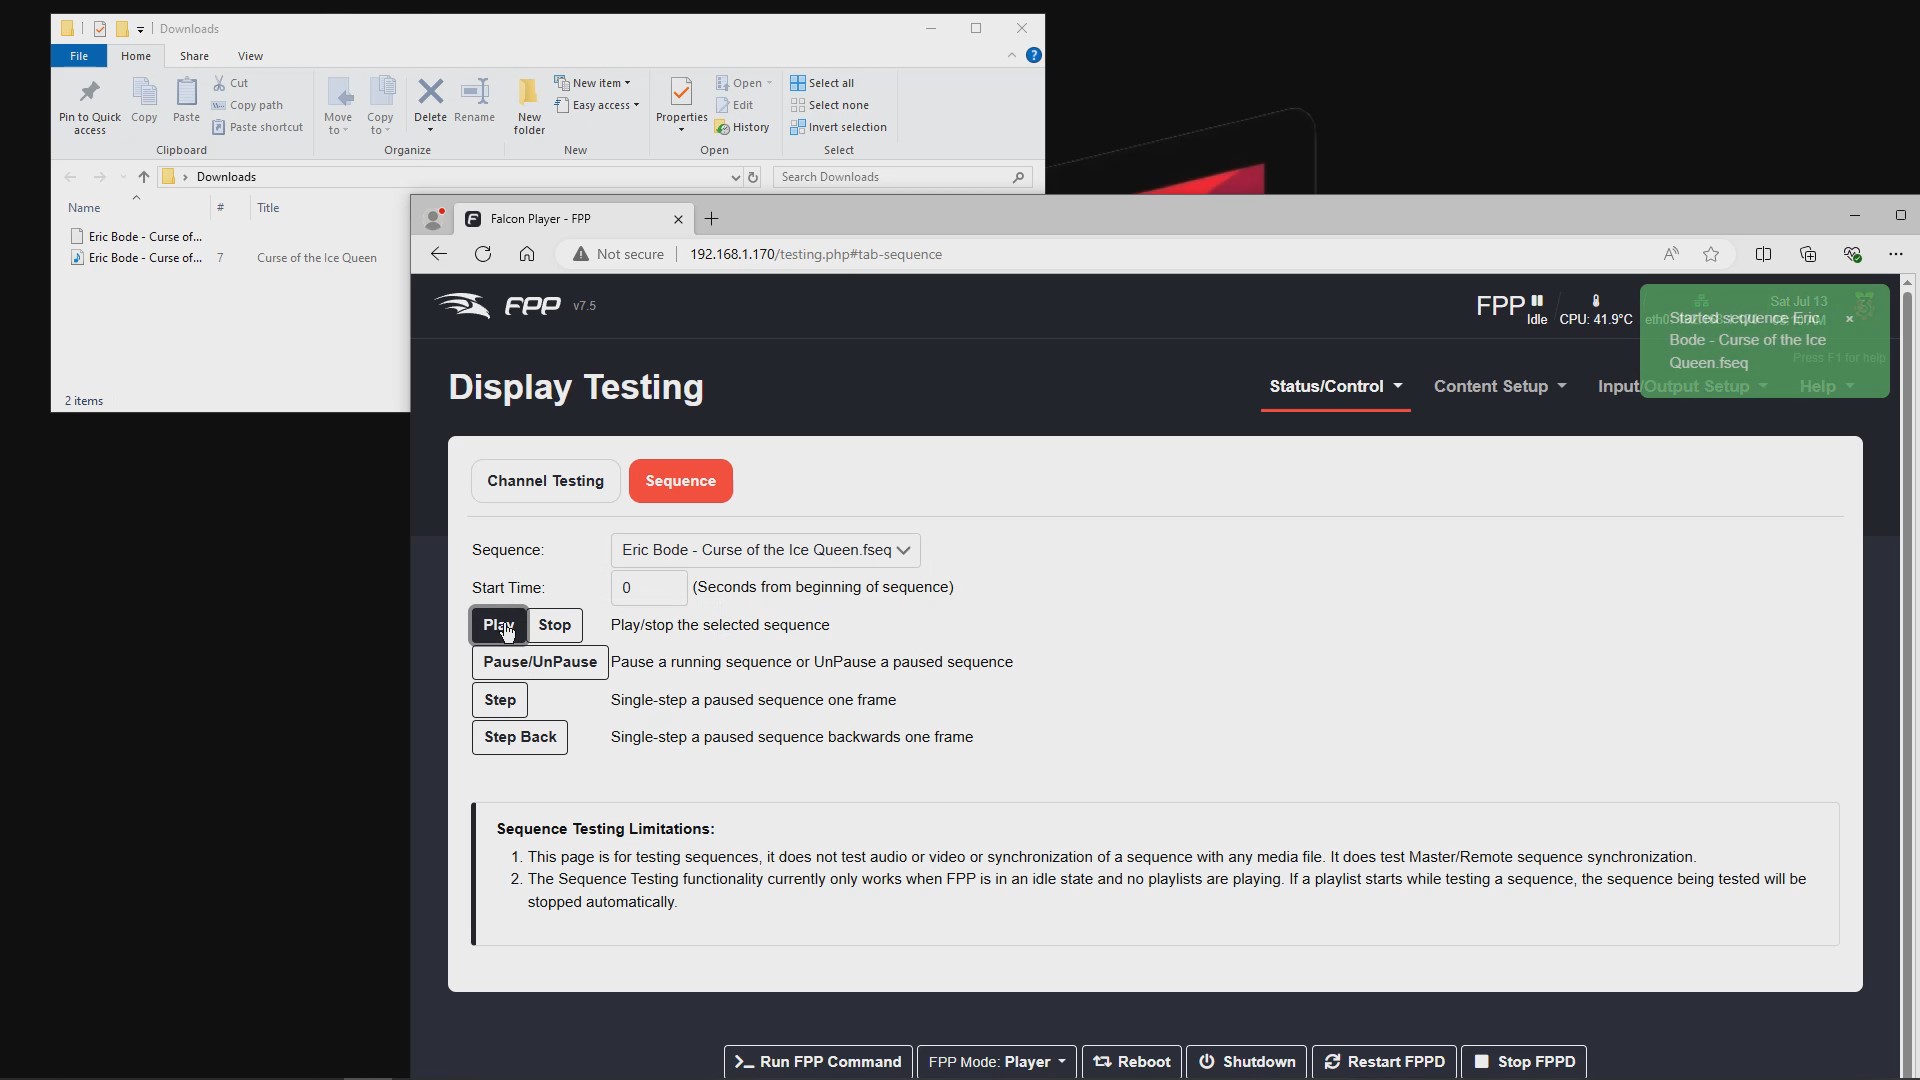
Now, press the “Play” button. Your sequence will begin to play.
We hope this guide helped you set up your Falcon Pi Player!
First, email our support team and let them know so they can change your account to reflect HinksPix Stand-alone mode.
Next, in xLights go to “File” click “New Sequence“

Select “Musical Sequence“

Select the Audio File

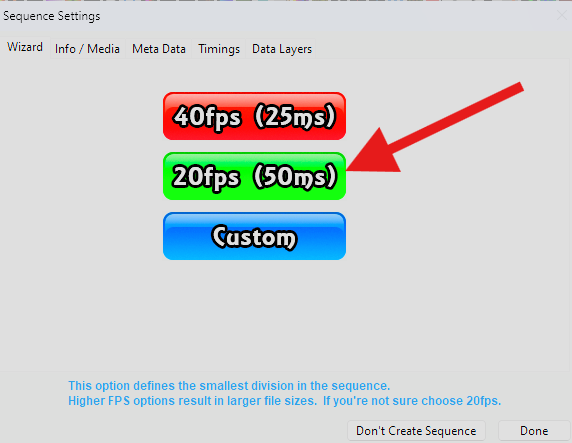
Select “20fps (50ms)“
At Select a View, click “More Options“

From Import Data choose “xLights“

Select the “Sequence”.fseq you downloaded from EZRGB

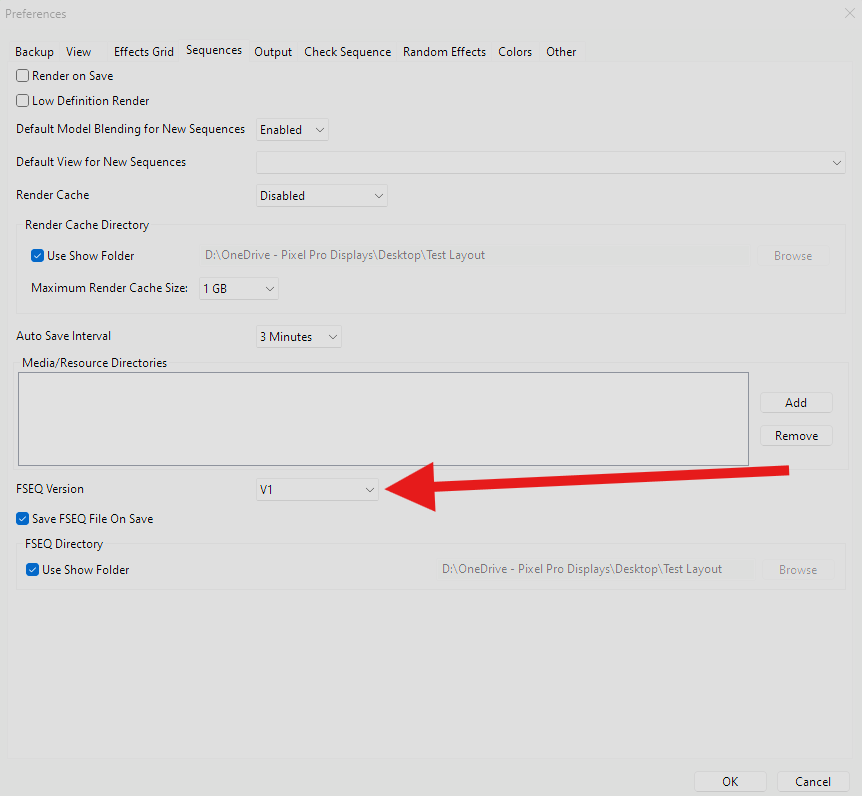
Now go to “File” and click on “Preferences” Then goto the “Sequences” tab and select FSEQ Version “V1“
Click “Render”

Click “Save” Sequence

Finally under “Tools” click “HinksPix Upload“

Now set your playlist and schedule and “Export to SD Card”
In this video, we’ll guide you step by step on how to upload your xLights layout and network files to the EZ RGB website. After you’re all set, you can quickly choose and apply the best sequences to match your holiday display. We’ll show you how easy it is to streamline the process and light up your show with our exciting sequence options!
Welcome to EZRGB! In this tutorial, we’ll show you how to easily add a sequence to Falcon Pi Player, making your holiday light show setup a breeze. Whether you’re a beginner or a seasoned pro, our step-by-step guide will help you get your lights synchronized to your favorite tunes in no time!🔔
Welcome to EZRGB! In this tutorial, we’ll show you how to easily add a sequence to xScheduler, making your holiday light show setup a breeze. Whether you’re a beginner or a seasoned pro, our step-by-step guide will help you get your lights synchronized to your favorite tunes in no time!🔔